Hi everyone! I’m clearly not as dedicated to blogging as I was when we were doing the Scaly Mountain project! But better late than never! It’s hard to believe, but next week will be one year from when we closed on the house. A lot has happened in a year!
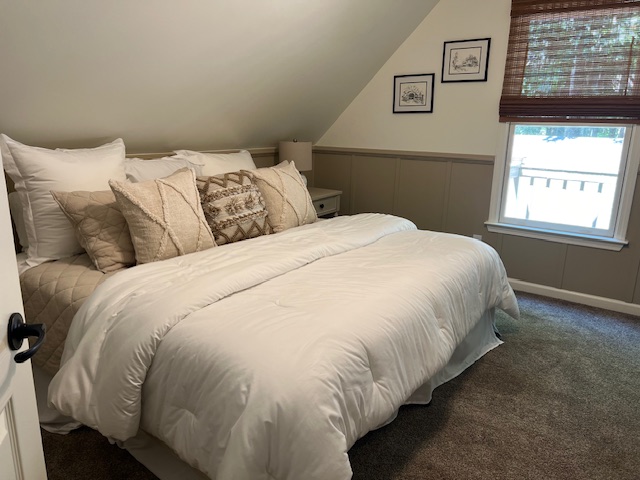
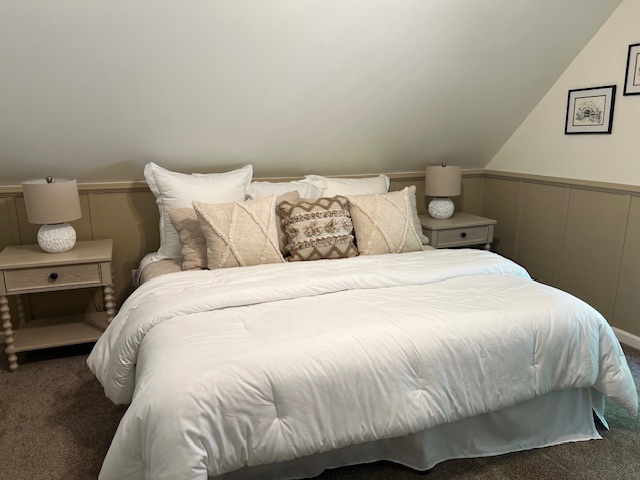
Once we wrapped up our laundry/pantry area, it was time to focus upstairs on the guest bedroom and downstairs with the den. Upstairs was a quick weekend project where we just added some chair rail and board and batten to give the room a little interest. It’s very neutral but needed something more, so this gave it what it needed! We are pleased with how it turned out and our guests seem to like it!
Here’s a picture of the room from when we were buying the house.
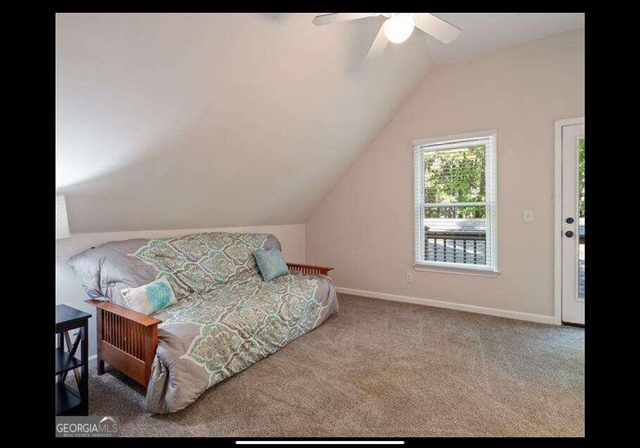
It was clearly underutilized and kind of sad looking! The room is plenty big enough for the king bed we put in there, and we are really happy with how it turned out! In addition to our board and batten, we also put in new bamboo blinds and replaced the super noisy ceiling fan with an updated, quiet one. The board and batten was an inexpensive and quick way to update the room and lean in to the angled ceiling. I like the way it all turned out.
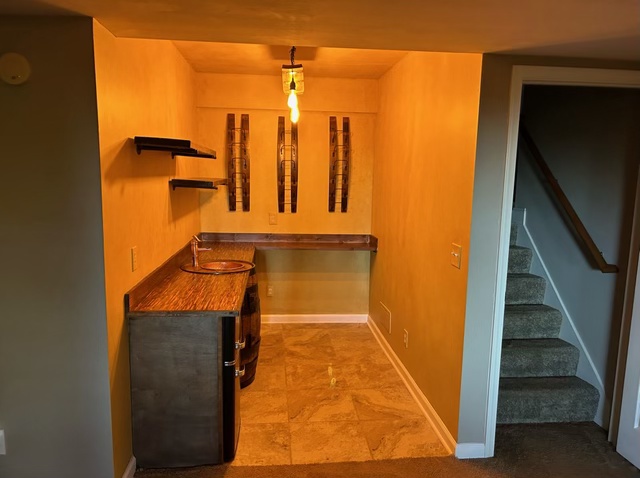
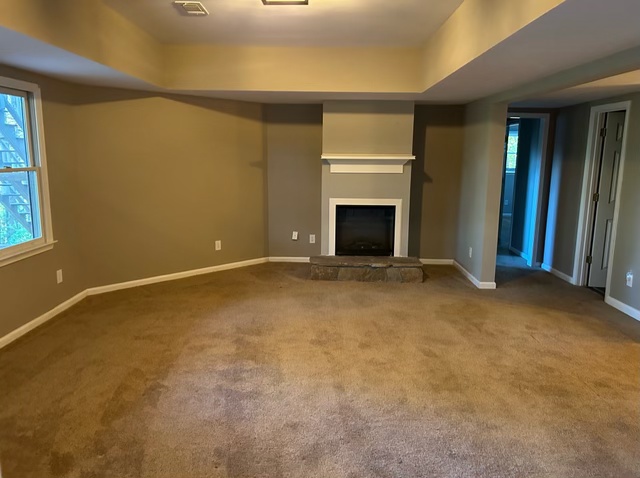
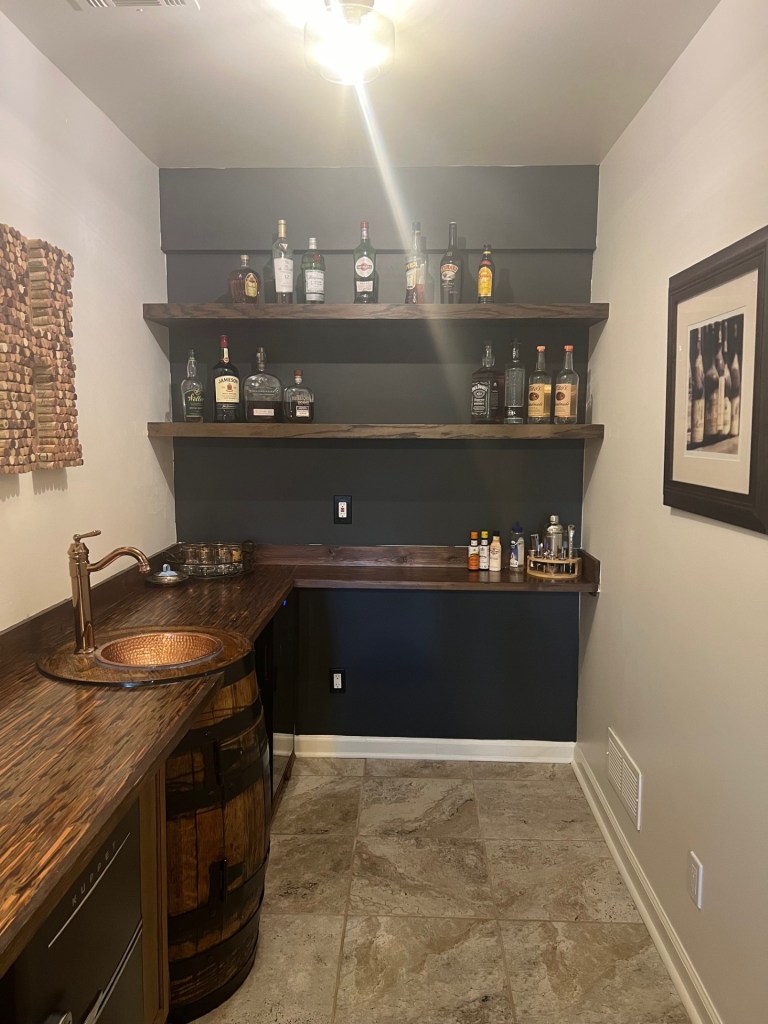
Once we wrapped up the bedroom, we started to work down in the basement. As a refresher, here’s what the den and the bar area looked like when we purchased the house a year ago.
Almost every light bulb in the house was an Edison bulb with a yellowish cast, which did the rooms no favors. We updated the light in the bar and put in a ceiling fan in the den and those both helped a lot. Additionally, we painted the entire house and put in LVP in the basement (with the exception of the bar area which had perfectly good tile in it).
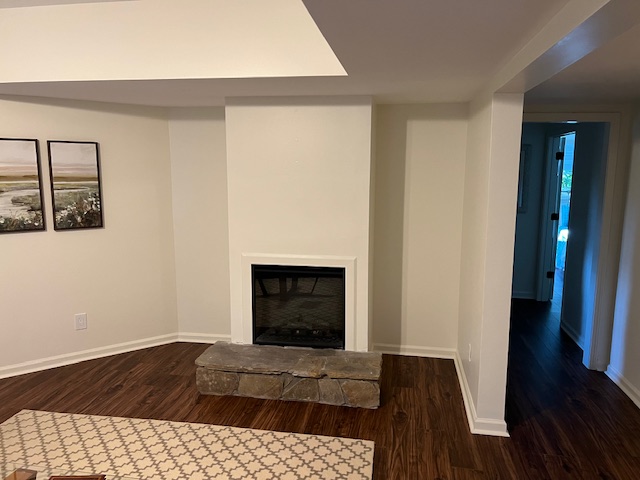
The bar area was okay but just never felt balanced. Plus the weird metal rods holding the wood shelves were dropping and looked awful. And in the den, one of the things that neither of us liked was how narrow the fireplace was and how huge the ugly stone hearth was (it was wider than the fireplace?!?!?).

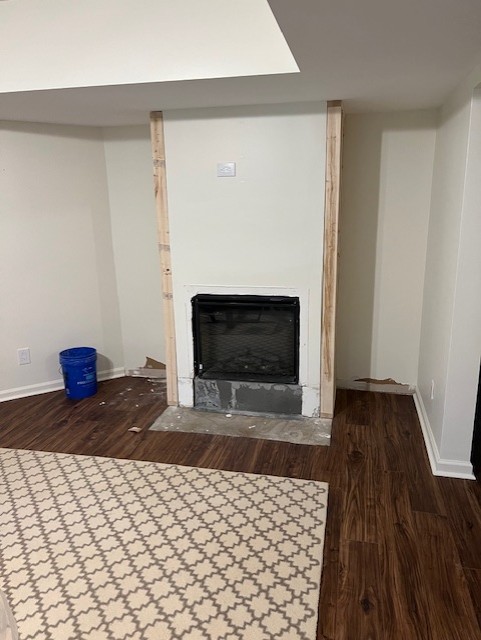
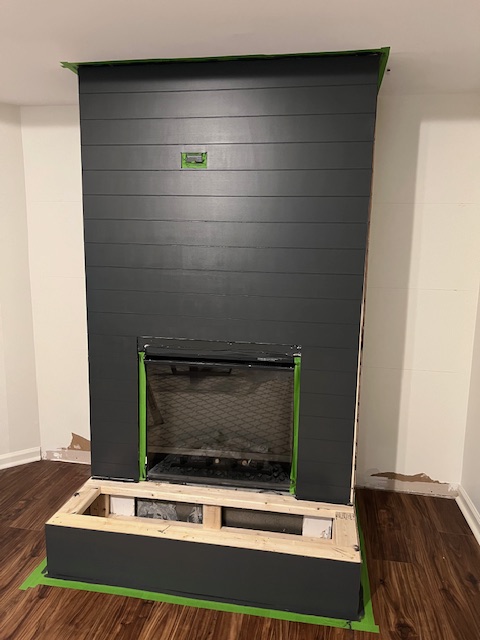
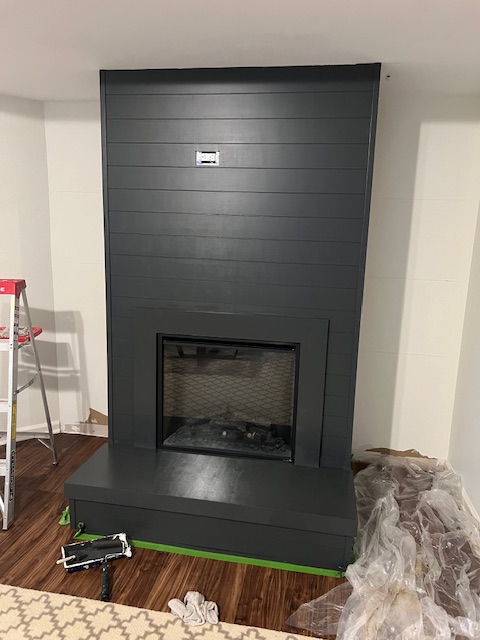
We started with some demo. Keith got out his trusty sledgehammer and got to work on both the fireplace and the awful hearth. We decided to remove it because it would just be easier to frame out a new one altogether. Because this is a faux electric fireplace, we didn’t have to worry about the hearth being fireproof. Here is a little before and after of the demo process. You’ll notice that Keith added framing to the sides of the fireplace to beef it up. It also allowed us to have the hearth be the same width as the now beefier fireplace.
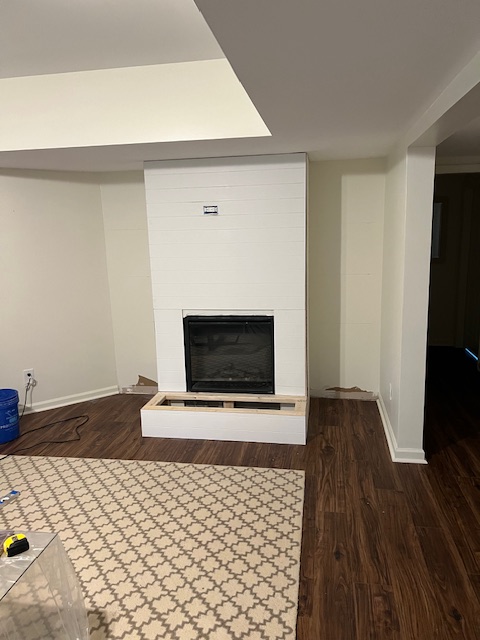
Next up was adding electrical for a TV then building the new frame for the hearth and shiplapping the fireplace. For the shiplap, rather than buy planks of it, it was easier and significantly cheaper to buy shiplap panels. So that’s what we used. For the hearth, we just used some leftover plywood.
Next up, shelves! We knew we wanted floating shelves, and Keith watched lots of YouTubes to learn how to do them. We bought some beautiful red oak plywood and he got to work using some new techniques to create them. It was a little easier said than done to install them but we figured it out! I don’t have pictures of the build process, but it was fairly intense. We built three for each side of the fireplace and two for the back wall of the bar. Here is the final product! *Don’t judge me for my painting skills! 😉
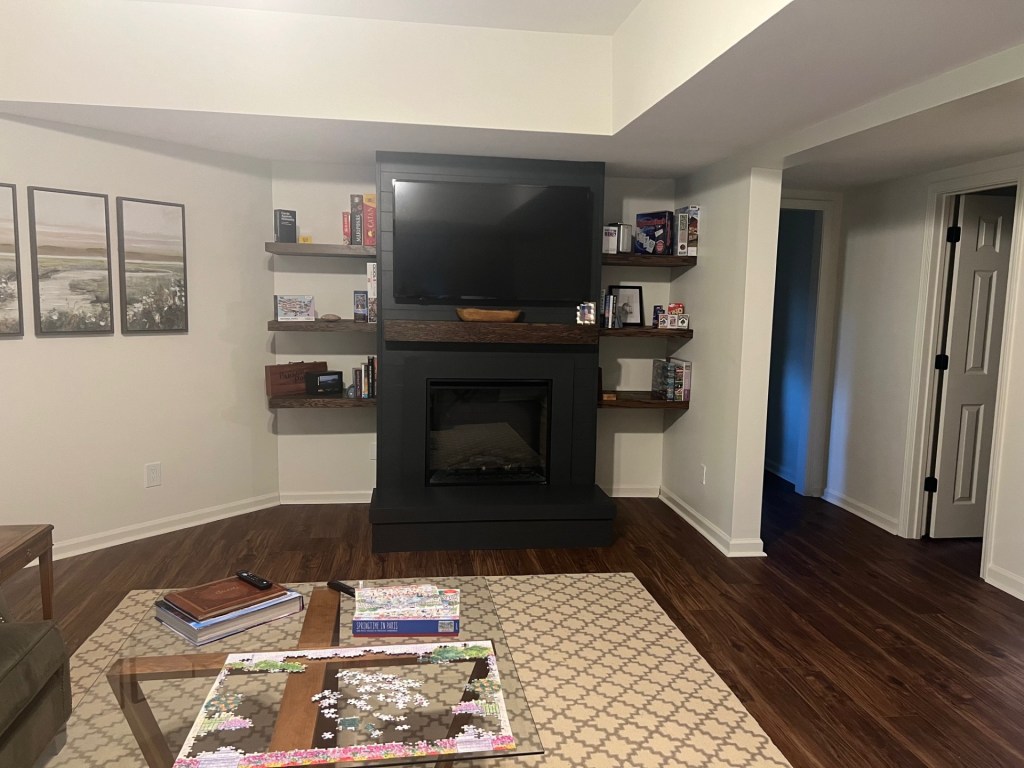
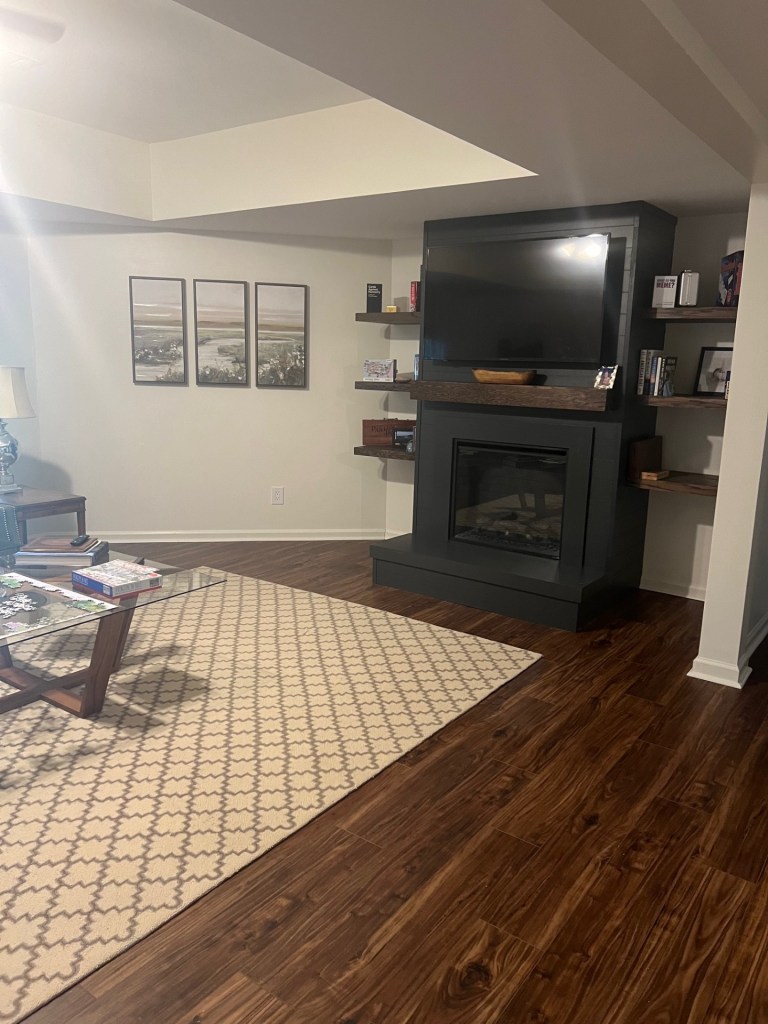
There you have it! We are so happy with the end result and hope you like it too! Next up … putting lipstick on the pig (aka our master bath tub) and taking our front door out of the 80’s! Stay tuned for that hopefully sooner rather than later!

What a beautiful make over. You two are so talented!!
LikeLike