The den and guest bathroom are officially wrapped up and I am a happy girl! We’ve had a productive five days since heading back up here Wednesday evening. Let’s take a look at what we’ve accomplished, and I’ll also share with you some projects in process.
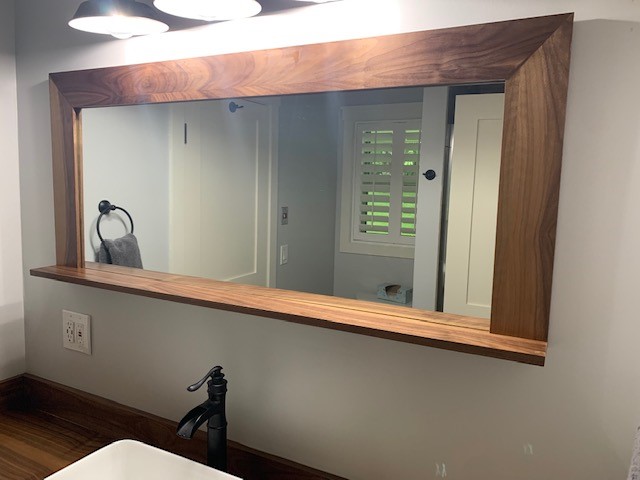
Starting with the guest bathroom. I mentioned we had something special planned for the mirror. Originally I had wanted to create an overall shadowbox mirror, but we had to modify it some thanks to the lighting we had chosen. If we had stuck with a shadowbox frame, it would have blocked some of the light from our light fixture. I really liked the idea of having a shelf at the bottom of the mirror, so we modified our plans and built a mirror frame with 3 sides which were flat and the bottom as a shelf. Because we do have a fairly high faucet, we had to build the mirror a little shorter than typical, but unless you’re really short it won’t be a problem. Just like the countertop, we used the walnut plywood with the veneer edge banding. I’m really happy with the end result!

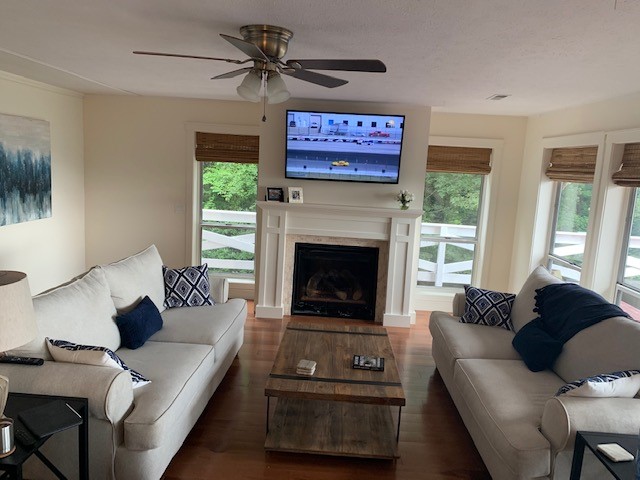
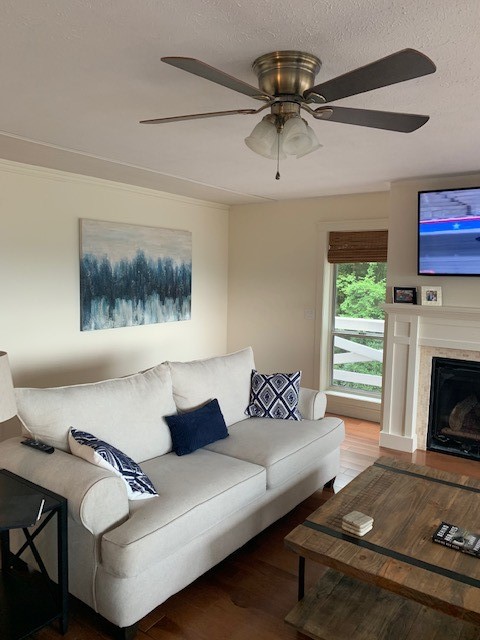
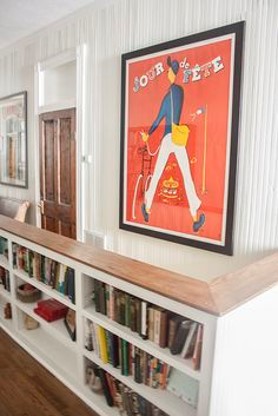
Moving over to the den, we have everything complete except for the ceiling and trim along the ceiling. We can’t do any more of the shiplap on the ceiling until we gut the kitchen because of the lengths of shiplap and how you stagger them. I did the final trim painting on the fireplace and the windows that I didn’t get to last week. We finally hung our tv, our cordless bamboo Roman shades and even hung some art in the house. And what a difference it makes!

As we get closer to the kitchen renovation, we are working on a few final projects. You’ll remember that we opened up the stairwell and moved the door to the bottom. Eventually we will finish out the basement but until then, the door will keep the winter cold down in the basement. In the meantime, the basement is my painting/staining/polyurethaning/Pelotoning workshop! We still need to paint down the stairwell and add our topper to the pony wall surrounding the stairwell, which we will get to sometime this week or next weekend, and we will change out the risers and the treads. Currently the steps leading down to the stairs are crappy builder grade pine which isn’t usable. We bought red oak stair treads and matched the stain as best we could to the color of the engineered hardwood floors upstairs. we will just use MDF for the risers and paint that white. Back to the treads … I had sanded all of them a few weeks ago and this weekend I started the multi-day process of staining and putting polyurethane on them.
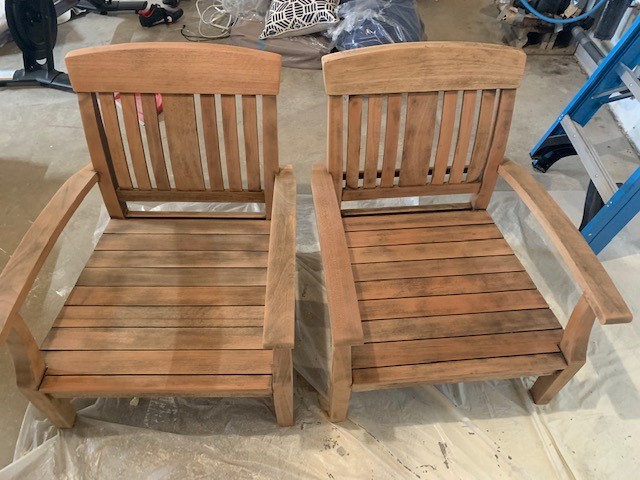
I also made some progress on the two remaining outdoor chairs. I’ve got them both sanded down and ready to stain/polyurethane. I’m not going to lie – I am very happy I’m done with sanding these bad boys! I’ll work on them during the evenings this week.
You may or may not remember that one of the modifications to my original design was for us to not make a built-in bookshelf but rather make a custom sized very long bookshelf to go along the den side of the stair pony wall. Here’s a reminder of my original design then my inspiration design.

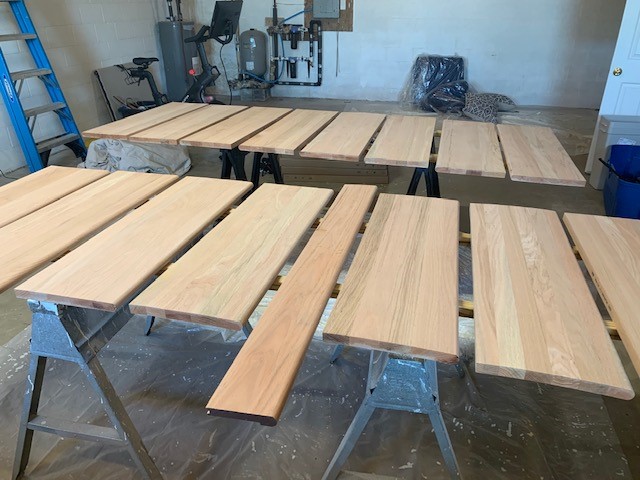
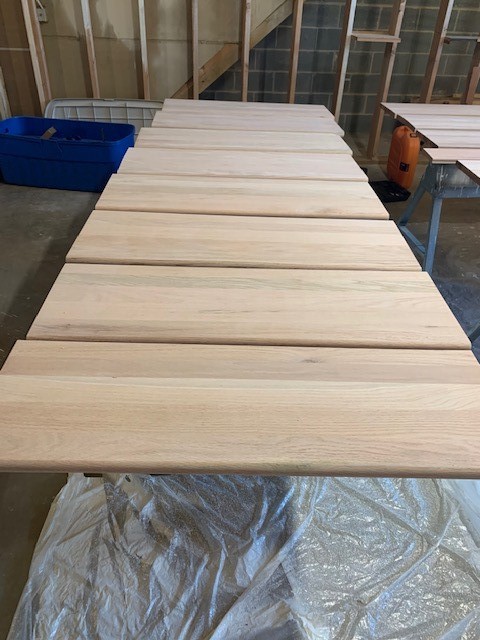
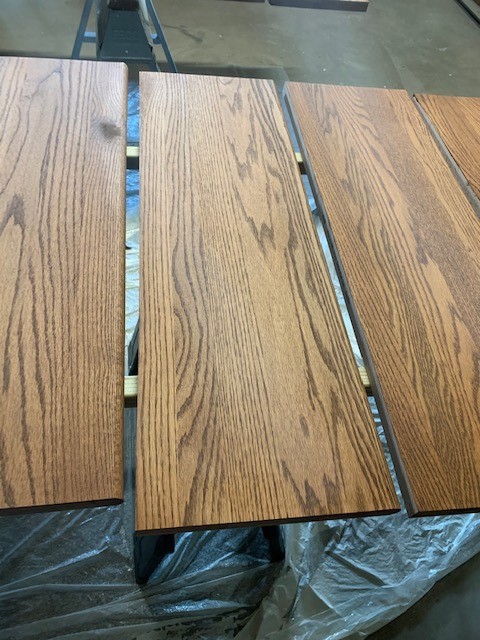
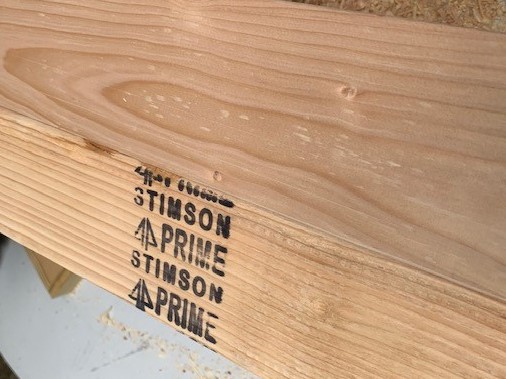
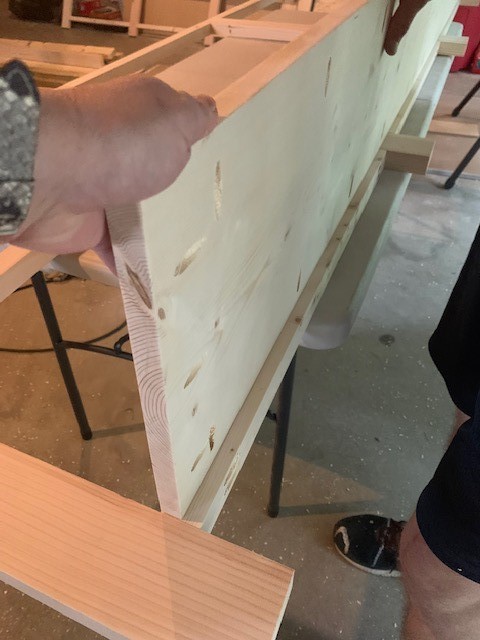
Yesterday we started on the custom bookshelves. We love Ana White’s blog as it has all kinds of great woodworking project designs with step-by-step instructions, cut lists, buy lists, etc. Since we’re customizing this bookshelf by making it taller and wider (to work well with the height and width of our pony wall) we had to adapt the plans. But it’s still a great plan and a huge time saver not to have to figure everything out from scratch. We are using construction grade pine 2×2’s, 2×4’s, 2×6’s and 1×12’s to make it. Because we cheaped out on the materials, partially because they’re easier to source, we did take the extra time to plane and joint the materials to make sure they were straight and smooth for our construction.

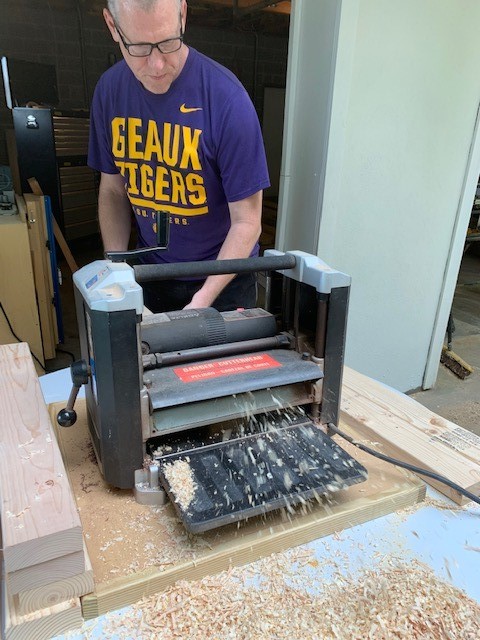
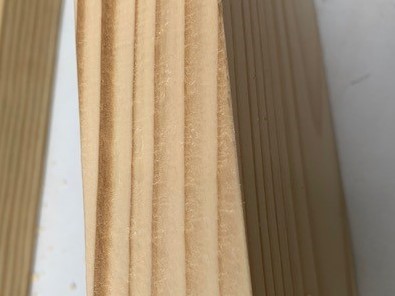
To give you a better perspective of what a difference using the planer and jointer makes, here’s a look at the before and after of the material.
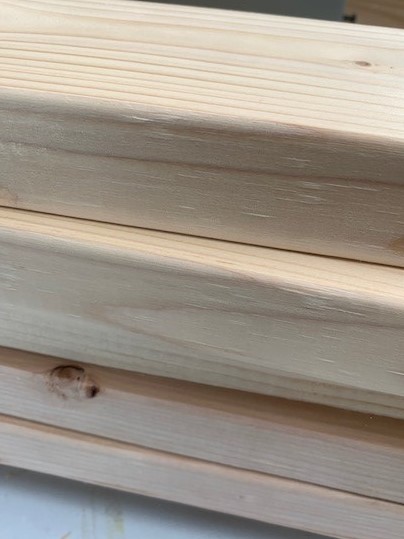
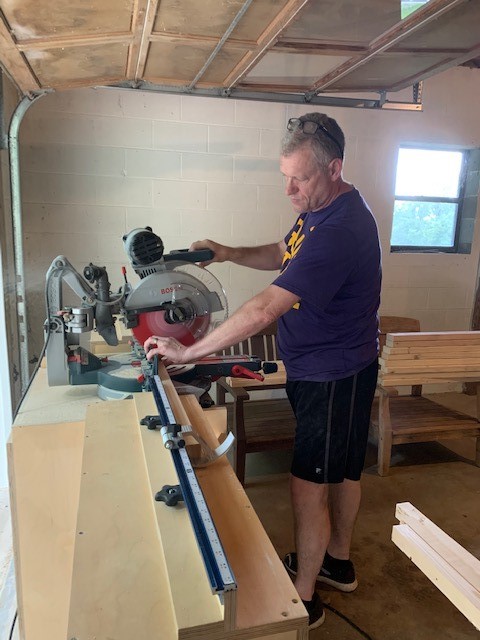
Once we had our materials prepped, it was time to rip them to width and cut to length.
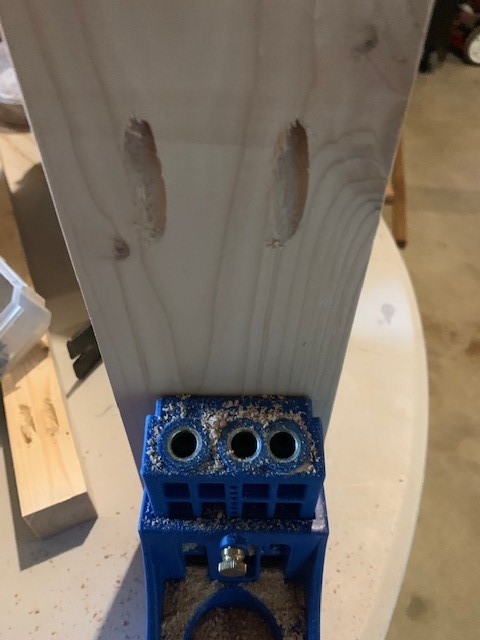
The bookshelves use pocket holes to assemble them without any visible screw holes. If you’re not familiar with pocket holes, here’s a good visual for you. Kreg has an adjustable jig you use to clamp the wood into, then you use a drill bit with a “collar” on it to keep from drilling too deep. When you use it, you have a hidden way to strongly join two pieces of wood together without any visible signs of the screw (at least from the top!)

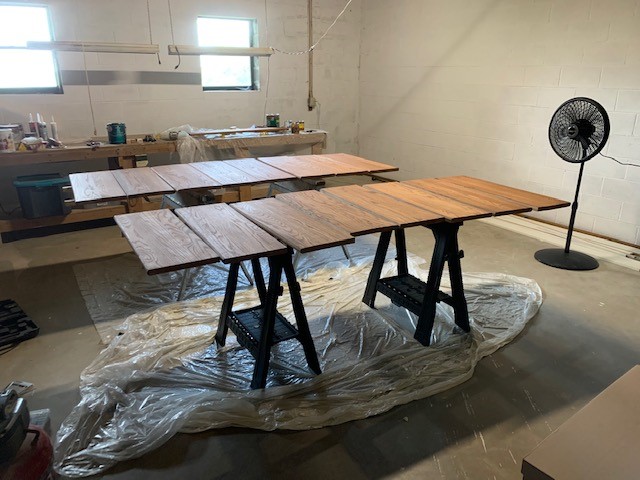
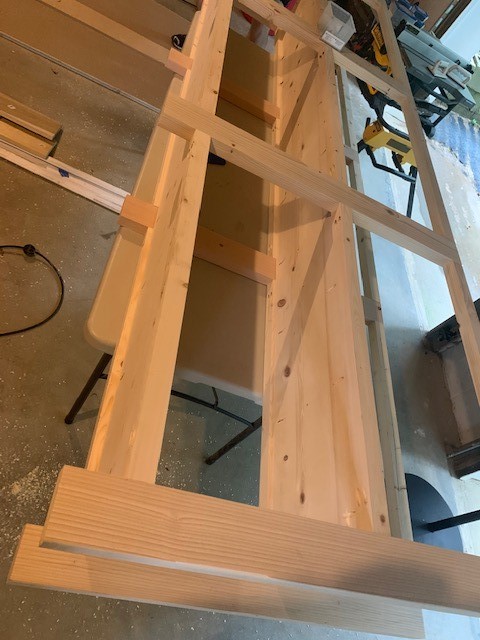
To assemble the bookshelves, we started with building the “front” and the “back” of the bookshelves. We joined the 2×4’s to the 2×2’s at a 90 degree angle and created the first of three sections for each side.
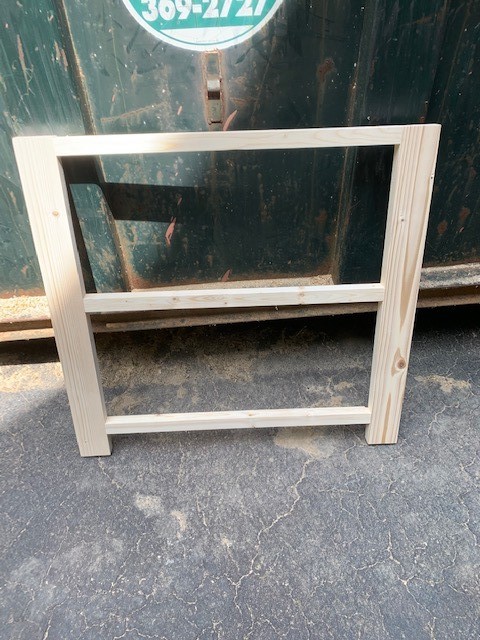
Then we connected the three sections to each other, creating the front and the back pieces.

Once the two sides were done, it was time to attach the two sides together with the shelves. We butted the shelf up next to the 2×2’s lengthwise and screwed them together. It’s a good thing Keith has long arms because this was a little awkward to connect the middle shelves.


Once we had the shelves put together on the two sides, we put additional 2×4’s on the ends

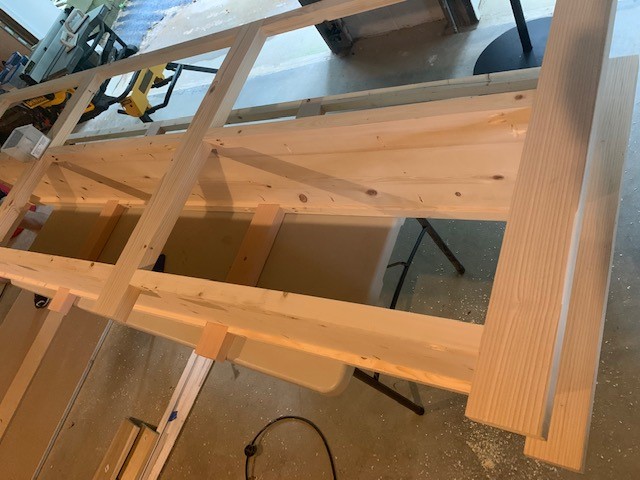
At that point, we decided to call it a day. This week we will finish up the sides by adding the X’s and build our top piece which will just be screwed on from underneath. We’ve decided to stain the top a medium brown stain and the bottom a grey stain. I’ll work on those separately during the week once we finish up construction. By next weekend you should be able to see the final results. We also have a similar project up our sleeves but will wait to share that until we actually start on it.
Last but not least, for the past several weeks, something exciting has been going on outside. Paint. Yes, I’m excited about paint! I won’t show you the front yet, but here’s a sneak peek of what’s happening.

Cheers to all of you! Please stay safe, wear a mask and look out for others. And for my prayer warrior friends, please say a pray for my cousin’s wife who is in the hospital battling Covid.


Love it all so much, but I am absolutely swooning over the guest bath!!! Everything is looking so great and the paint makes a HUGE difference on the rails! I can see why you are excited!❤❤❤ 🙏for your cousin’s wife.
LikeLike
The transformation just keeps getting better!
Sending prayers for your cousin’s wife🙏🏻🙏🏻
LikeLike
Wow! Everything looks amazing! LOVE the bathroom! LOVE the furniture! LOVE it all!! Such nice finishing work. Can you tell I’m impressed? 🙂
LikeLike
I can’t wait for ya’ll to come up and see it! We’re definitely keeping busy!
LikeLike
You two are truly amazing! Can’t wait to see it in person! I will continue by prayers for Gretchen. That is her name, correct?
LikeLike