Hi everyone! It’s been a big weekend full of lots of work and lots of progress. We are so pleased with our progress and I can’t wait to show it to you.
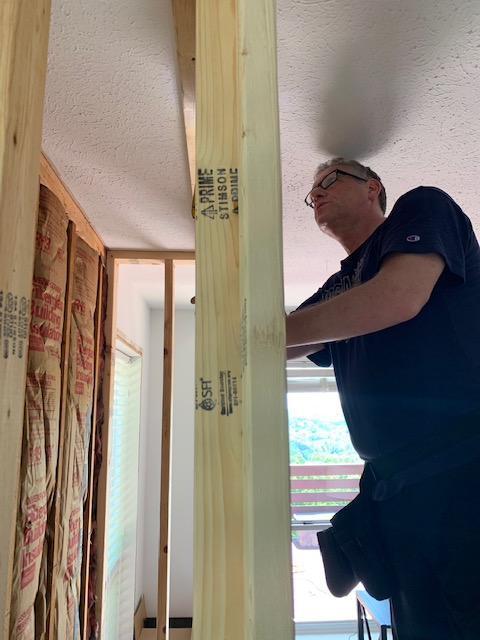
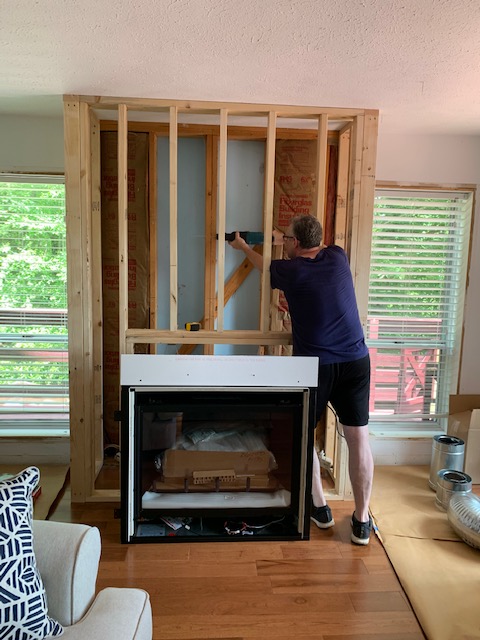
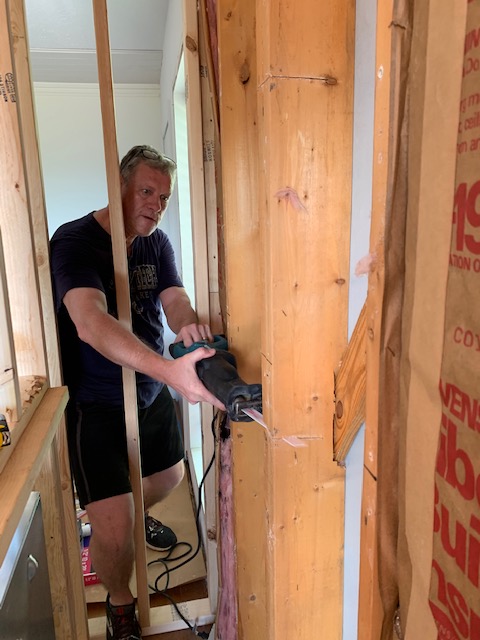
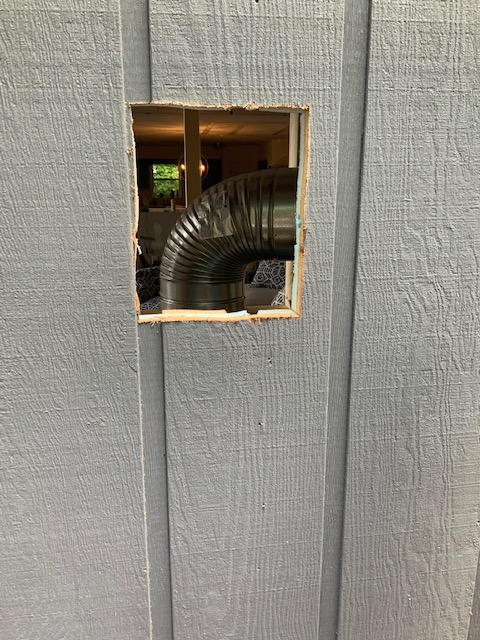
Let’s start with where we left off last week … the fireplace. It finally came in and Keith got to work on reading the manuals. All 120 pages of them. Yes, you read that right .. 120ish pages. And each and every one of them had a caution saying “Caution! Fire! Explosion!” A little intimidating to say the least. But nothing stops my man and he got to work figuring out his Home Depot shopping list and he made a plan. After a long trip to/from HD, he got to work. Folks, this is no easy task and I can honestly say I helped very little with it. I’ll take credit for what I did help with, don’t worry. But let’s take a look at the progression from receipt of the fireplace on Friday morning until we turned it on this morning! And don’t worry, there was no Fire! Or Explosion!!!

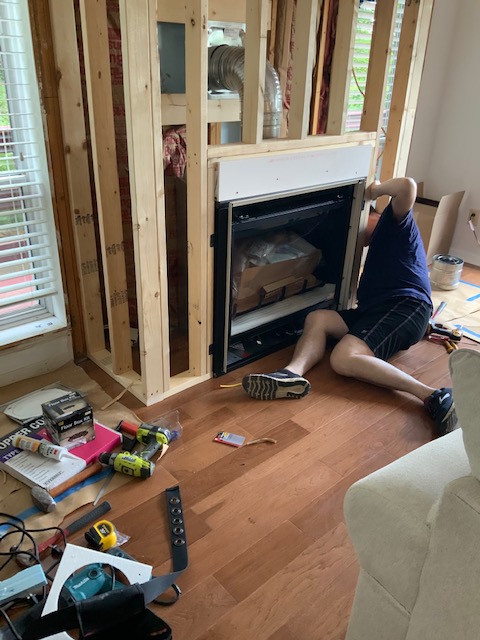
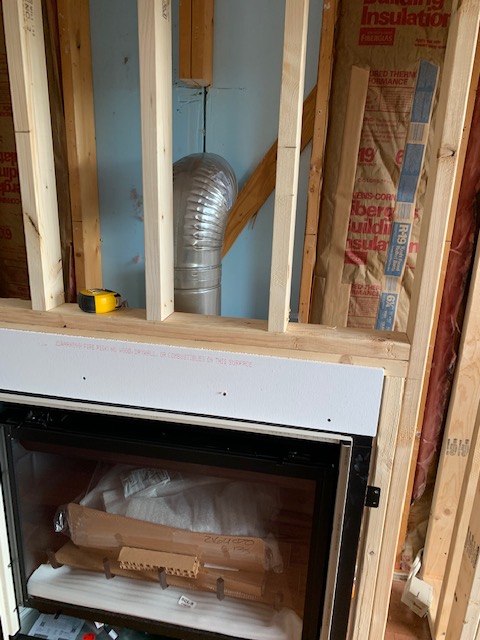


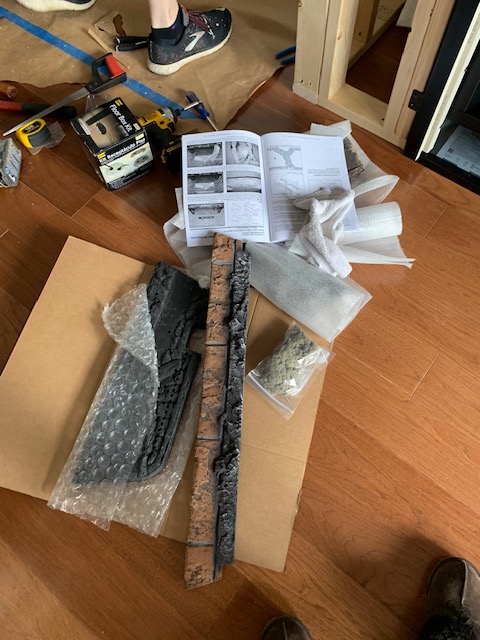
All of that took the better part of the afternoon to get accomplished. Don’t worry – while Keith was working, I was as well but I’ll get to that shortly. Now, onto what I helped with – placement of the logs and the “embers”. After the whopping three pages of instructions I had to read to place everything correctly (don’t forget, danger! fire! explosion!), I had some serious sympathy for Keith dealing with the other 117 pages!! 😉


After that, Keith hooked up the gas, and voila! We have a fireplace! Not exactly a showpiece (yet), but we were happy.

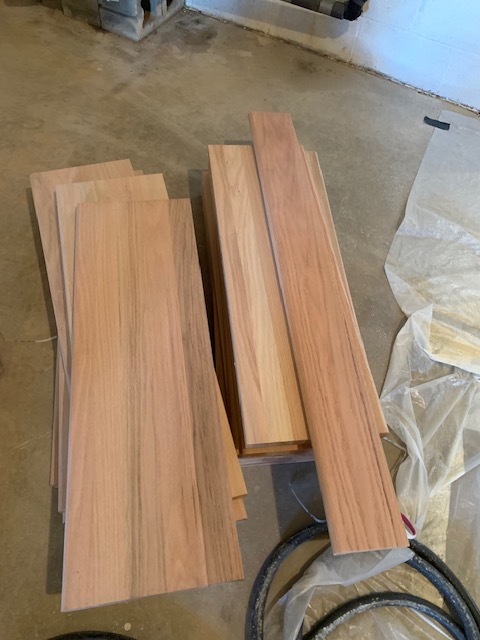
The next step is to drywall it, tile the surround and then build the mantle. That will all happen when we’re back up there in a couple of weeks. In the meantime, here’s a little peek at our tile we’ll be using.

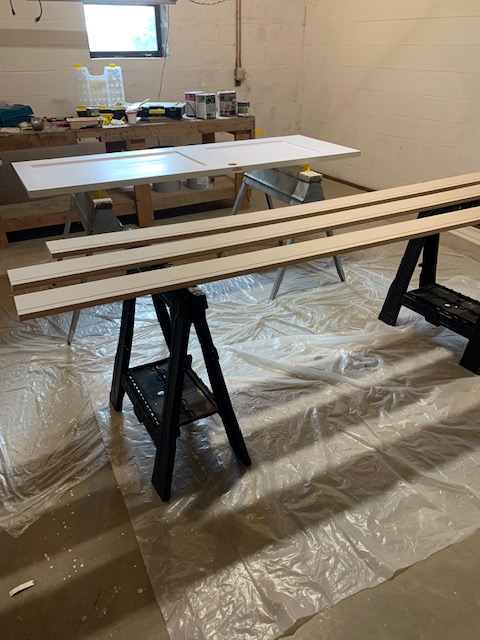
So while Keith was doing his marathon Home Depot shopping, I was working, I promise. I mowed the front yard, painted a couple of doors, sanded and primed a BUNCH of trim and sanded the oak treads we bought for the stairwell down to the basement.


After all that, we were both pooped. And apparently Chloe was as well, as this is where she ended up when I laid down on the sofa….

I mentioned revisions and recycling in our subject line, so I’ll get to that now. We are getting close to being ready to install the kitchen, so we took some time to tape things out and revisit my kitchen design.
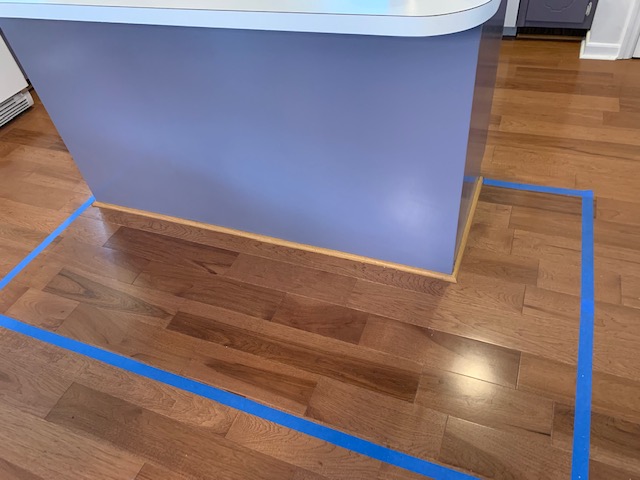
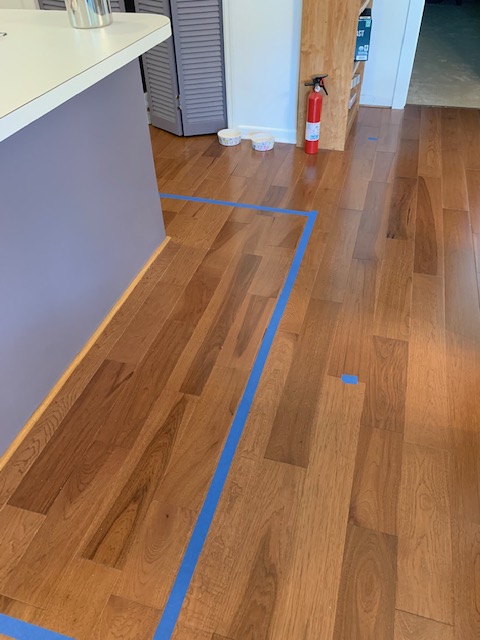
The good news is the design itself is mostly intact, but we had to make a few small revisions. Namely, we reduced the width of a few cabinets on both sides of the kitchen, as well as the island. Keith had the brilliant idea to start our kitchen remodel with the island. We can demo the current island and go on and install the new island without disturbing our current cooking situation. Since we plan to install our range (which has a downdraft) in our new island, we can get that up and running before demoing the rest of the kitchen. We can move the current refrigerator to the den during kitchen demo and that way we won’t ever be without a kitchen. So back to the revisions we made. After taping out where the cabinets would end, we realized they were just a little too much, so we are cutting our pantry cabinets (2 on each side) from 24″ to 18″ each. That will give us an extra foot of floor space but it takes away from our pantry space. Ordinarily that wouldn’t be a big deal but we had planned to put the microwave in one of the pantries. So, back to the drawing board! We saw that Ikea has an under-cabinet microwave cabinet, so we’ll be putting that to the right of the range and we’ve solved our problem.
In the spirit of revisions, we also revisited our guest bath vanity design and decided it just wouldn’t really work well. We looked into buying a vanity which would work, but finally I came up with the idea of us keeping the existing vanity but swapping out the doors and drawer fronts for custom ones we make. Then when we get the stone counters installed in the kitchen, we’ll also replace the hideous rose colored formica bathroom vanity top with something far more attractive. It won’t take much to be more attractive!

Some nice shaker doors and drawer fronts, along with European (hidden) hinges will make this look new. We’ll get to working on that in a few weeks.
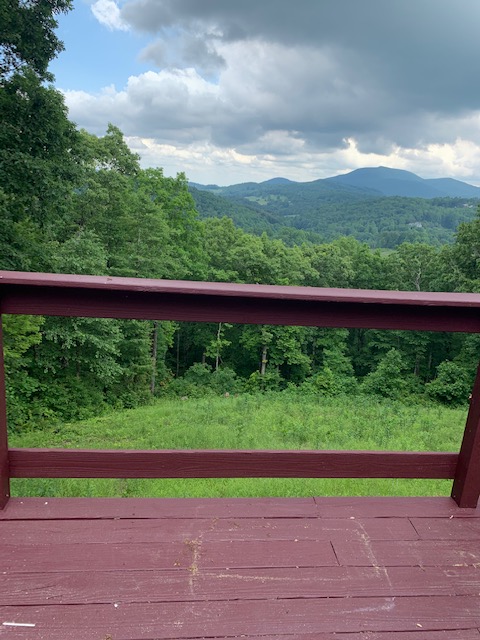
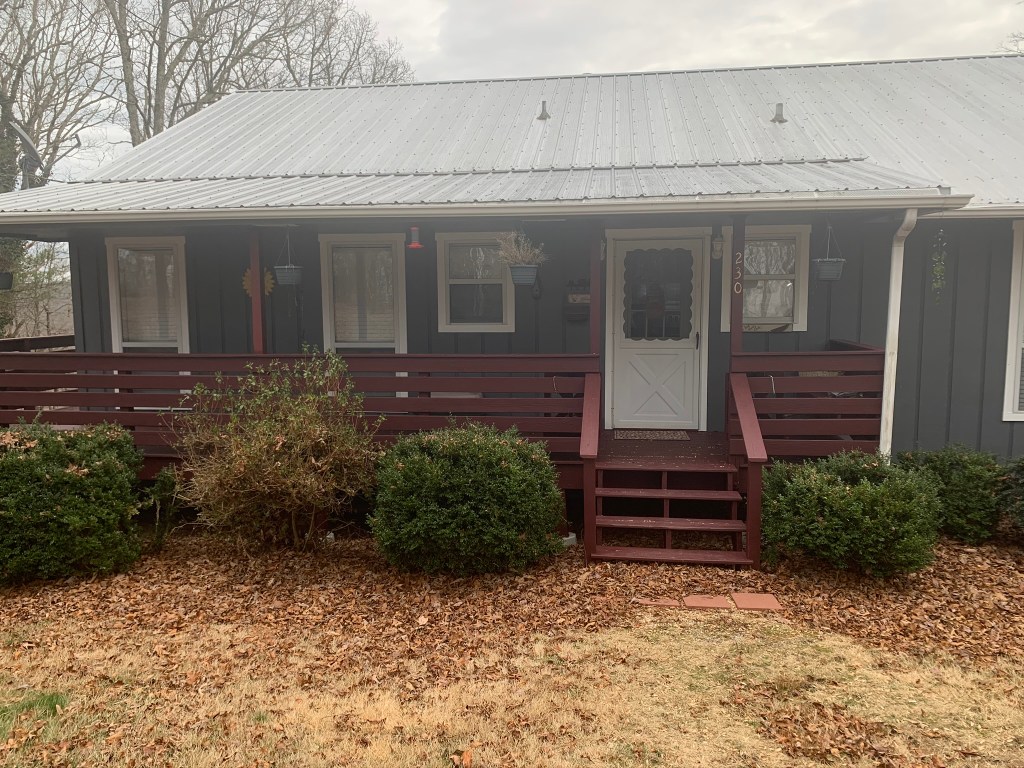
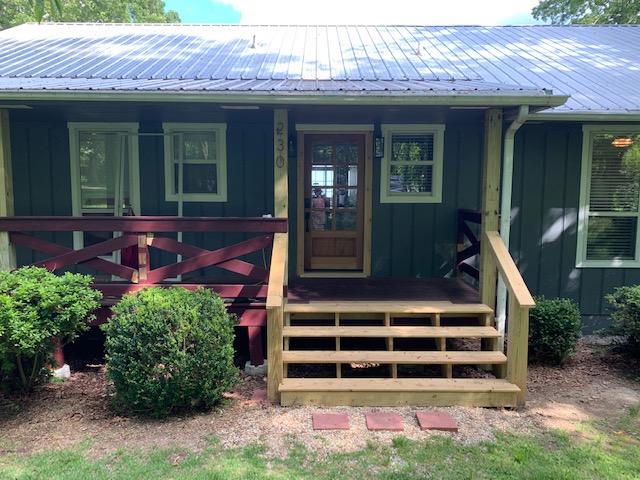
Now, last but not least … recycling. I have not been a huge fan of our railings which wrap 3/4 of the house, but I had hoped that just painting them white would make them disappear. And it will, but then I had a brilliant (if I do say so myself) idea. What if we ripped down the middle 3 of the 5 railings and recycled the boards and made them into X’s. It’s probably easier to visualize.
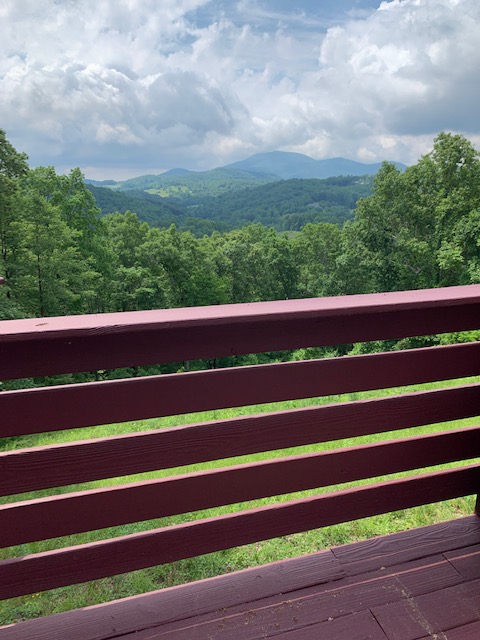
So that’s what the railings look like “before”. They really cut off the view and feel very heavy.
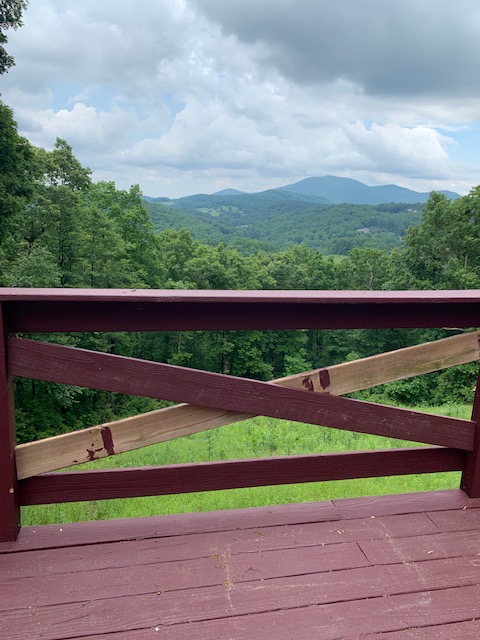
Here’s a little view of the “during” after we ripped off the middle 3 boards.
And voila – the after! Try to imagine those painted white and not the patchwork they currently are. Isn’t it amazing what a difference it makes? I am SOOOO happy and so is Keith!
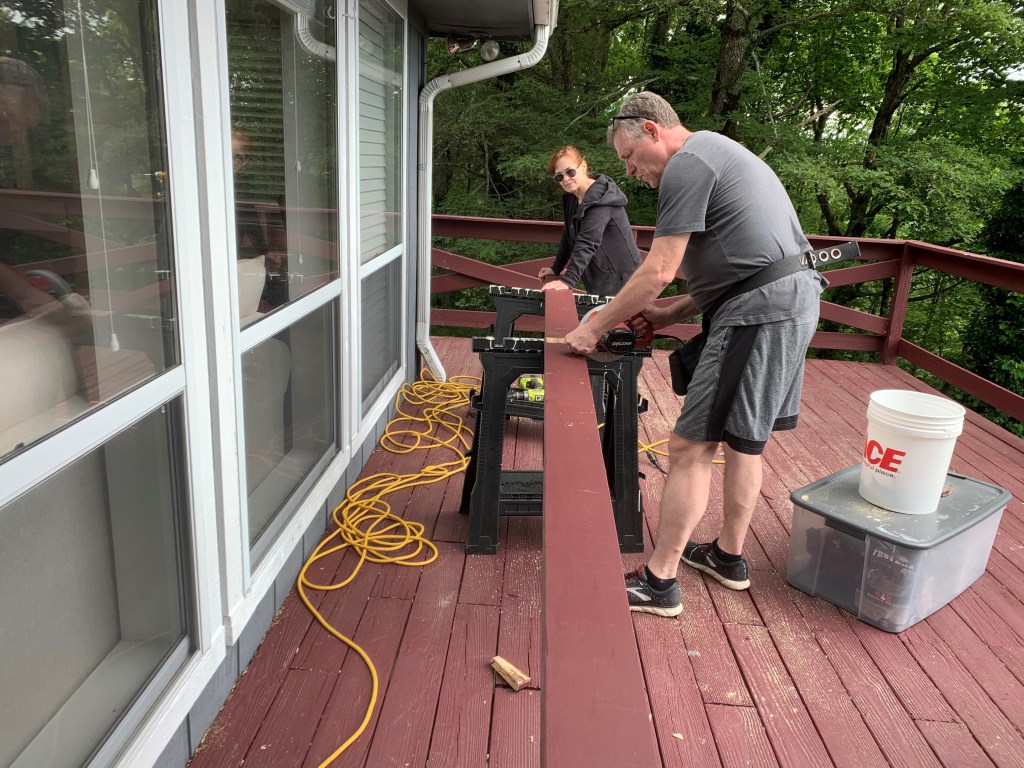
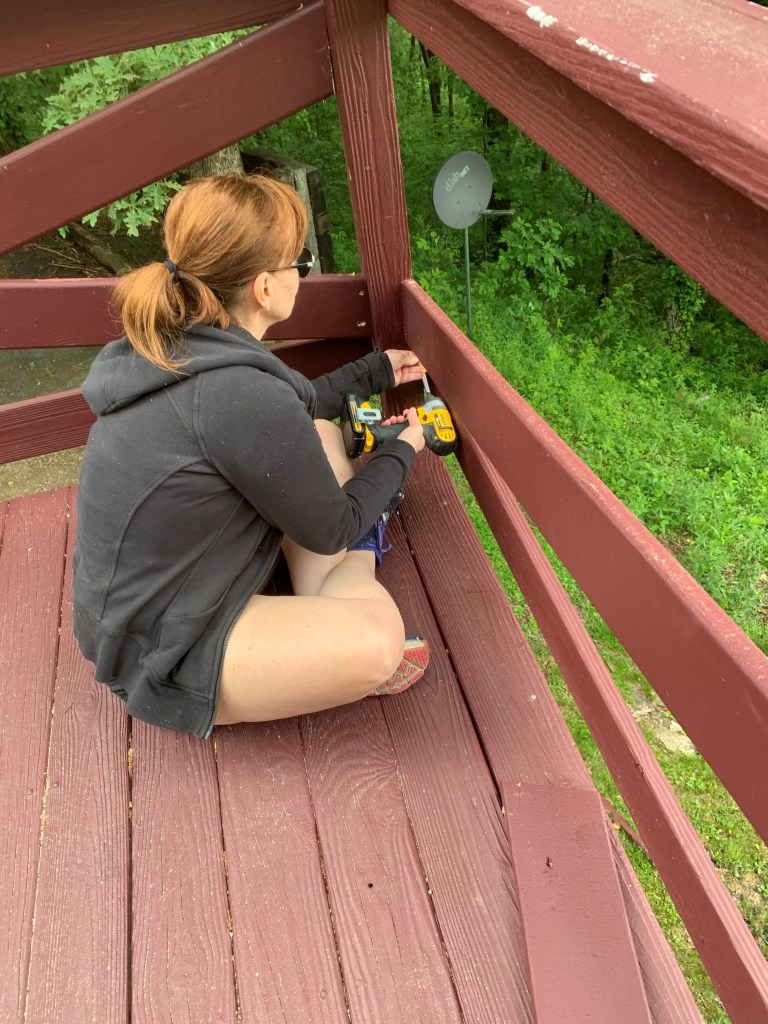
It was a little awkward to remove the big boards, especially as we moved around the house and the drop went from 3 feet to 20+ feet! It was a multi-step process. We removed the middle boards, measured, cut, dry fit, cut a second board, drilled pilot holes and screwed them in. Then rinse, repeat. None of the spaces between the posts were the same, so we had to do that each time. There are 21 spans, and we got 16 done today before it started sprinkling. We got a lot better as we went along, and it took less time. But we are so happy about how it looks! What do you think?
Just for reference, here’s the before from when we first moved in and I’ll wrap up with the “after”. We will be calling a couple of painters this week to get quotes to paint the exterior as we are only a few weeks away from being ready to do that! I cannot wait to see the transformation then.
We will be headed to Baton Rouge to take mom home next weekend, so you’ll have to wait a couple of weeks until our next update. Until then, stay safe and stay well!

Your mid-flight creativity is awesome!
LikeLike
Amazing!! You guys are putting so much thought into every detail, and it shows!!
LikeLike
Thanks! Ya’ll need to come up and visit soon! Let’s pick a date!
LikeLike