I mentioned a couple of weeks ago that we were making a video of how to make Shaker style doors we made to replace our old guest bathroom cabinet doors. If you have eight and a half minutes to waste, you can learn how we did them. It was fun to make and I realized I will never become a YouTube star! I definitely need to hire some hair and makeup people and dress far nicer (and more flatteringly) for any future videos 😉
Well, this weekend we had every intention of wrapping up all of the trim in the den/breakfast area, but you know what they say about good intentions…. However, we did make really great progress and I’ll share with you a little bit about where we are in the process of the overall renovation. We did manage to get the rest of the fireplace trim cut and in place and we have finished putting up the trim in the den/breakfast area. We just haven’t finished painting it. It shouldn’t take a ton of time for us to finish it, but we just didn’t have enough steam today to wrap it up. So let’s take a little look at what we did accomplish this week.
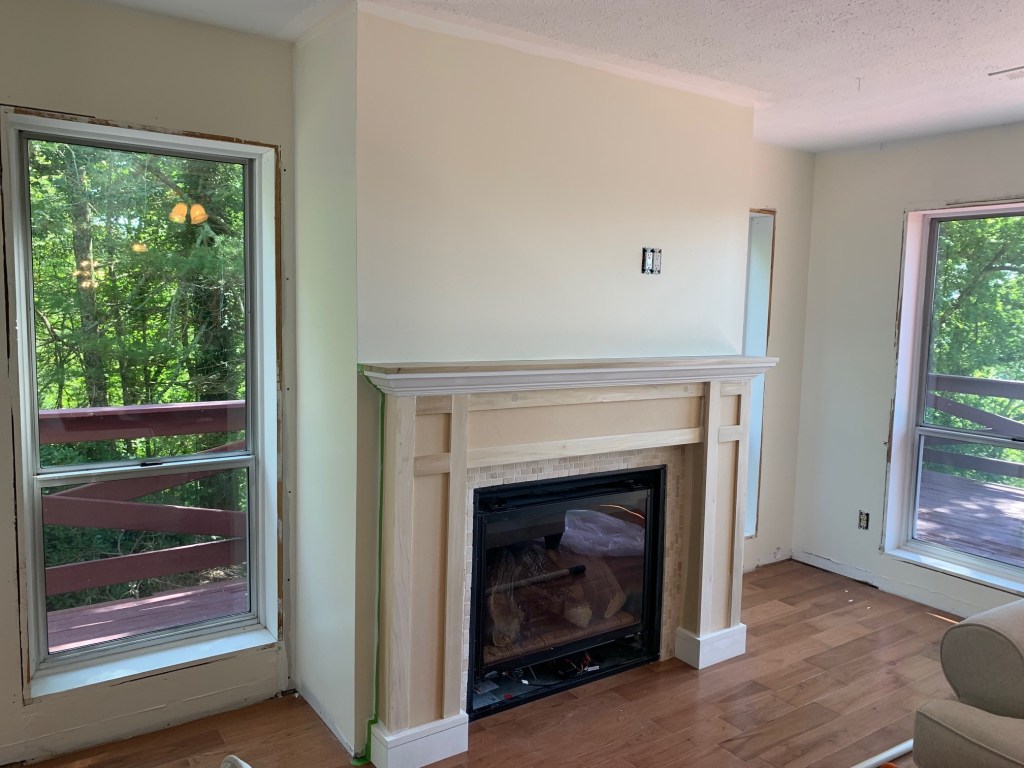
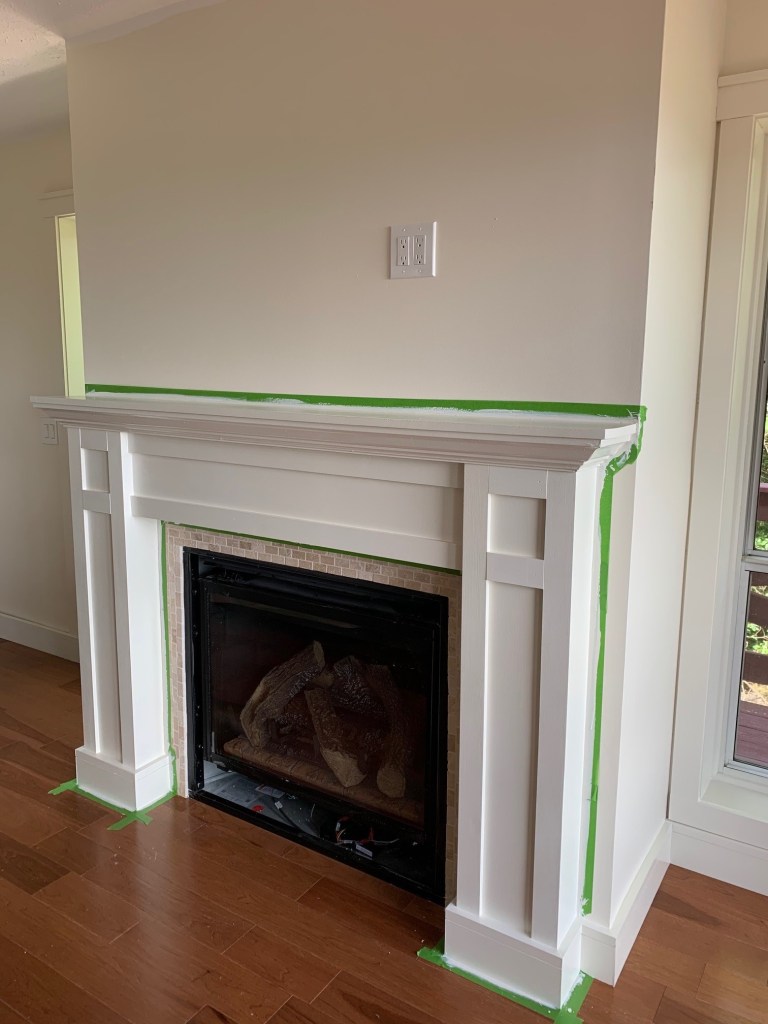
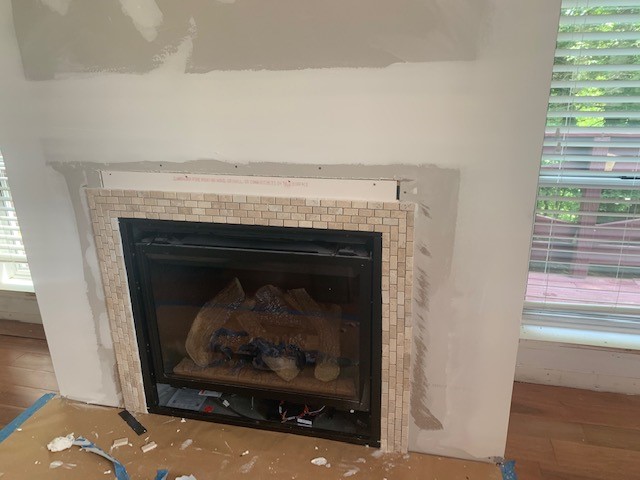
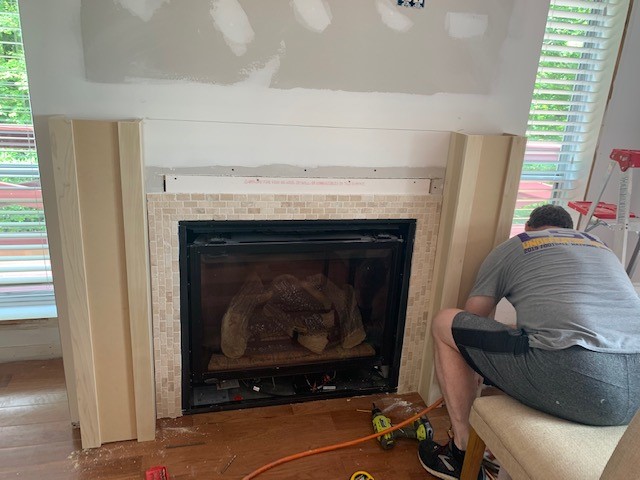
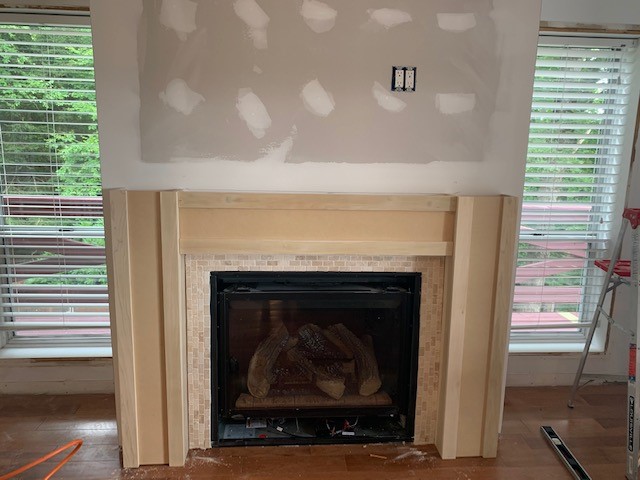
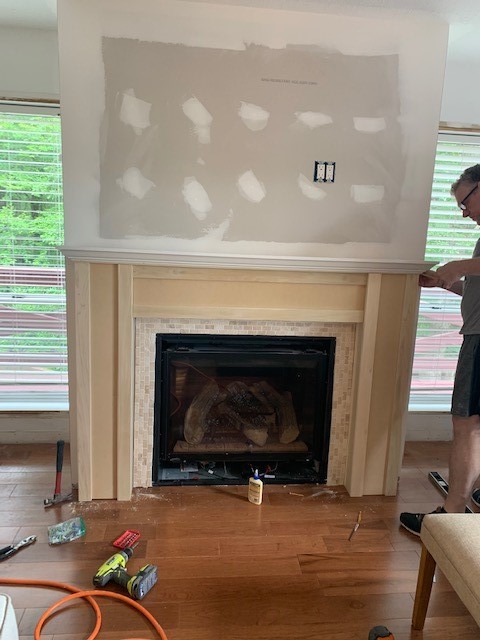
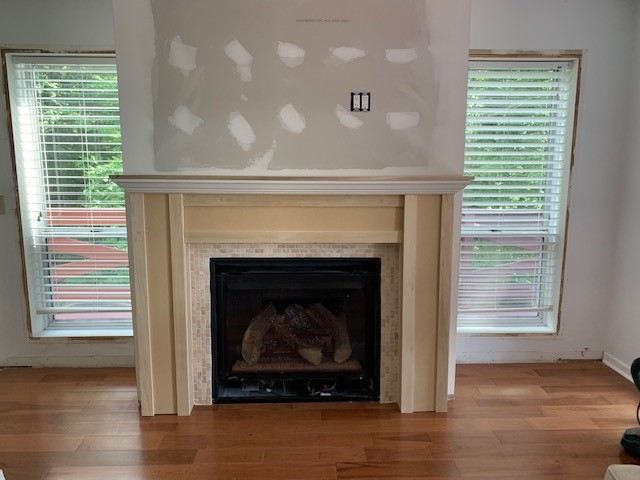
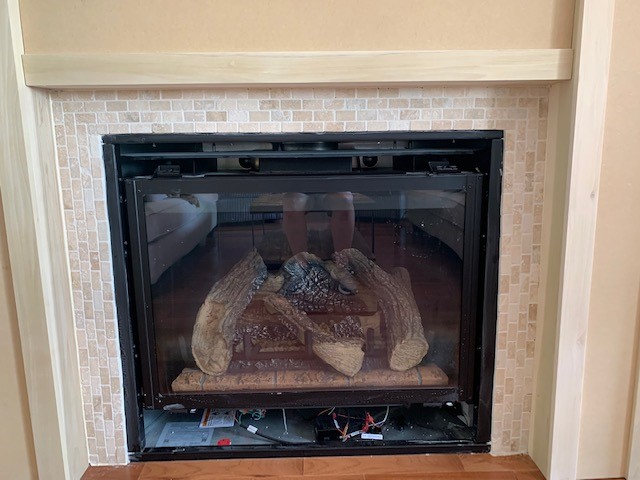
Fireplace….it just needs one more coat of paint on it and then it’s done. Because none of the wood or MDF we used had been primed, it’s taking three total coats. But it looks great. It’s still missing the decorative front cover and the blower. I can’t say I’d recommend the fireplace shop we bought it from. They definitely operate on “mountain time”. But here’s what it currently looks like.
Turned out pretty great, huh? We are really happy with it. And I’m anxious to finally get the TV back up on a wall and not resting on a chair! That will happen when we return later this week.
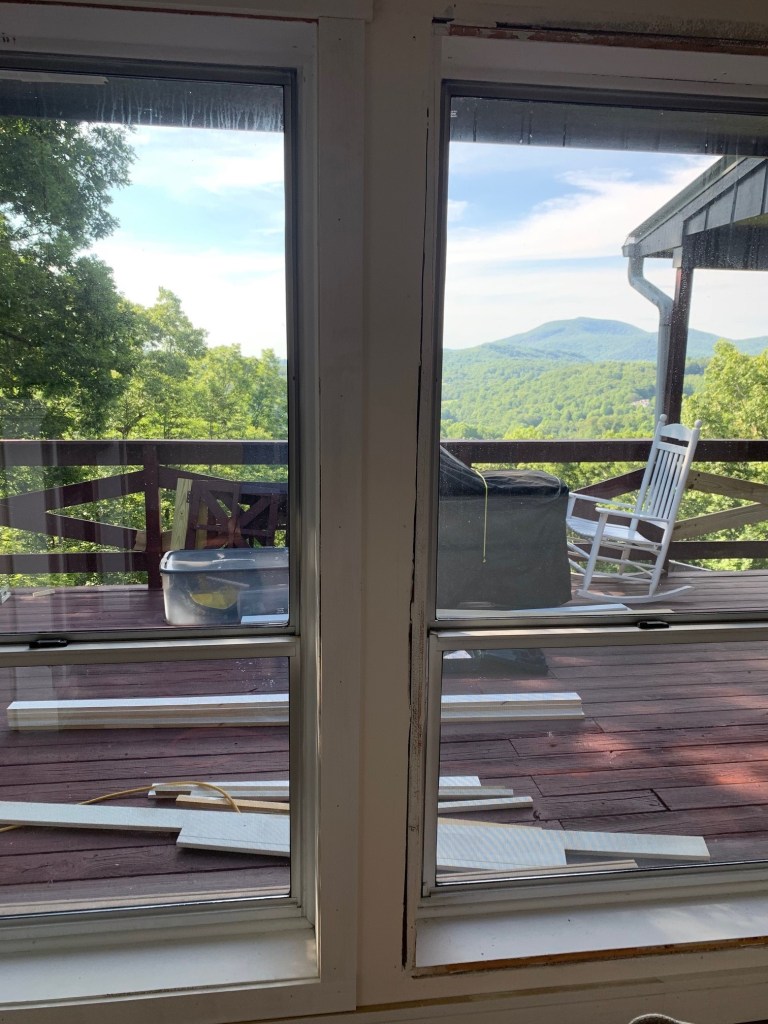
Now on to the trim. It’s not exciting or glamorous, but it does make us happy. Yesterday we had to cut a bunch of extra trim and I spent a LOT of time priming it. Meanwhile, after pulling off all the old trim, Keith was busy painting all of the walls. We did manage to get it all up today and then I began to caulk. And caulk, and caulk. Yep – my fingers bled again. I know there are tools to smooth out caulk but they don’t work (sorry Peter Hunt but they really don’t work well) and it looks better to use your finger to smooth it. After we let that dry, Keith taped it up and I got about halfway through painting it. The windows take a lot of time to paint because they are deep window wells and they haven’t been painted in a while. I’ll finish up the job later this week. In the meantime, here are a few super exciting pics of trim….
Left: Trim on one side, not yet on other side. Middle: finished trim, not painted. Right: finished baseboards and trim
Last week I mentioned we were planning something for the mirror in the guest bath. We got started on that but needed some silicone caulk to finish it, so you’ll just have to wait until next week to see that.
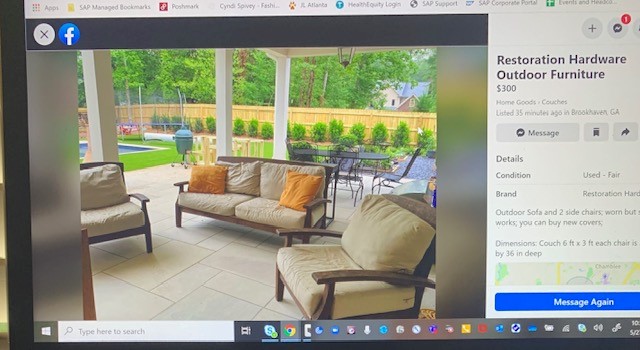
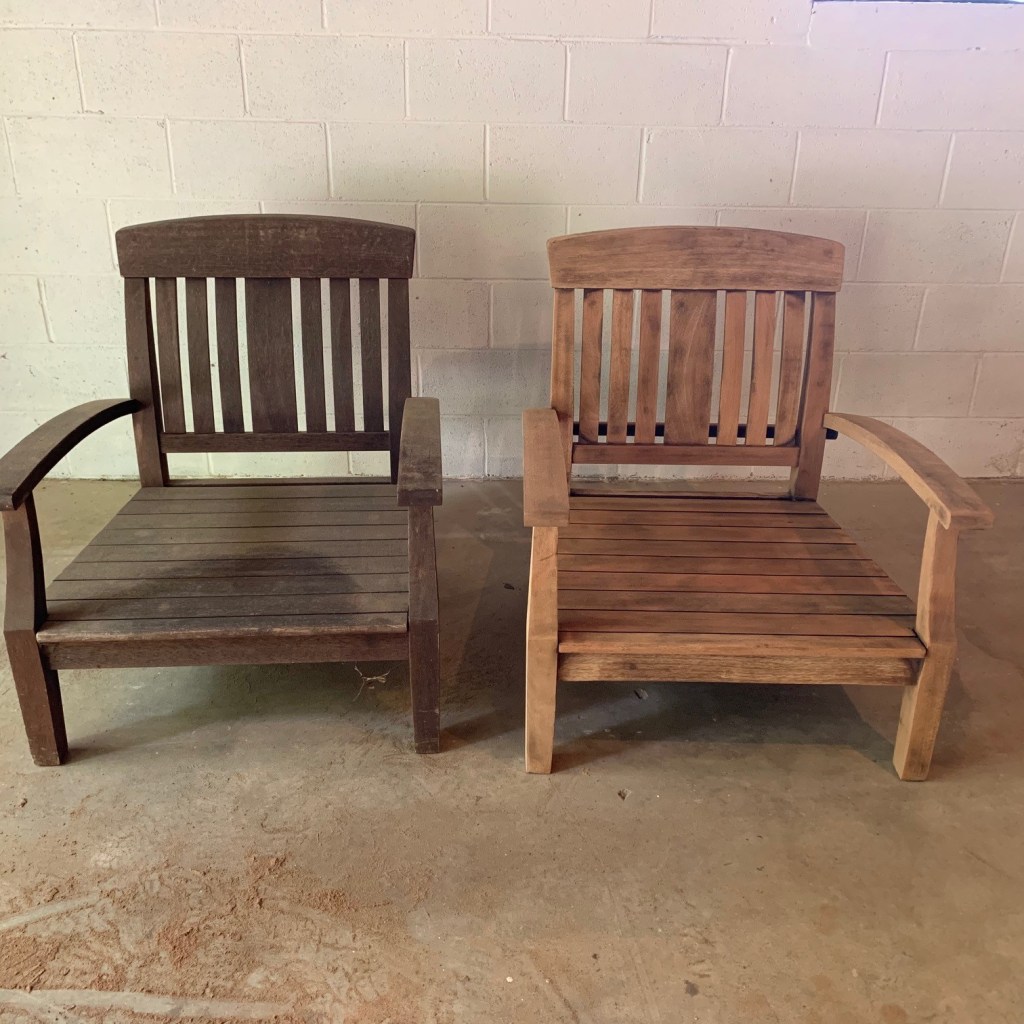
Last but not least is outdoor furniture. Initially I wanted to just build some outdoor furniture, but then found some used Restoration Hardware furniture on Facebook Marketplace. I pretty much bought it sight unseen and when I got it, it was in a bit worse shape than I imagined. I knew the cushions were GROSS and in bad shape, but the actual furniture took a bit more work than I initially counted on. But, after working on and off the past several weeks, I finished up the sofa and we finally sat outside on it last night! We haven’t had anything other than some rocking chairs which are too tall for my short legs, so I didn’t have any comfortable seating until now. I still have to finish up the two chairs (one is sanded and ready to be stained and sealed and the other hasn’t been started), but here goes! Let’s start with the picture that I saw on Marketplace…
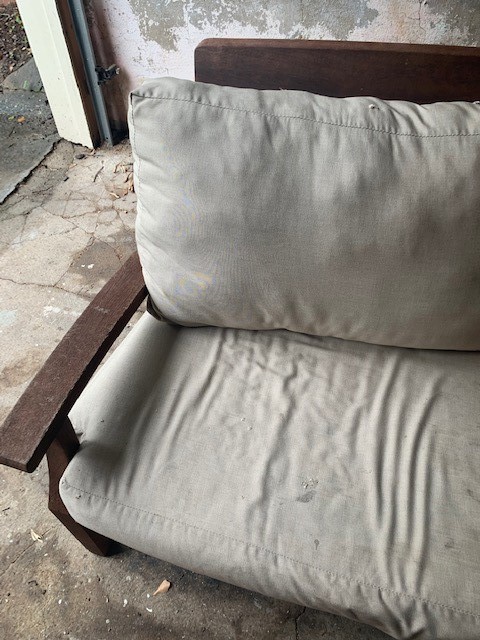
From those pics, you’d think that maybe a quick coat of polyurethane and recovering or replacing the cushions would do it, right? That’s what I thought too. Well, here’s the reality of what I got…
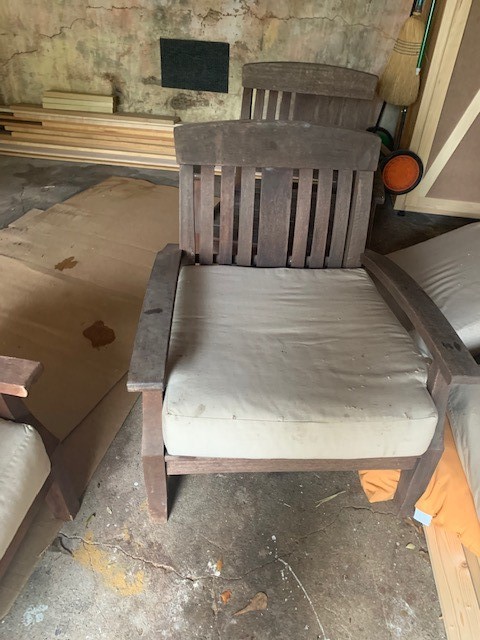
So then it became time to turn lemons into lemonade. I had the cushions recovered (for Atlanta friends, I used Fast and Great Upholstery on Howell Mill and they did a great job for the most reasonable price I could find). While they were working on the cushions, I started sanding and sanding and sanding and sanding. Here’s a look at one sanded and one unsanded chair just so you get a feel for it.
I wish I could say that sanding went quickly, but it didn’t. Once I got it smooth enough and most of the finish off, I went with a dark walnut stain to try to hide any places were I couldn’t sand off the old finish. This is a super unflattering picture of me, but I’ll share anyhow! Those are my “painting” clothes which are covered with paint, poly, etc. but they’re practical to have since I’m quite messy!
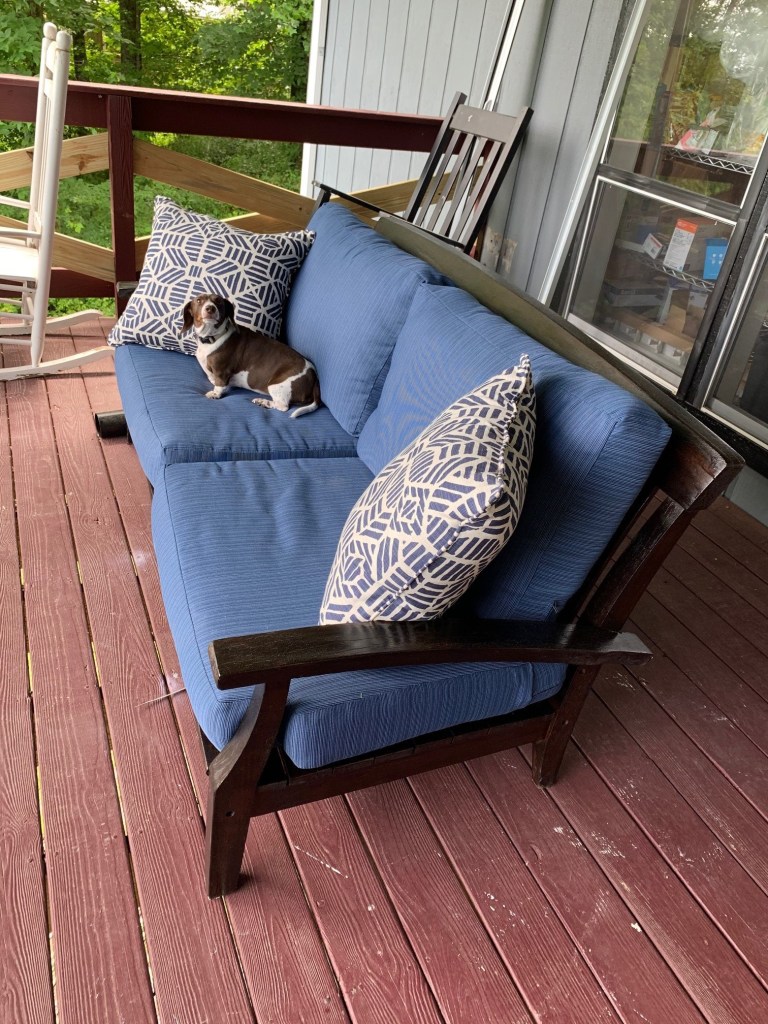
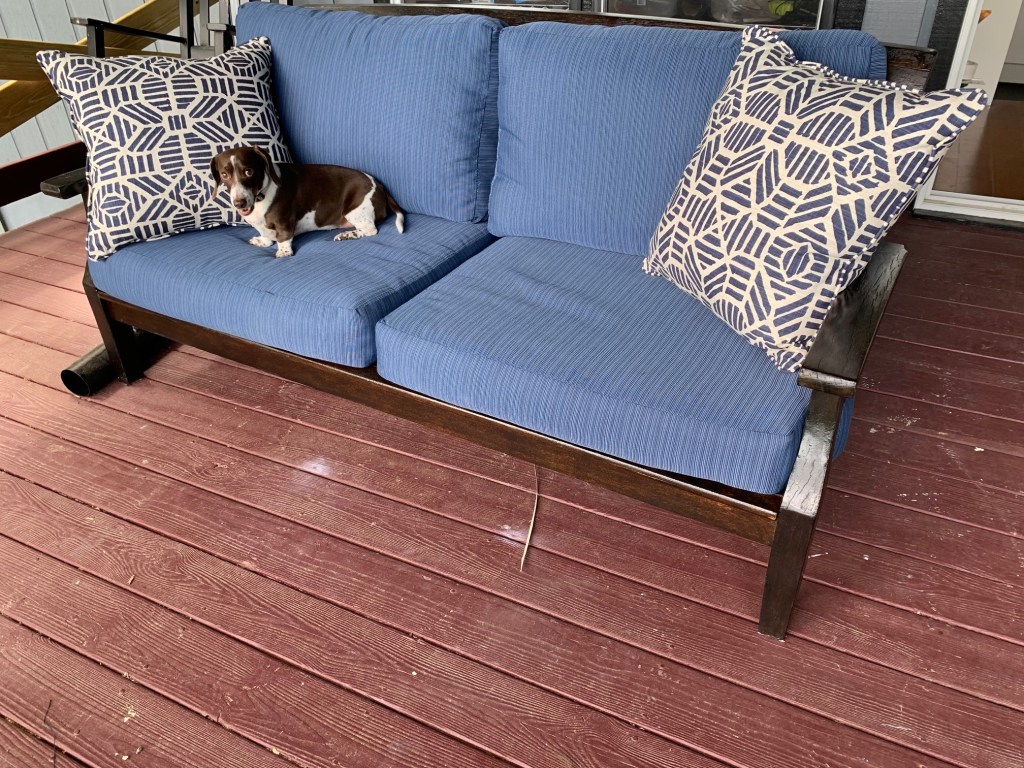
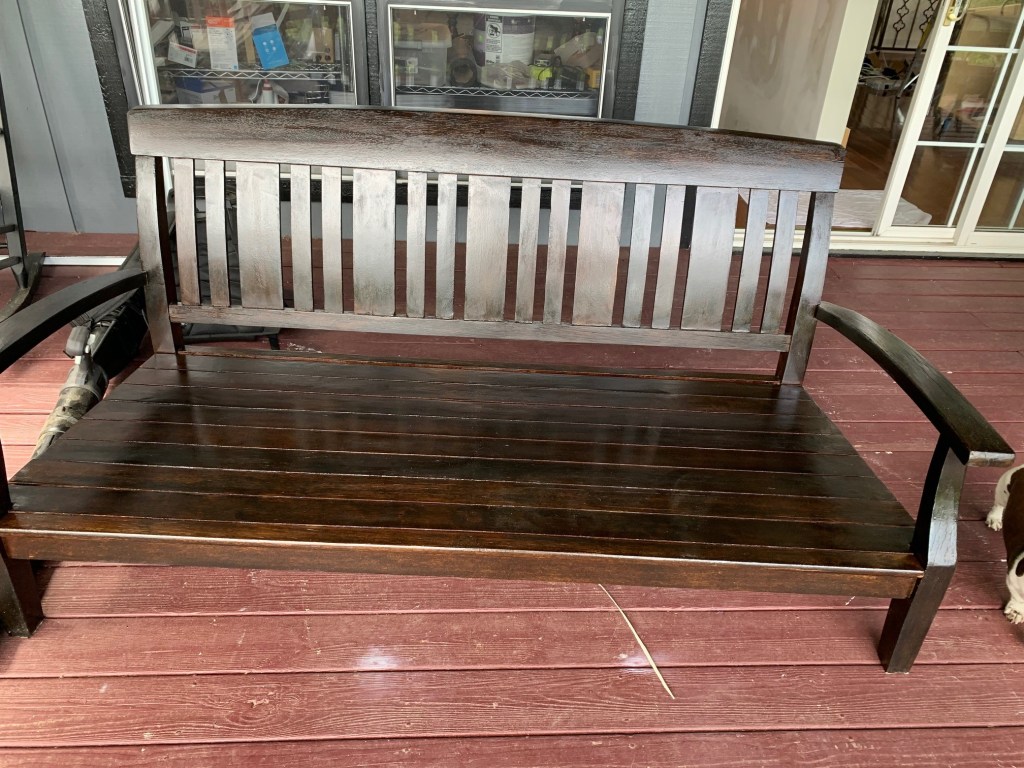
I must admit I had a lot of moments of doubt. After the first coat of polyurethane done in the garage, it never really cured and remained very sticky. We moved it over to the unfinished part of the basement and that solved that problem. Three coats of poly later, and the end result is something I’m quite happy with!
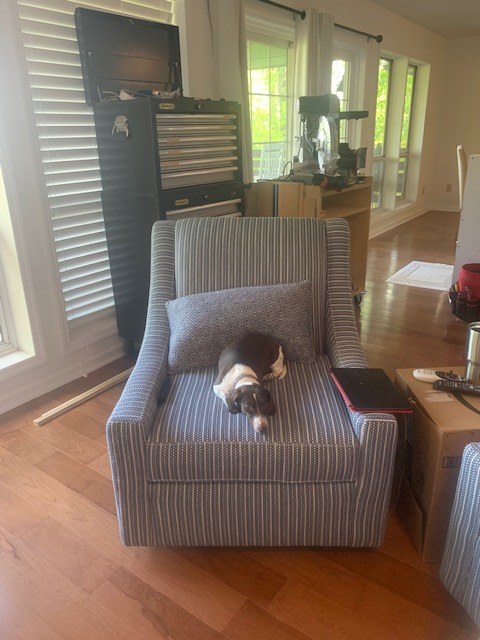
It’s not perfect, but it looks good and is very comfortable for me with my short legs. And you might notice that another girl with short legs named Chloe seems to like it a lot too!
I also wanted to give you an update on the kitchen. We finally ordered everything we could online at Ikea about 10 days ago. The earliest delivery date (to our house in Atlanta) is August 2, so that’s when we’ll get the bulk of our cabinets. They didn’t have 7 base cabinets we need in stock online, so now we’re trying to check to see when the local store will get them. Thankfully we live about 7 minutes from Ikea so it’s not horrible to run over there, but if you’ve ever been to one you know there’s no such thing as a “quick” trip to Ikea. They get new inventory in every week. Allegedly they will have 4 of the 7 cabinets in stock by Tuesday so guess where I’ll be going Tuesday evening after work…. Frustrating but given that ALL of our cabinets are costing about $5500 (that doesn’t include the fronts, because remember we are making those ourselves), it’s worth the hassle.
Well folks, that’s about it! I hope you are all staying safe.
We hope everyone had a fun and safe holiday weekend. I’m sure it’s no surprise to all of you that we had a productive week! I took Wednesday and Thursday as PTO and had Friday off as a holiday so we got a lot done. And we managed to have some fun this week too! (although we are nerds and find renovating to be fun!) So sit back and get ready for a long blog post….
This week was Keith’s birthday so I wanted to do a few fun things together with him. One thing we did was hike Glen Falls. It is one of our favorite relatively easy hikes and it is breathtaking. It’s the first place we ever hiked together four and a half years ago too, so it’s kind of special to us!
After that little break, we got back to work in the guest bathroom. My original thoughts for the bathroom was to rip out the current vanity and replace it. Then I had an idea that we could swap out the shower and the current vanity and make a larger shower, but we scrapped that idea due to cost and the amount of work it would be. The more I started looking at the vanity, it was really just the doors which were ugly so that’s how we decided to make our own. It was a good practice round for the kitchen since that’s our plan for it is to make our own fronts for Ikea cabinet boxes. Of course you saw that in last week’s blog, so I won’t go through the process of that again. And Keith is putting together a video showing how we made them, so look for that hopefully today or tomorow.
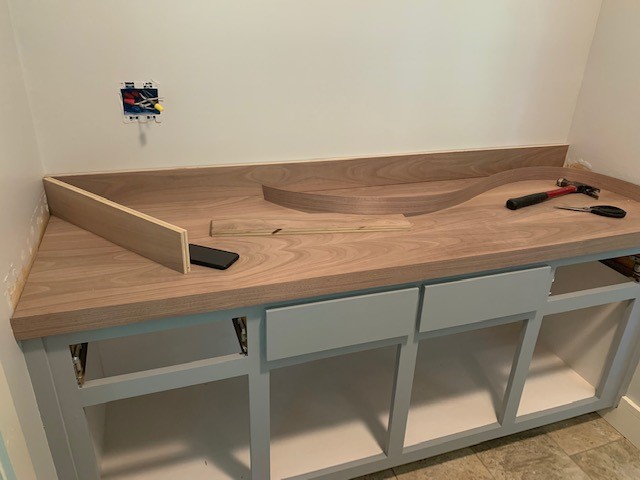
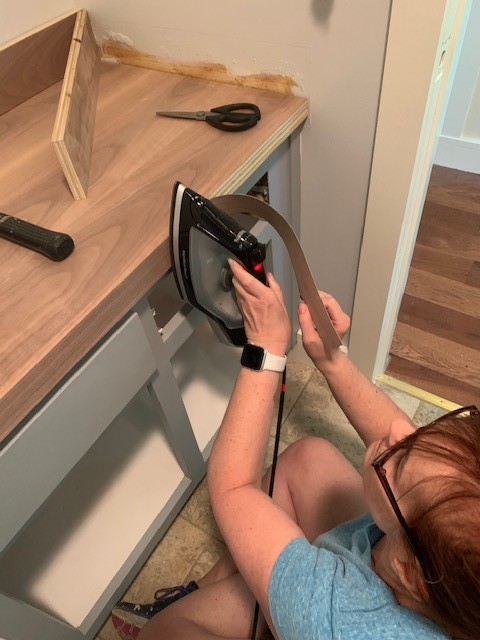
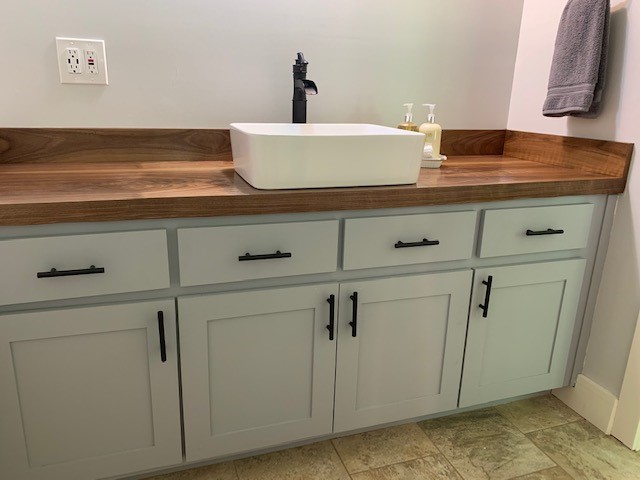
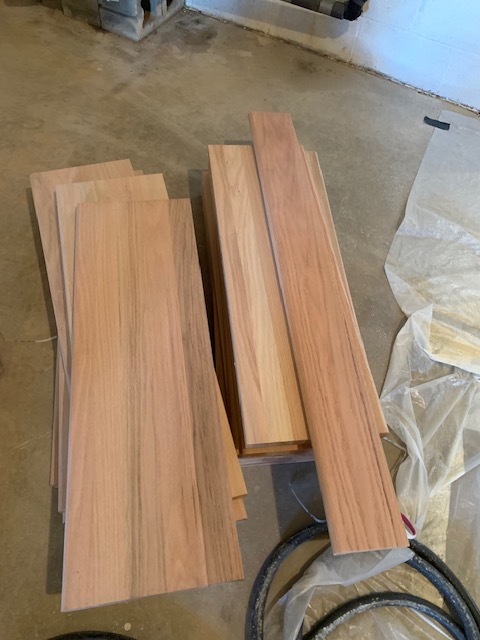
Once we decided to do replace the cabinet doors with our own, we had to figure out what to do with the ugly countertop. I did a fair amount of research and we decided to make our own countertop using walnut plywood and edge banding. You don’t know what edge banding is? Well, I had used it during a woodworking class I took back when I lived in Chicago, so I had a tiny bit of experience with it. So let me show and tell you a little bit about our countertop. We started with a 2’x8′ piece of plywood and cut it to the right length. Then we placed it on top of the old vanity top plywood after pulling off the formica (it’s just a thin layer). Once we did that, we cut our edge banding to length and used a hot iron to glue it to the edge of the two pieces of plywood. Then our plywood looked like a solid piece of walnut!
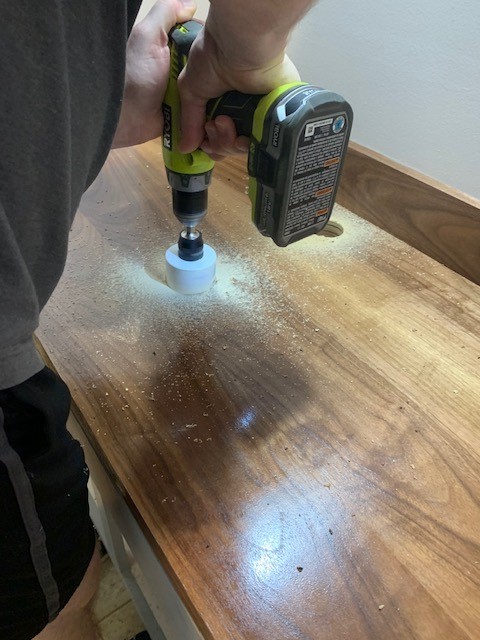
Once we had this in place and put the backsplash on with the edge banding, I sealed it with three coats of exterior grade polyurethane. After that dried completely, it was time to cut holes for the sink drain and the faucet and install them.
During the week I had sanded down our cabinet doors, primed them and put three coats of paint on them. Then it came time to install! We used European concealed hinges with soft close. Keith got to use his new Kreg jig for drilling out the hinges, which of course he loved!
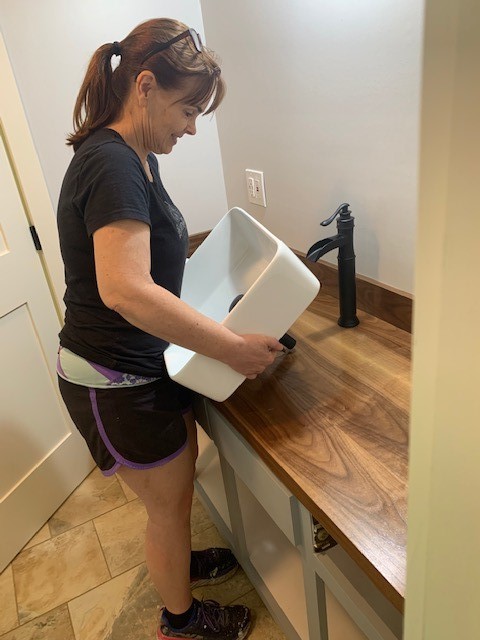
And now for the big reveal….may I present to you our new guest bathroom!
We still have to make our mirror, but it is a completely functional and attractive bathroom now! More on the mirror next week, but we have a neat plan for it involving more of the walnut plywood.
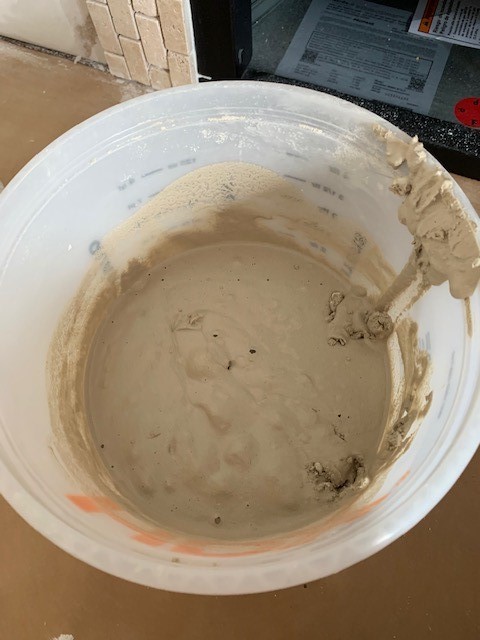
Now on to our other big project this week, the mantle. We aren’t quite done but we are super close. We just need to plane a few trim pieces and then we will wrap it up. But since our planer was in Atlanta and we weren’t, we will bring it back up with us for next weekend. Let’s start with the tiling. After watching about 5 minutes of YouTube videos, we were confident enough to start. We used premixed thinset which made it fairly easy. We measured and taped off the “lines” we wanted to stay within and we also placed a ledger board to make sure we kept our top line straight.
We then had to wait 24 hours for the tile to set before grouting. This was a wee bit more challenging as we thought we had bought premixed grout and we hadn’t! It kept hardening up on me but we eventually got it up and it turned out great.
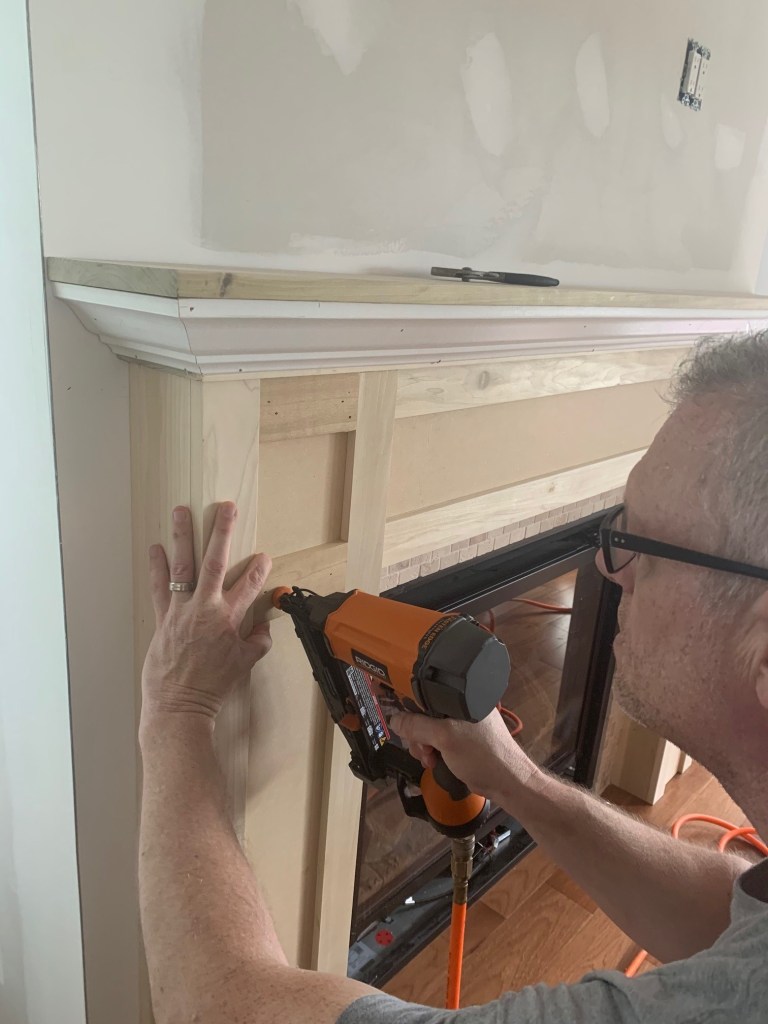
After this was done it was time to make the mantle! Yesterday morning we started cutting our MDF and our poplar boards. We started with making the columns. To do this, each column is comprised of two poplar boards and a piece of MDF. We used our dado blade on the table saw to cut grooves for the MDF panels to sit in. Then we used our pocket hole jig to cut pocket holes and screw in the sides of the columns.
Voila! Columns for the mantle. We followed a similar method to create the piece which goes across the columns, then it was time to place a piece of poplar, attach crown molding to it, and then attach the top piece of the mantle.
And here’s the (almost) final product! We still need to add the additional trim pieces at the top and the base, but otherwise the mantle is complete.
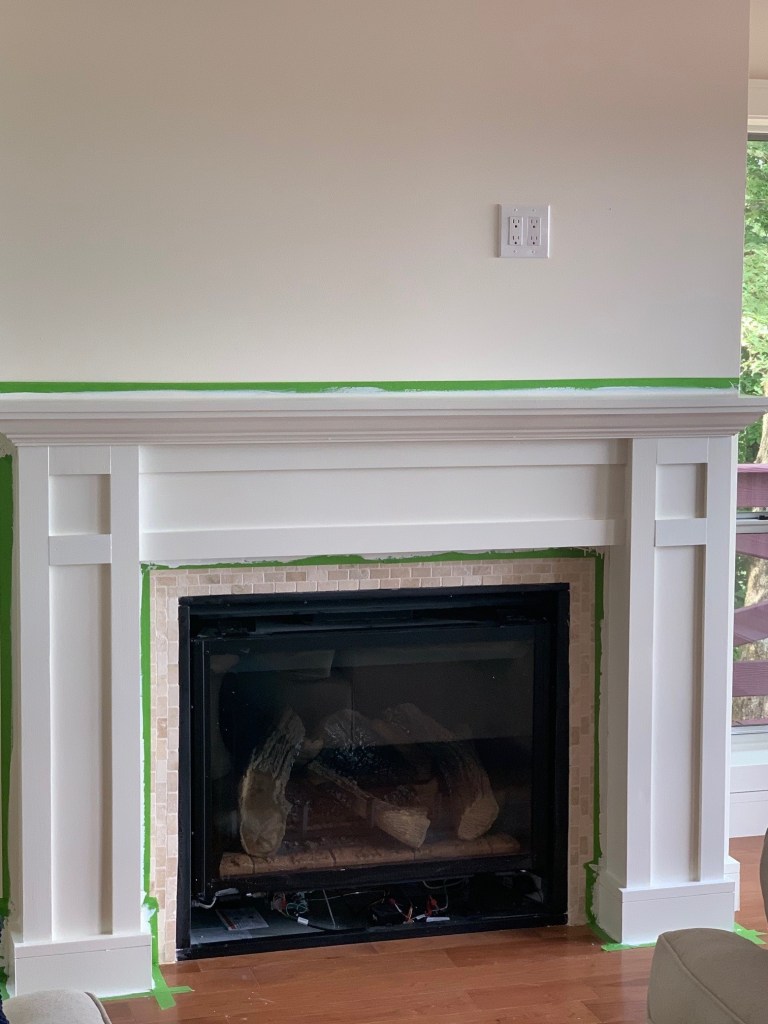
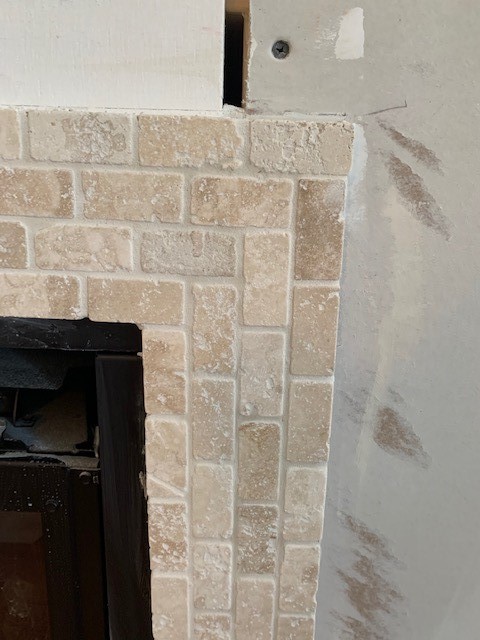
Here is a closer up view of the mantle next to the tile.
In between building the columns of the mantle and the top of the mantle, we took a little break to go fishing. There’s a little trout pond about 3 minutes from our house, so we decided to go check it out. Well, it was us and a bunch of 3-10 year olds with their parents out fishing! Haha! We each caught one and were so excited to make this be our dinner. We brought them home, brined them and smoked them on the Egg.
And … they sucked. Really sucked. As in inedible. We don’t know what we did wrong, but we ended up eating some leftover BBQ and we literally threw the fish off the deck way out onto our very sloped backyard for some wild animals to enjoy. Because we did NOT enjoy them! Oh well. It was fun!
Last but not least, I thought I’d show this adorable picture of Chloe sitting in a pile of sawdust. She’s pretty tolerant of us working on the house, to say the least.
After a whirlwind trip to Baton Rouge to drop mom back off at home, we are back up in the mountains and back to work! There are a lot of exciting changes happening and I can’t wait to show you!
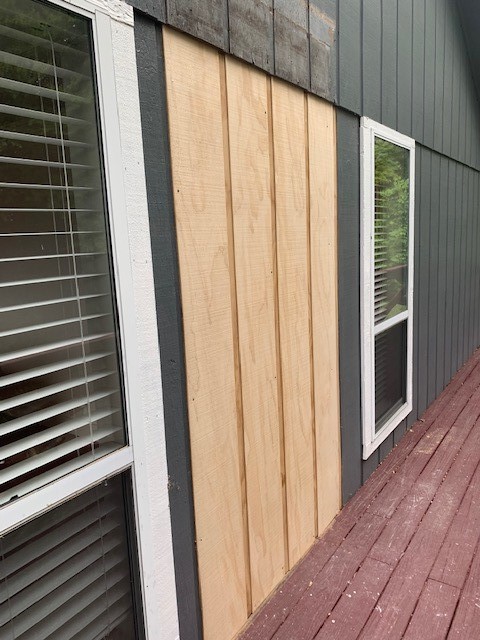
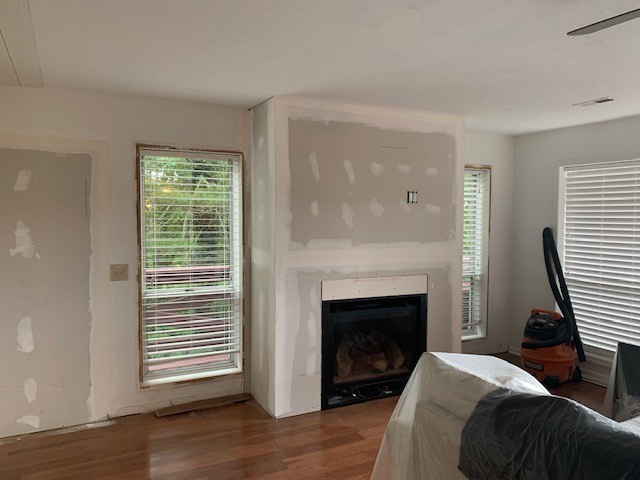
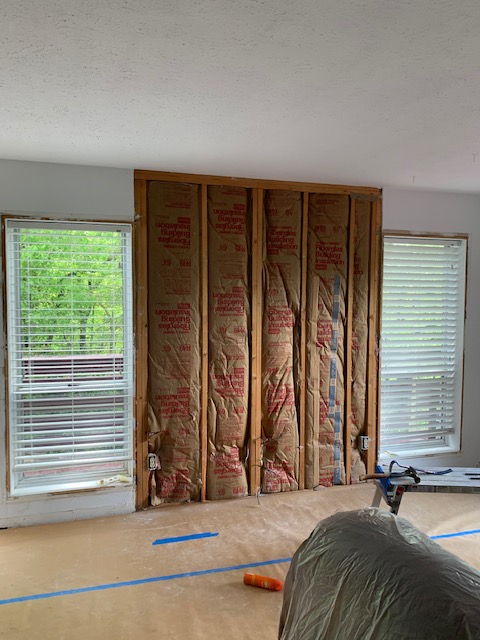
While we were driving back from BR, our handyman Kevin was busy drywalling the fireplace and closing up the superfluous side door. Our fireplace is now starting to look like a fireplace and I’m so happy to be rid of the side door! Take a look at it both from the inside and out!
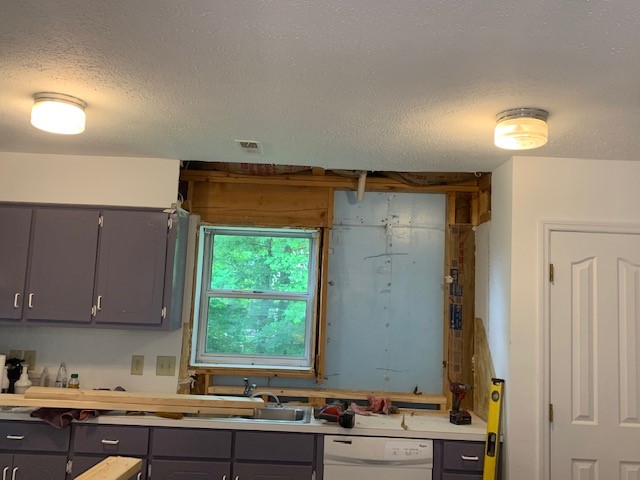
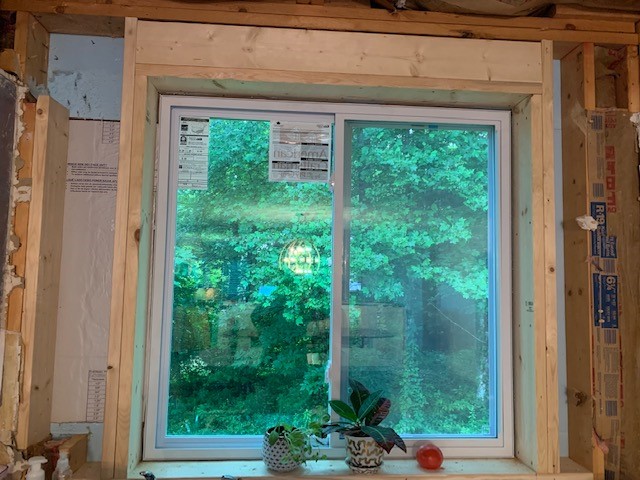
Once we were back up here, Kevin and Daniel (his assistant) got to work on another big project replacing the kitchen window. Today, the kitchen is not centered in the room because there are two closets to the right of it. Since we are (eventually) demoing those closets and replacing them with pantry cabinets, we were faced with the dilemma of an off-center kitchen window. Because we had to move it anyhow, we chose to go a LOT bigger with it. We now have a 48″ square window in the kitchen and we love it! It wasn’t such an easy task to do, but Kevin was up for it. As a reminder, here’s the “before” of the kitchen window.
It’s crazy to think how much it has changed since we closed just a short 3 months ago. None of that pantry or wall is there anymore! That’s where our kitchen table is now! Back to the window. It wasn’t tiny before, but when you see the new one you’ll see what a huge difference it makes! In addition to removing the old window, we did have to go on and remove the upper cabinet to the right of the window since that’s where a lot of the new window went.
It took three of them to safely get the window out of the hole and into the new framing!
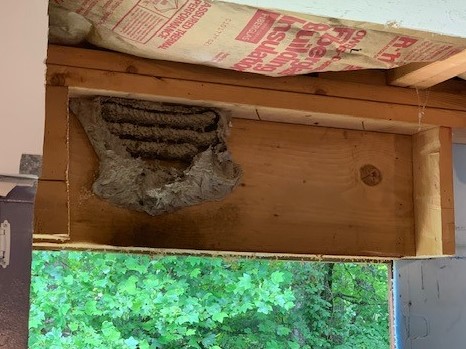
Before I get to the big reveal, I thought I’d show you what we found in the wall when we opened it up. GROSS! Thankfully this is a very old hornets nest which is not active. If it had been, we might all be goners!
Now, back to the big reveal. I present to you our new kitchen window! Eventually it will be surrounded by a new kitchen once Ikea gets cabinets back in stock!
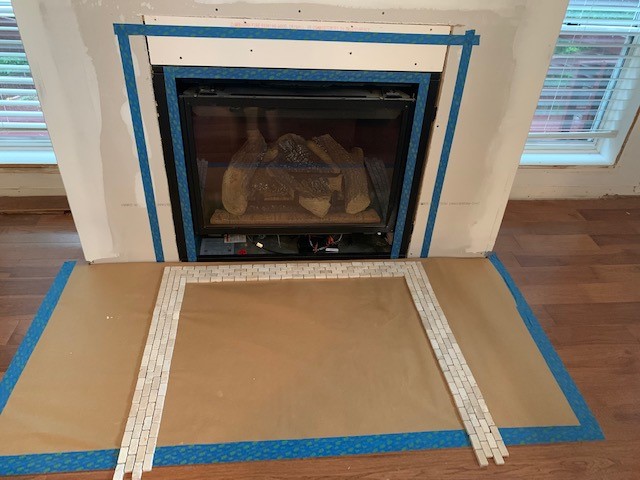
Let’s jump back to the fireplace for a minute. We are getting ready to start tiling and then build the mantle. This will be our first time to tile, so we picked an easy tile (1″x2″ tumbled travertine on mesh). We have it laid out but will wait until we have more energy tomorrow or Tuesday to actually put it up. We’re excited but a little nervous too!
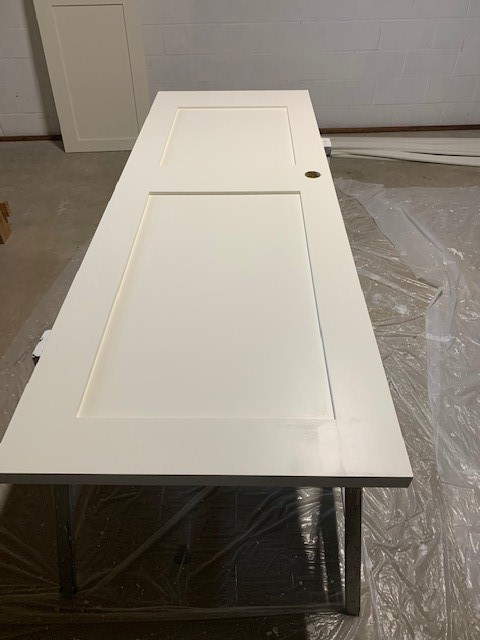
Next up for progress is that I am finished painting interior doors. Let me repeat that. I. Am. Finished. Painting. Interior. Doors.!!!! Woo hoo! We had waited until mom was gone to pull the hall door to the guest bath down for me to paint, so I wrapped that up yesterday. Don’t worry … I’ve got plenty more painting in my future. Just not interior doors!
We are in the midst of the guest bathroom makeover now. Just as a reminder, here is a “before” picture. We will not miss the rose colored formica or the coordinating wallpaper!
So far, we have taken down the mirror (more on that in a future blog), Keith has added two more outlets (there were only two to start with!?!?) and we raised the junction box for the new light fixture. It’s not so exciting so I won’t bore you with pictures of it, but I have been busy with drywall mud covering up all of the holes from the old towel bars and the giant hole from where we moved up the junction box for the light. While we wait on that to dry and get perfect, we stayed busy working on the vanity.
As I mentioned in my last blog, we decided to just use the current vanity and make new doors for it. Keith has pulled off all of that rose-colored formica and we will reuse the plywood under it for the base for our new counter. We will be making a counter out of walnut plywood and we are so excited to see it come to fruition. Look for photos and more of an explanation in next week’s blog.
Now back to what we have gotten accomplished. Initially we were intending to make new drawer fronts too but decided to reuse the existing ones. I sanded down all of the face frames and prepped the vanity for painting.
Once it was prepped and I cleaned up the sanding mess, it was time to get to painting! Because the face frame isn’t that big, it didn’t take too long. I managed to get three coats on this afternoon.
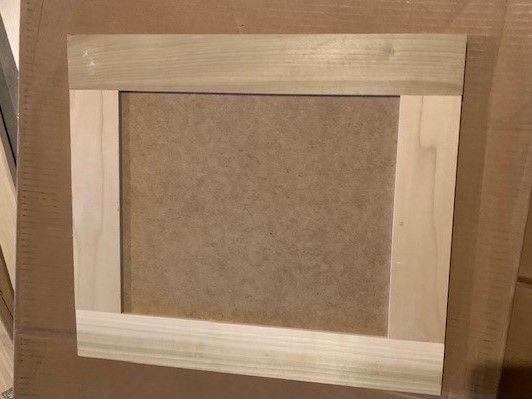
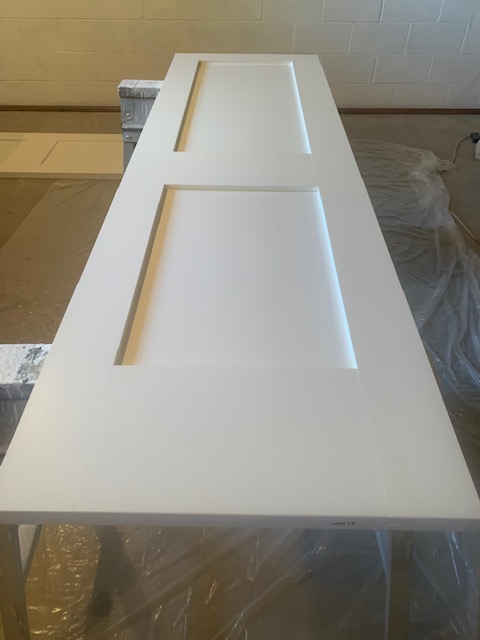
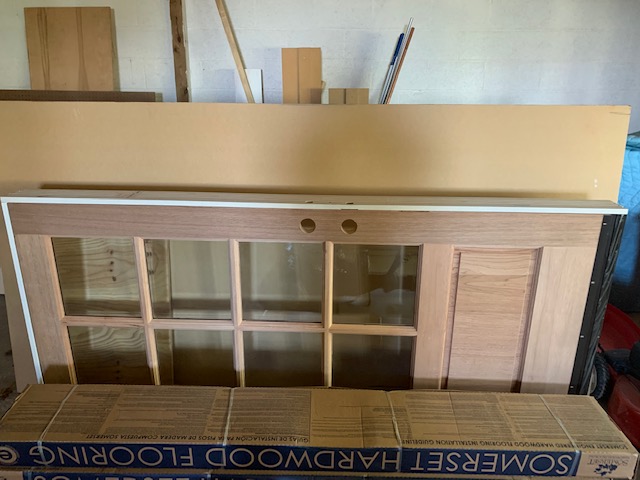
Additionally, we kept ourselves busy with making the new doors for our old vanity. Stay tuned for a demo video that we made, but in the meantime I’ll give you a sneak peek at one of the new door fronts! Needless to say, it still needs to be sanded and painted, but we are super pleased with how they turned out. Good thing since we plan to build all of our own doors and drawer fronts for out Ikea kitchen!
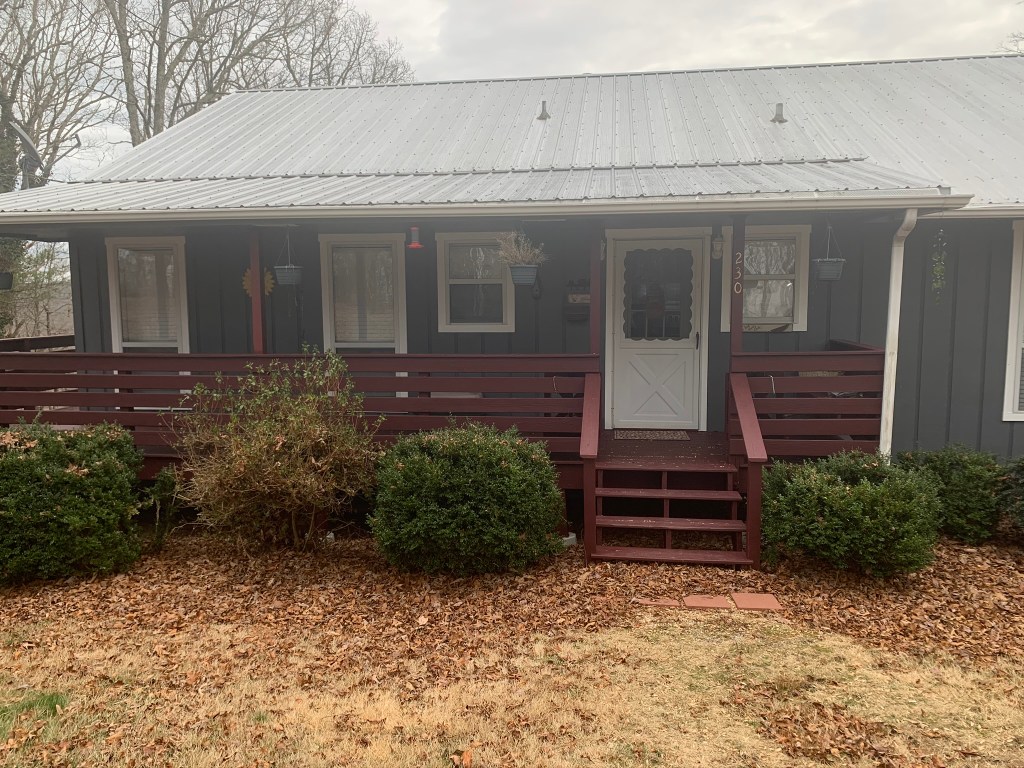
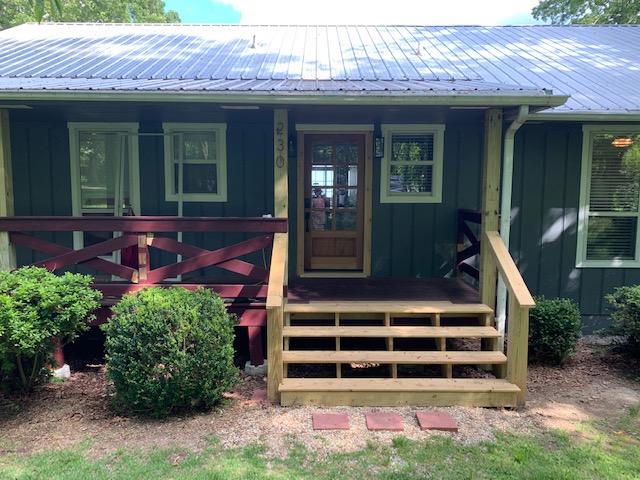
Last but not least, we finally wrapped up our railing project outside. I couldn’t be more pleased with how it turned out! We are waiting on a final quote for painting the exterior of the house, but we are ready to get it painted now. Once it is painted, it is going to look amazing! But I’ll leave you with a final look at the new (old) railings! Until next week….
Hi everyone! It’s been a big weekend full of lots of work and lots of progress. We are so pleased with our progress and I can’t wait to show it to you.
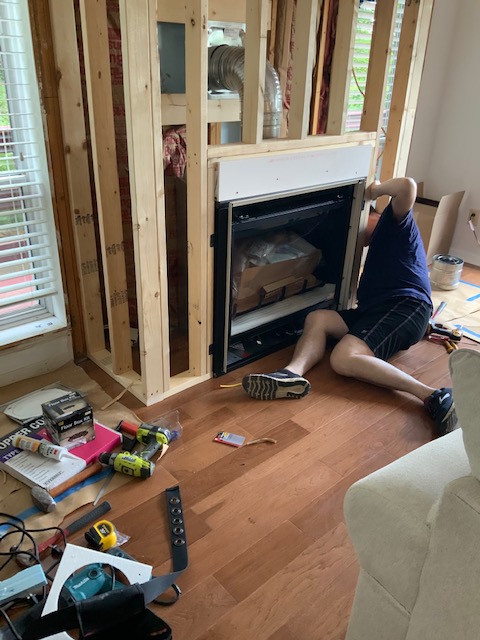
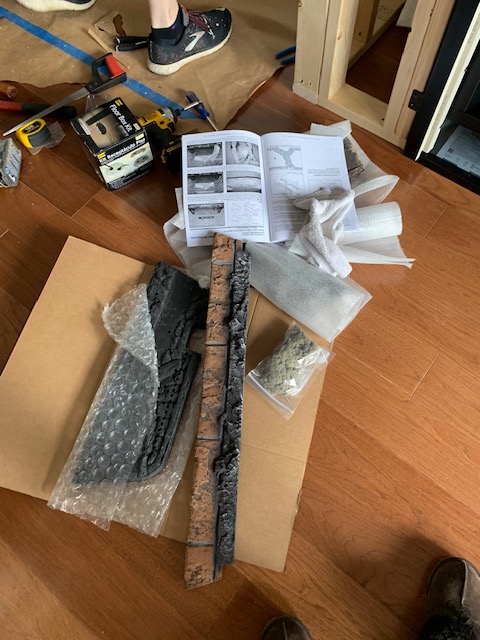
Let’s start with where we left off last week … the fireplace. It finally came in and Keith got to work on reading the manuals. All 120 pages of them. Yes, you read that right .. 120ish pages. And each and every one of them had a caution saying “Caution! Fire! Explosion!” A little intimidating to say the least. But nothing stops my man and he got to work figuring out his Home Depot shopping list and he made a plan. After a long trip to/from HD, he got to work. Folks, this is no easy task and I can honestly say I helped very little with it. I’ll take credit for what I did help with, don’t worry. But let’s take a look at the progression from receipt of the fireplace on Friday morning until we turned it on this morning! And don’t worry, there was no Fire! Or Explosion!!!
Fireplace before installation
All of that took the better part of the afternoon to get accomplished. Don’t worry – while Keith was working, I was as well but I’ll get to that shortly. Now, onto what I helped with – placement of the logs and the “embers”. After the whopping three pages of instructions I had to read to place everything correctly (don’t forget, danger! fire! explosion!), I had some serious sympathy for Keith dealing with the other 117 pages!! 😉
After that, Keith hooked up the gas, and voila! We have a fireplace! Not exactly a showpiece (yet), but we were happy.
The next step is to drywall it, tile the surround and then build the mantle. That will all happen when we’re back up there in a couple of weeks. In the meantime, here’s a little peek at our tile we’ll be using.
So while Keith was doing his marathon Home Depot shopping, I was working, I promise. I mowed the front yard, painted a couple of doors, sanded and primed a BUNCH of trim and sanded the oak treads we bought for the stairwell down to the basement.
After all that, we were both pooped. And apparently Chloe was as well, as this is where she ended up when I laid down on the sofa….
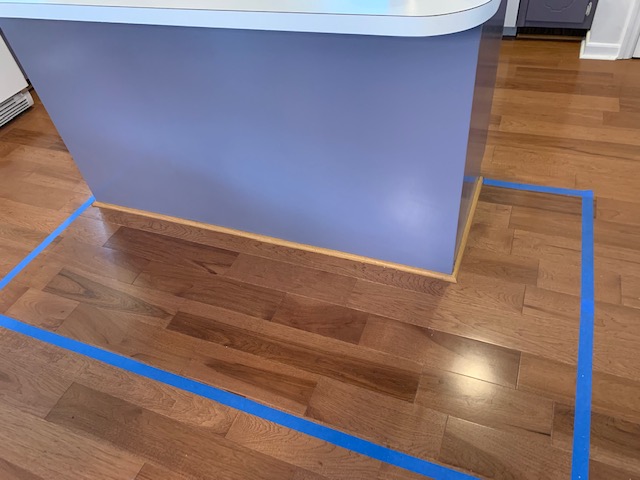
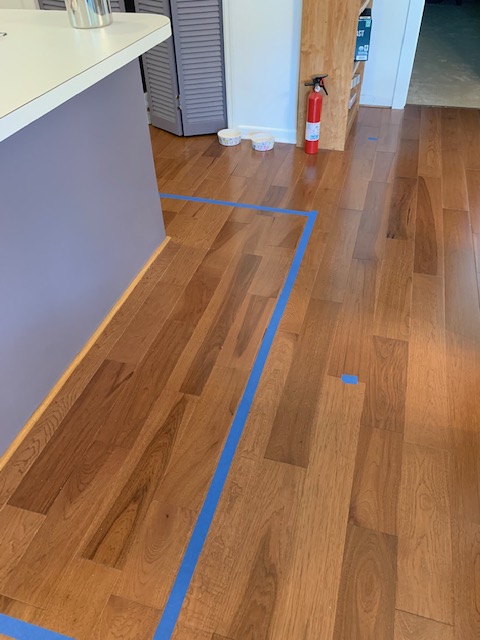
I mentioned revisions and recycling in our subject line, so I’ll get to that now. We are getting close to being ready to install the kitchen, so we took some time to tape things out and revisit my kitchen design.
The good news is the design itself is mostly intact, but we had to make a few small revisions. Namely, we reduced the width of a few cabinets on both sides of the kitchen, as well as the island. Keith had the brilliant idea to start our kitchen remodel with the island. We can demo the current island and go on and install the new island without disturbing our current cooking situation. Since we plan to install our range (which has a downdraft) in our new island, we can get that up and running before demoing the rest of the kitchen. We can move the current refrigerator to the den during kitchen demo and that way we won’t ever be without a kitchen. So back to the revisions we made. After taping out where the cabinets would end, we realized they were just a little too much, so we are cutting our pantry cabinets (2 on each side) from 24″ to 18″ each. That will give us an extra foot of floor space but it takes away from our pantry space. Ordinarily that wouldn’t be a big deal but we had planned to put the microwave in one of the pantries. So, back to the drawing board! We saw that Ikea has an under-cabinet microwave cabinet, so we’ll be putting that to the right of the range and we’ve solved our problem.
In the spirit of revisions, we also revisited our guest bath vanity design and decided it just wouldn’t really work well. We looked into buying a vanity which would work, but finally I came up with the idea of us keeping the existing vanity but swapping out the doors and drawer fronts for custom ones we make. Then when we get the stone counters installed in the kitchen, we’ll also replace the hideous rose colored formica bathroom vanity top with something far more attractive. It won’t take much to be more attractive!
Some nice shaker doors and drawer fronts, along with European (hidden) hinges will make this look new. We’ll get to working on that in a few weeks.
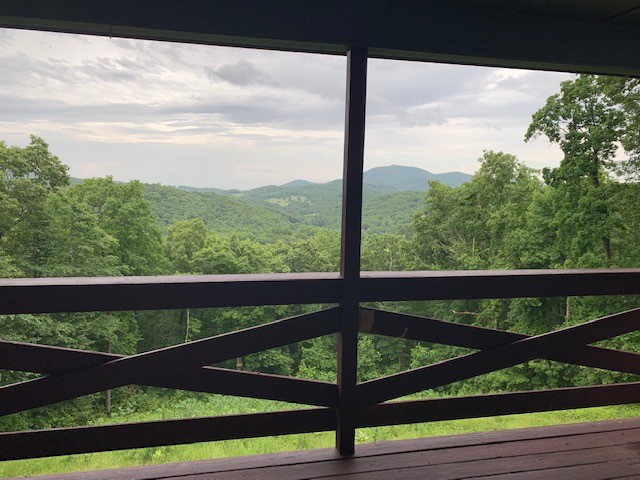
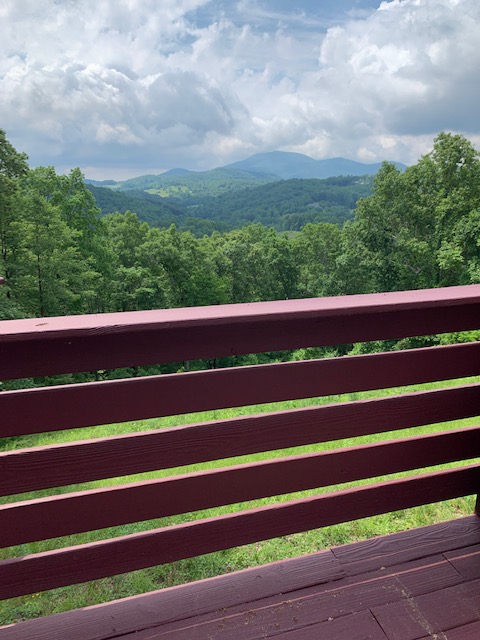
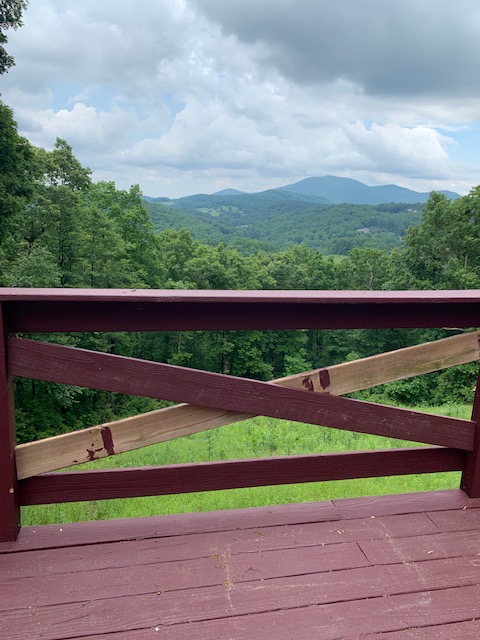
Now, last but not least … recycling. I have not been a huge fan of our railings which wrap 3/4 of the house, but I had hoped that just painting them white would make them disappear. And it will, but then I had a brilliant (if I do say so myself) idea. What if we ripped down the middle 3 of the 5 railings and recycled the boards and made them into X’s. It’s probably easier to visualize.
So that’s what the railings look like “before”. They really cut off the view and feel very heavy.
Here’s a little view of the “during” after we ripped off the middle 3 boards.
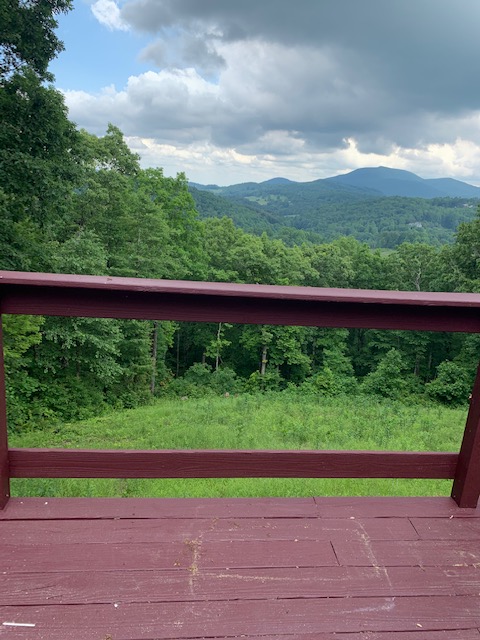
And voila – the after! Try to imagine those painted white and not the patchwork they currently are. Isn’t it amazing what a difference it makes? I am SOOOO happy and so is Keith!
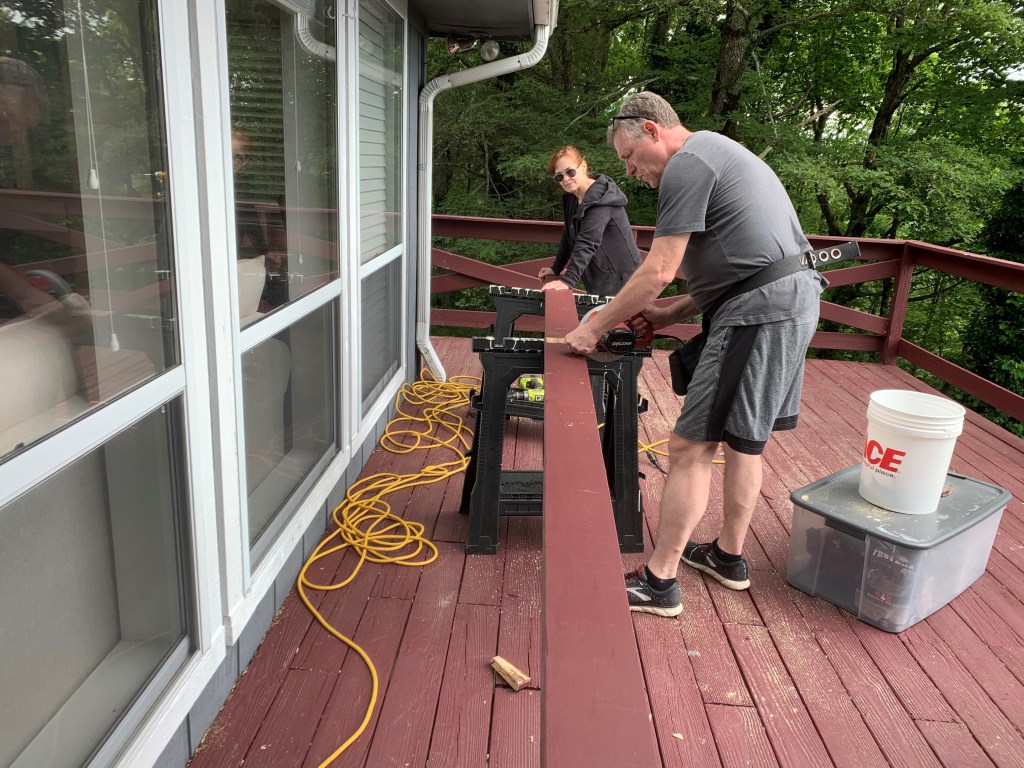
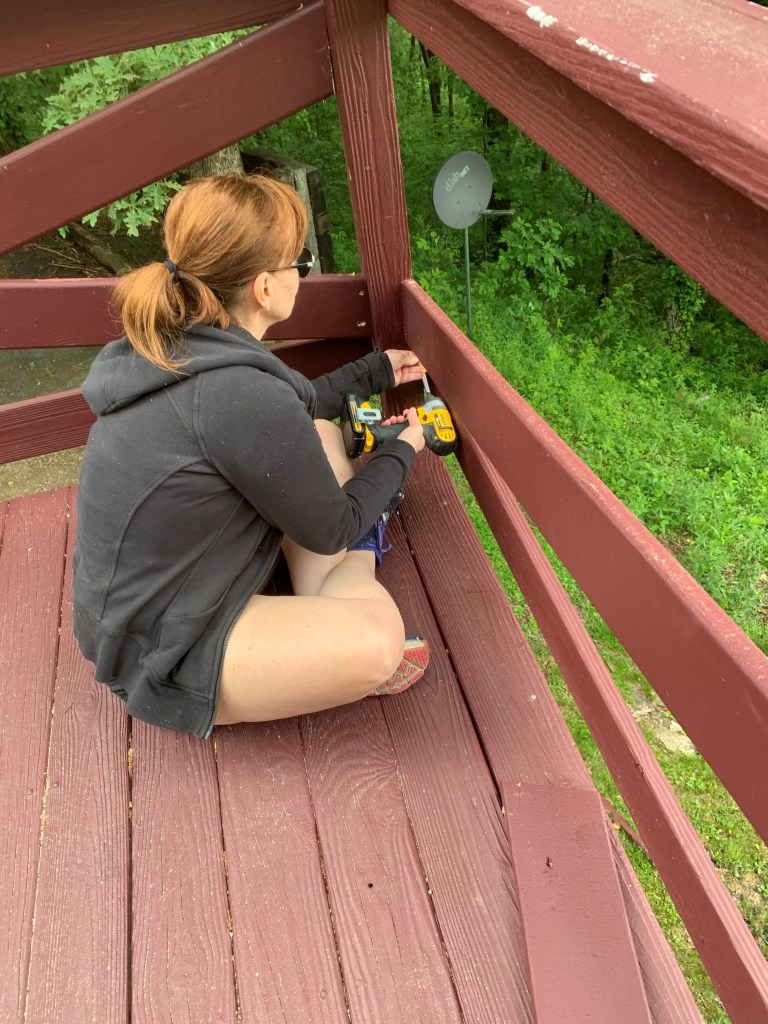
It was a little awkward to remove the big boards, especially as we moved around the house and the drop went from 3 feet to 20+ feet! It was a multi-step process. We removed the middle boards, measured, cut, dry fit, cut a second board, drilled pilot holes and screwed them in. Then rinse, repeat. None of the spaces between the posts were the same, so we had to do that each time. There are 21 spans, and we got 16 done today before it started sprinkling. We got a lot better as we went along, and it took less time. But we are so happy about how it looks! What do you think?
Just for reference, here’s the before from when we first moved in and I’ll wrap up with the “after”. We will be calling a couple of painters this week to get quotes to paint the exterior as we are only a few weeks away from being ready to do that! I cannot wait to see the transformation then.
ThenAnd now!
We will be headed to Baton Rouge to take mom home next weekend, so you’ll have to wait a couple of weeks until our next update. Until then, stay safe and stay well!
This week’s blog is going to be a little lighter on pictures as we worked on a lot of little things but nothing as dramatic as the past few weeks. We worked hard to button a lot of things up so we can be ready to start the fireplace work next week. I’ll get to that in a minute.
In the midst of doing all of the work at the house yesterday, we attended three (count ’em three) virtual events! My sweet friend Robin from work had her Bat Mitzvah on Zoom and I couldn’t be prouder of her. Then my brother-in-law Jeff retired from the Air Force and there was a Facebook Live for us to watch the beautiful ceremony. And last but not least there was a virtual Gala for the Illinois Leukemia and Lymphoma Society MWOY (Man/Woman of the Year) where my friend Clio won Woman of the Year for raising over $169,000 for LLS!
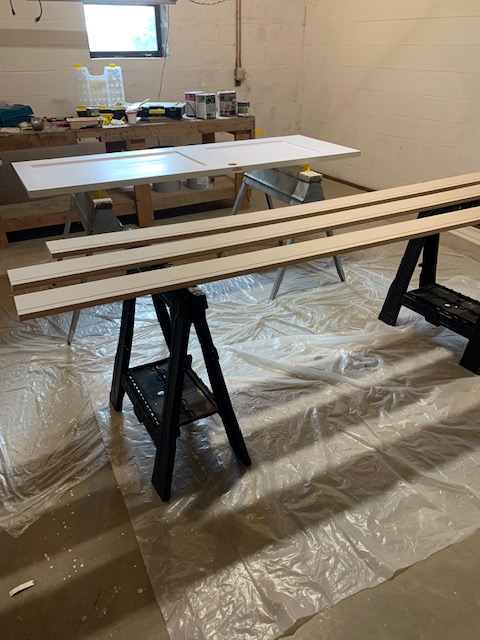
Now, back to our progress, which we are both pretty pleased with. I’ve been able to paint 6 of the 9 doors. The other three are hung with door knobs, etc. but just need me to paint them. It takes a day for me to do two (I have two sets of sawhorses set up), as I have to do two coats on each side and also allow for drying time. Yesterday we got up, took down the two bedroom doors and I painted them. Then lucky Keith got to hang them about 9 p.m. last night. Good fun for him! Apparently I did a lot of painting yesterday, since I have a blister on my thumb from holding the paintbrush!
While I was painting the doors, Keith started putting up more trim on the bedroom walls. I joked that if you could put blinders on, you might actually think we’re done with the house, since those walls are wrapped up now. In between coats of paint on the doors, I came up and caulked all of that trim and eventually painted it all. Keith painted the ceilings in the hall and the guest bathroom, which we hadn’t gotten to last week.
Doesn’t that door look good? Ha! Don’t forget that eventually we’ll be building a banquette to kind of “hide” that wall which is around the basement stairs.
During the week Keith had also switched out our electrical switches for rocker switches and our outlets for nice clean white flat outlets. It’s amazing how such a little project makes such a big difference. I can’t stand the look of bandaid colored switches.
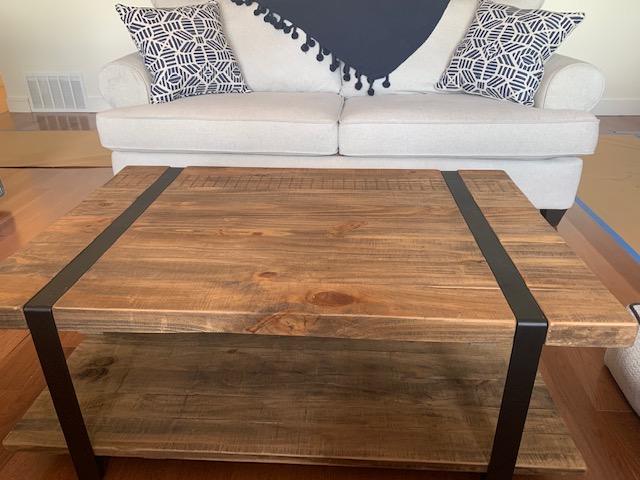
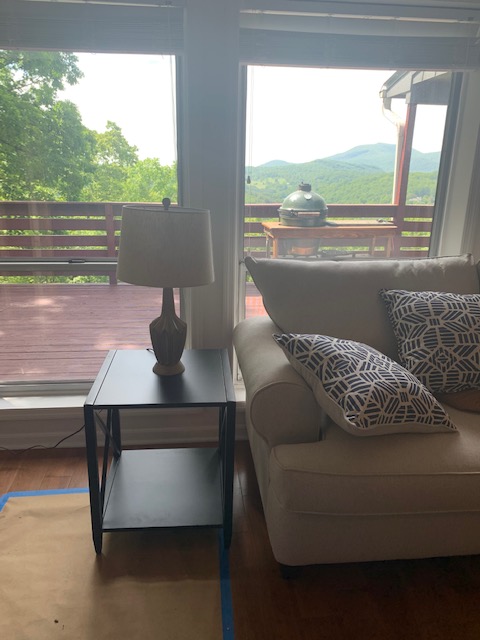
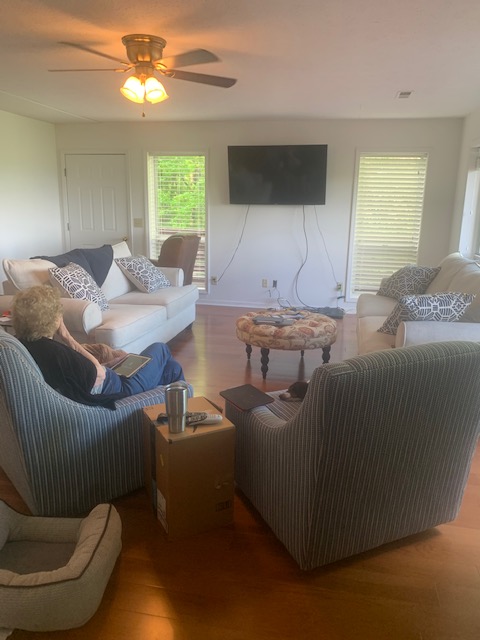
When we arrived back to the house this week, it felt like Christmas. Some more of our accent furniture had arrived. Yay! We assembled our new coffee table, lamps, etc. We are happy with everything and you can almost believe it’s not a construction site still!
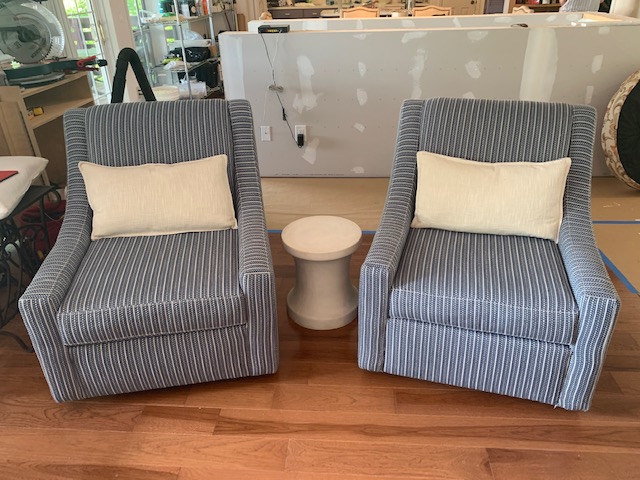
That is, you can almost believe it’s not a construction site until you look behind our swivel chairs and see a shop vac, a compound miter saw, etc. Hah!
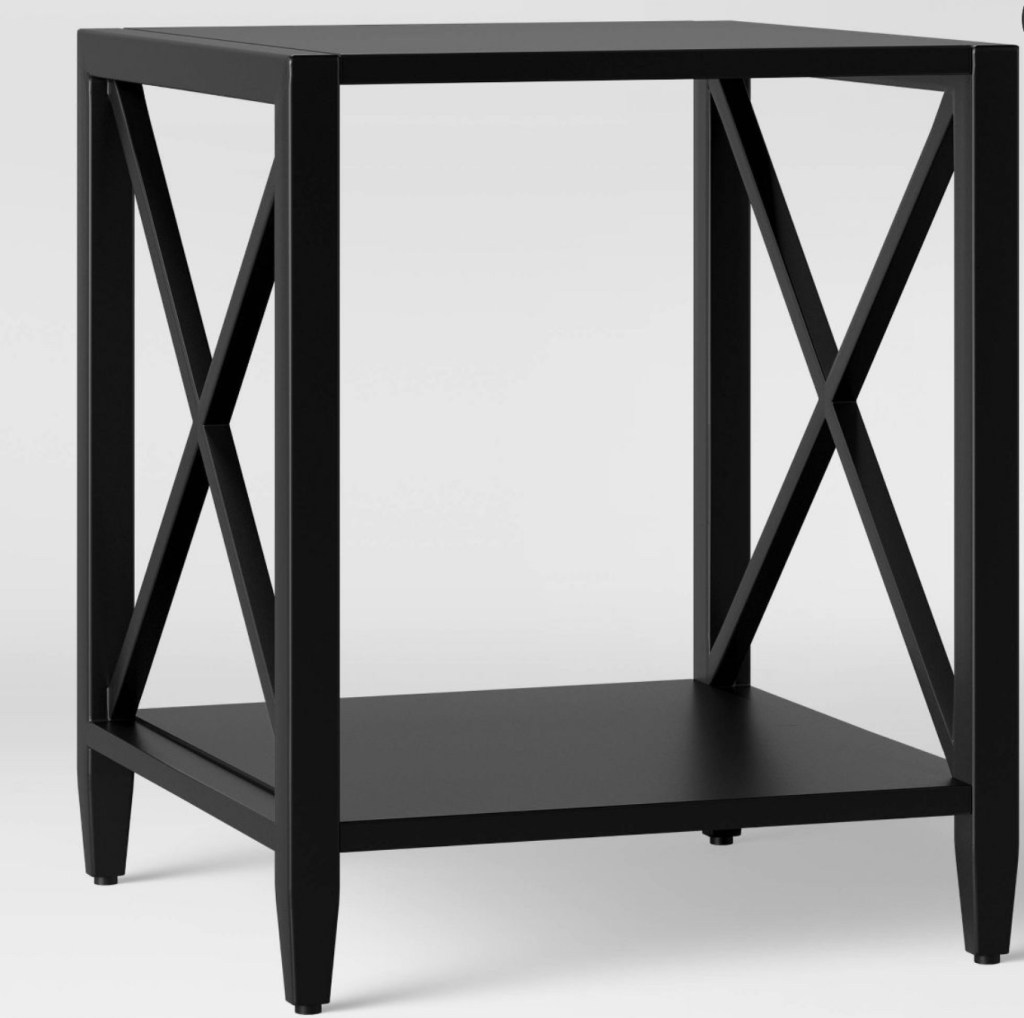
Some of the pictures above didn’t come out so well, so here are stock photos of our coffee table, end tables and lamps.
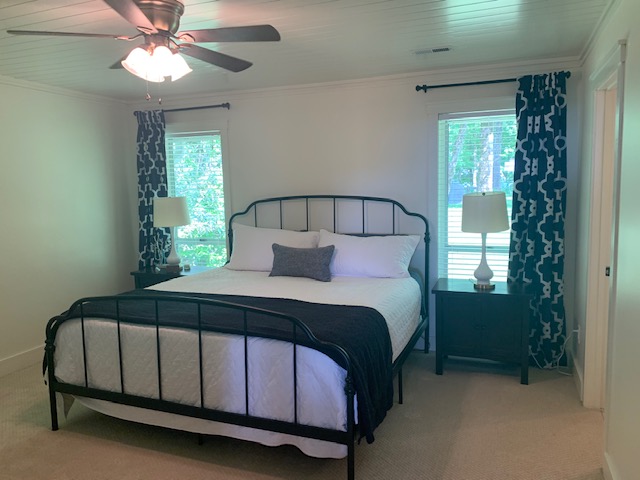
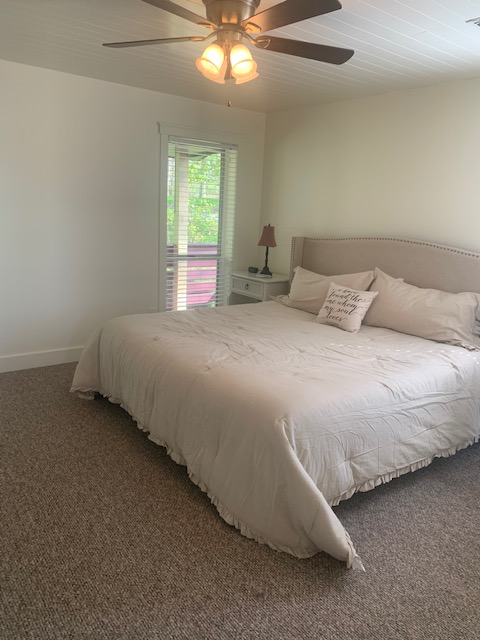
One other thing we wrapped up today was our master bedroom. I had ordered curtains but we hadn’t yet put them up. A thanks to our friend Anna who had some curtain rods which she couldn’t use, so we were able to use them to hang our curtains. It’s nice to get some color up. I do still need to get an extra long bedskirt if I can ever remember to order one. And we need art! Lots of art throughout the house! All in due time….
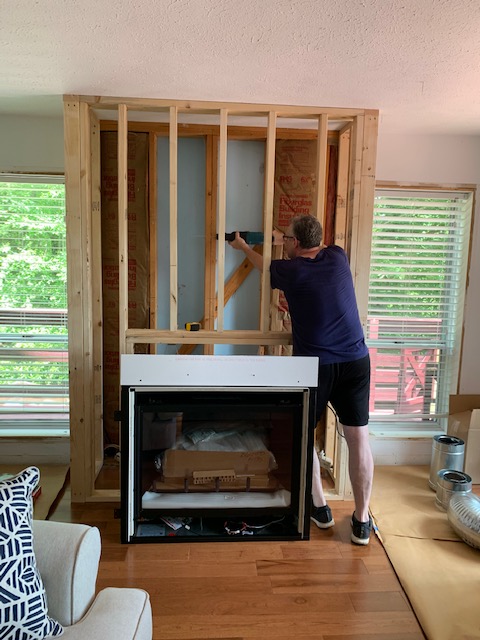
Now, let’s talk about our fireplace. We ordered a direct vent gas fireplace a couple of weeks ago, and it’s been delayed but should arrive this week. We built out the frame for it last week but can’t really do much else until we can set it in place. After a lot of discussion prior to us buying the house, we decided direct vent was the best option. It will only require use to cut a small hole in the side of the house, rather than build a chimney which is expensive and would be difficult to make happen. It will also generate a lot of heat as it will have a blower. It will be gas (propane) and will have your normal gas logs. Because it’s direct vent it will have a glass front to it, but it will be real flames and it will be super easy to just turn on and off. Here’s a picture of what the logs and box will look like.
We will build out the mantle to fit with the vibe of our house. We will be attempting to tile the surround ourselves, which may be an interesting endeavor! We have picked a 1″ x 2″ tumbled travertine tile which will hopefully be easy to install. And here’s a picture of our inspiration fireplace. The blogger who had this inspiration actually has plans you can buy, so we did go on and buy them to save ourselves some time when it comes to the cut list, materials needed, etc.
Thankfully Keith is very comfortable with running electric to allow for us to hang a TV and for the electric igniter for the fireplace. He’ll also run the venting and gas (not as hard as it sounds as the gas comes into the house directly under where the new fireplace will go). Hopefully we’ll make some good progress on this next weekend and I’ll be able to share with you some of the process. While Keith is working on that, I will be painting two more doors and working on our oak treads which we will be installing in our stairwell down to the basement. Right no the treads are builder grade pine in poor condition, so they need to be replaced. And once those two projects are wrapped up, we’ll be hitting Ikea and starting to buy some cabinets! Woot Woot!
Wow, what a week! After our Memorial weekend madness, mom and I had to head back down to Atlanta for her to go to Physical Therapy and Keith stayed behind to take delivery of our new carpet. Yay! It was fun to come back and have some nice new lighter colored carpet to sink our feet into. It looks great and we are very pleased with it. To give you a little reminder of what the carpet looked like before, here’s a pic from the day we moved in.
And now you can see our “after” picture! We chose a textured carpet with a subtle pattern in a lighter neutral.
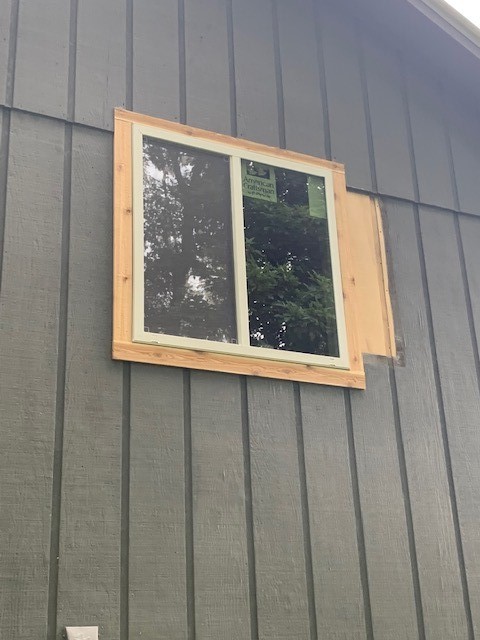
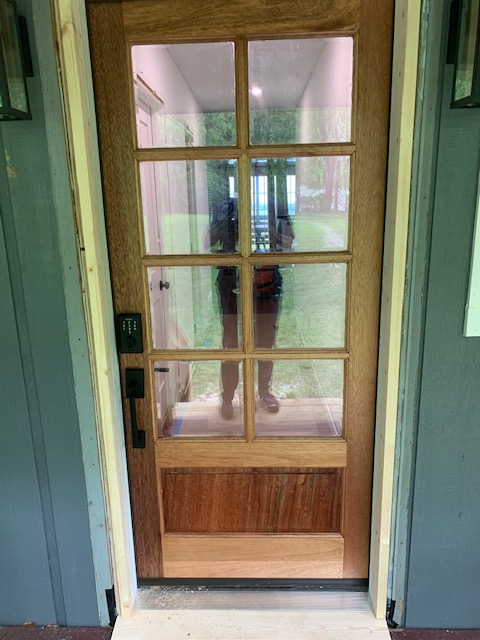
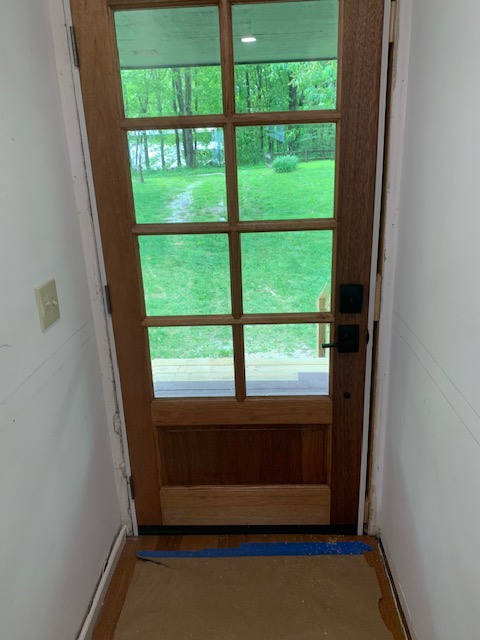
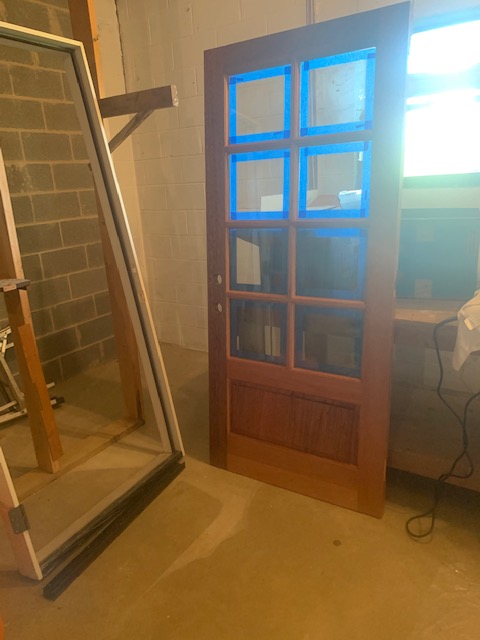
But honestly, I was a lot more excited about our front door which also got installed this week. It makes a dramatic difference to the exterior of the house. You can now see the killer view when you pull up in front of the house. I am so pleased with it! After all of my hard work sanding and putting polyurethane on it last week, it was nice to finally see it up. I still need to clean the edges where the poly either bled through or I was messy, but it looks absolutely amazing!
Okay, well, maybe that view isn’t so “killer” since it’s got all of our construction equipment which you get to look at, but you get my drift! 😉 Here’s another picture of it after Keith put on the trim around it.
We went with a programmable lock, which will be a lot easier than using a lockbox. Here are a few more pictures for you to see the progression of the front door this week.
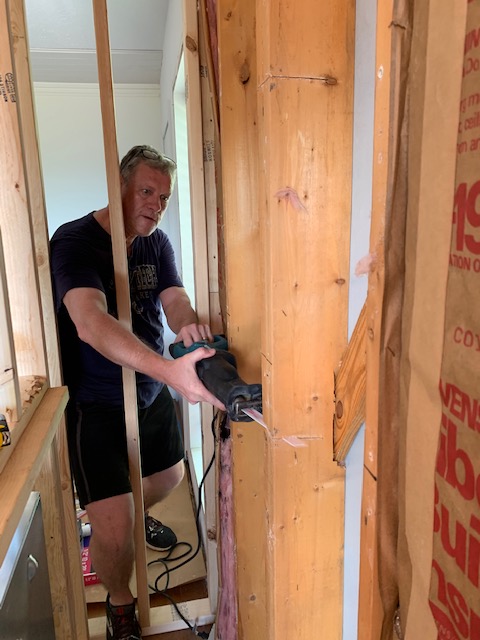
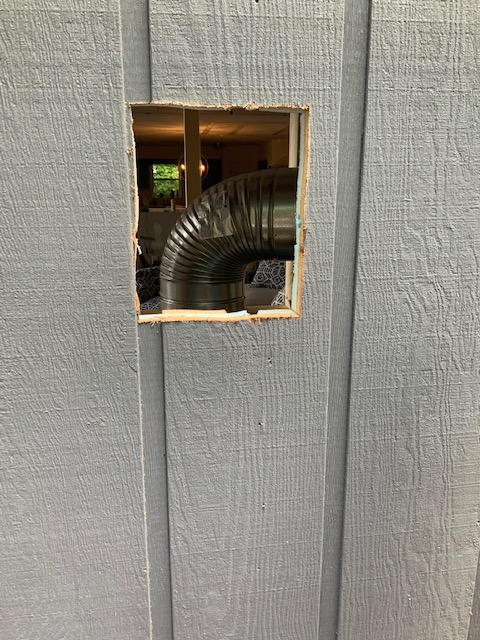
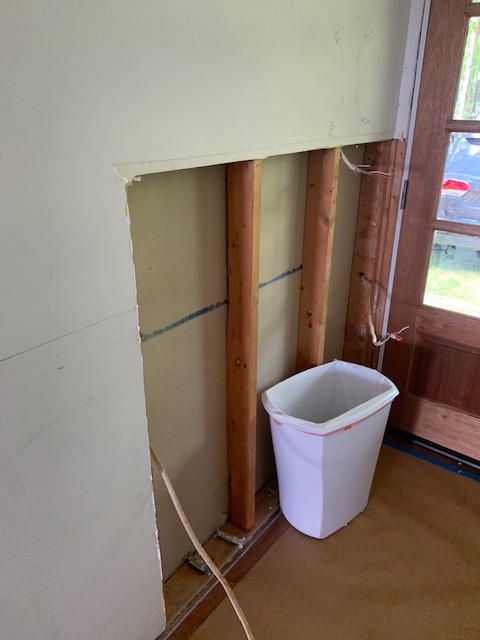
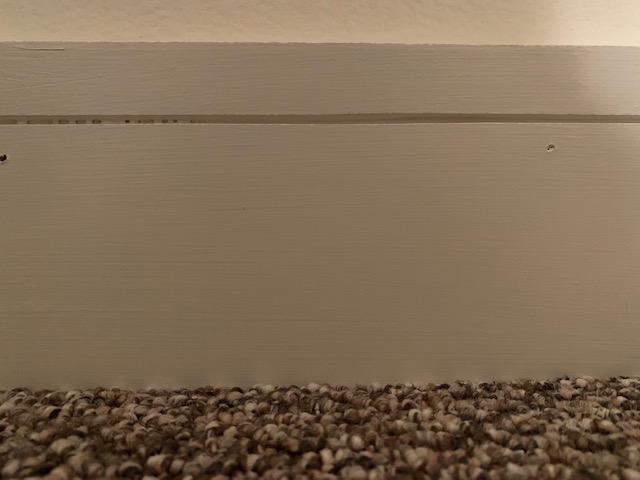
One other thing I should mention about the door is we changed the direction it opened. The old door opened to the left which was somewhat awkward as it opened right next to the hall entrance to the guest bathroom. We intentionally bought our new door to open to the right which is where the long stretch of the hallway is. That brought up one issue which was the light switches. Since Keith couldn’t switch them to the other side of the wall, he had to figure out a way to move them to just past the door. Along with our handyman (who does the drywall work for us, thank goodness), we decided the easiest way to do this was to cut out a 4′ section of the drywall and pull the wiring down a few feet. It wasn’t the most graceful solution but it worked and this is what happened!
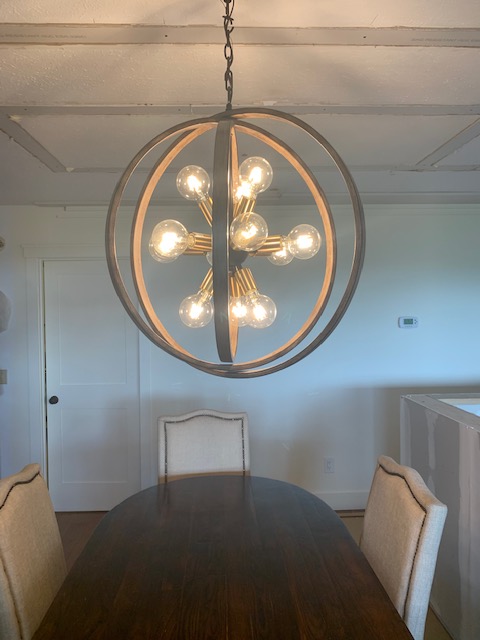
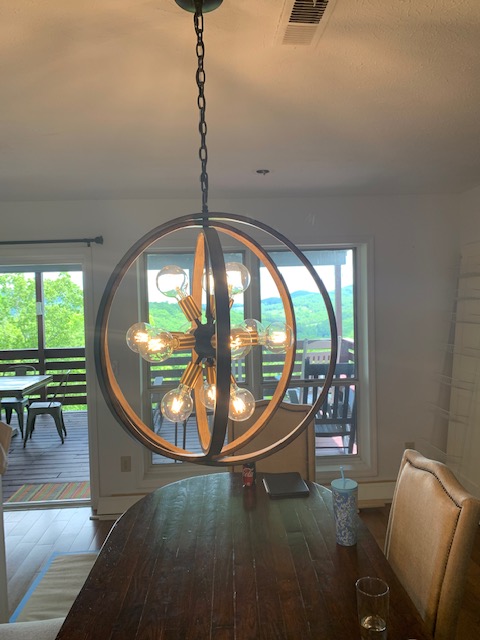
Thankfully Keith has excellent electrician skills and was able to use them for this. One other electrical bit of work he did while we were gone was to hang the new light fixture over our kitchen table. My sweet friend Anna gave us this light fixture she had bought and couldn’t use, so thanks Anna! We love it! We do need to shorten it a little bit but I think it looks amazing.
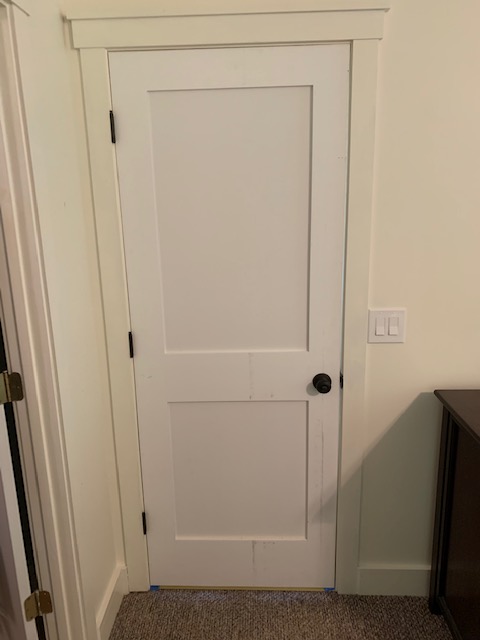
Once mom and I arrived back up after PT on Thursday, I got to work on the interior solid wood doors. I had figured out the best way to paint them last week but simply ran out of time. This weekend I was able to wrap up 4 doors and have now figured out how to paint them relatively quickly. Which is a good thing when you don’t have a door on the bathroom. Just sayin! The finished doors look amazing and I’m really proud of the work we did on them!
Sorry for the blurry picture here! It’s the only one I took.
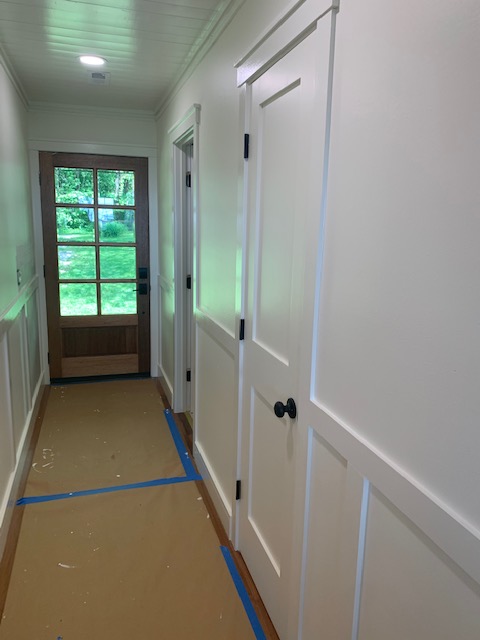
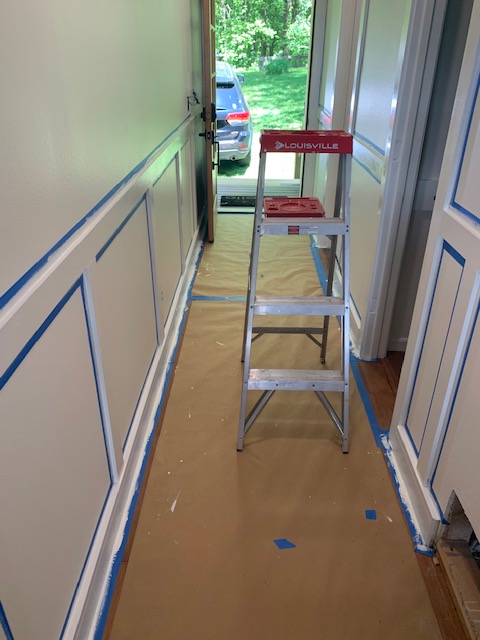
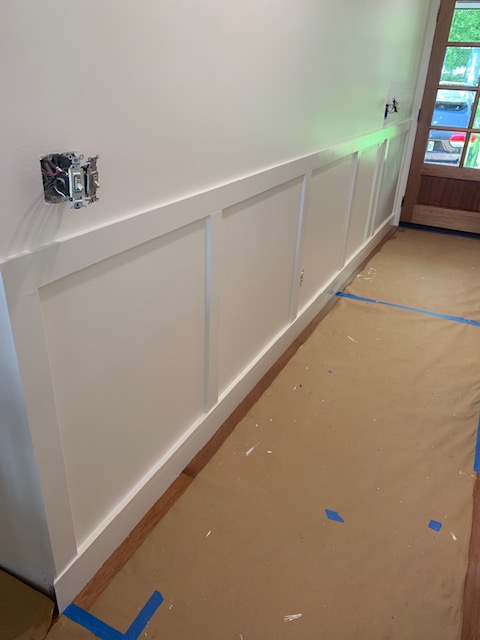
In between all of the coats of paint on the doors, I worked with Keith to finally dress up the long entrance hall which greets you from the front door. I had mentioned in my first blog that we wanted to add some board and batten to give the long narrow hall some interest. Last week we drew it out with pencil on the walls and agreed to how high and how far apart we wanted the boards. This weekend we brought that to life and milled, painted and put up all of that trim. That’s fairly time consuming but the result was so worth it. Once the trim was up, I was back to caulking until my fingers bled! Then it was time to tape and paint.
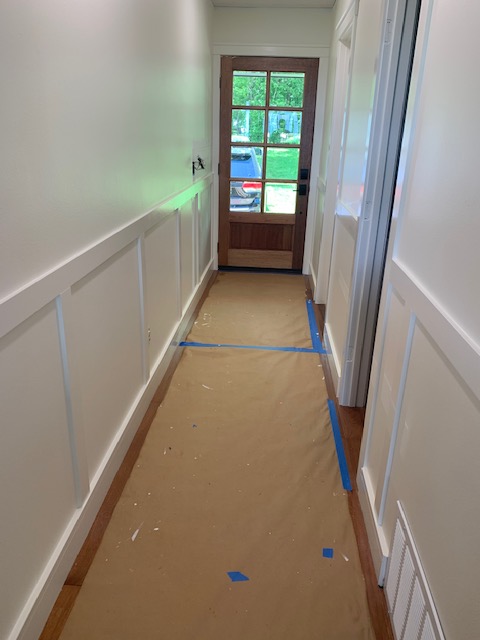
We do still have to switch out the electrical outlets and switches and put up the trim around the ceiling and paint, but we’re close with the hall now. And here’s a look at the (almost) finished product.
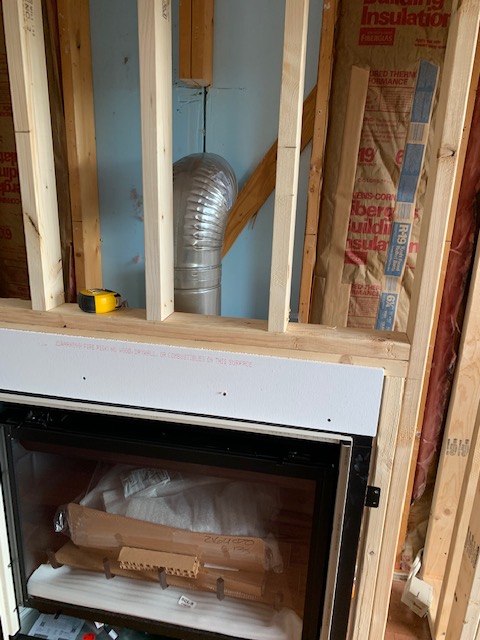
When we wrapped that up, we had a fun surprise visit from the Robinsons from whom we bought the house! It was so great to see them and see their reactions to all of the changes we’ve made in the past 10 weeks. We had a great visit and hope to see them again really soon. They have bought a house “in town” in Highlands so they’re not too far away. After they left we did a little more trim around the entrances to the bedrooms (we had done the trim inside the room but not outside) and then called it a day and headed back to Atlanta. When we go back up later this week we’ll wrap up the trim along the bedroom walls and in the hall, paint the ceilings and then get to working on our fireplace. I’ll tell you a lot more about that next week but here’s a sneak peek at the prep work being done for our new fireplace!
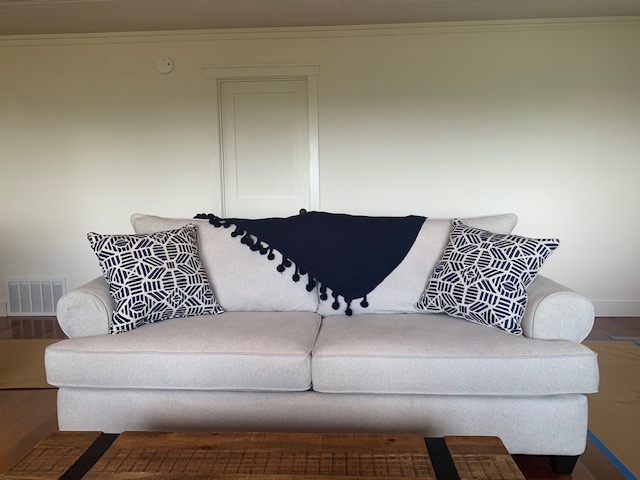
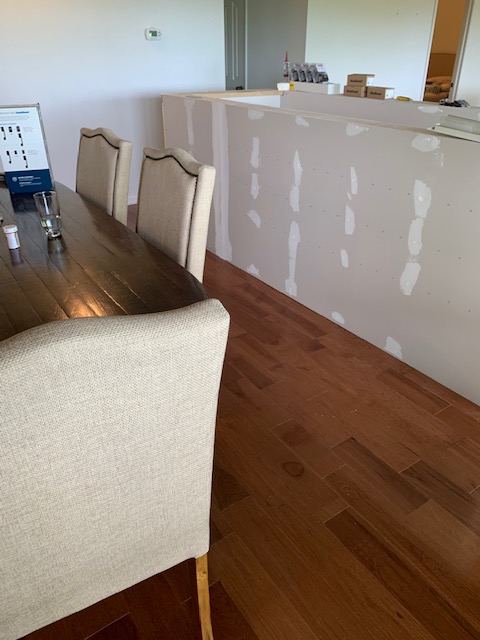
I hope everyone has had a restful Memorial Day weekend. I can’t say ours has been restful but I can say it’s been productive! We are finally getting things a little more organized and a little more homey, in spite of the fact that we’re still living in a construction zone. We had two couches and two chairs delivered a week and a half ago and it has made life a LOT more comfortable to be up here. We still have an Amazon box as an end table, a round ottoman that normally sits under my baby grand in Atlanta as our ottoman, etc. I’ve got a coffee table and end tables on order so those should arrive in the next couple of weeks and make it a little more cohesive looking. Here’s a peek at our den now. Note the lovely backdrop of the tool chest and the compound miter saw, but hey, this is a huge improvement, trust me!
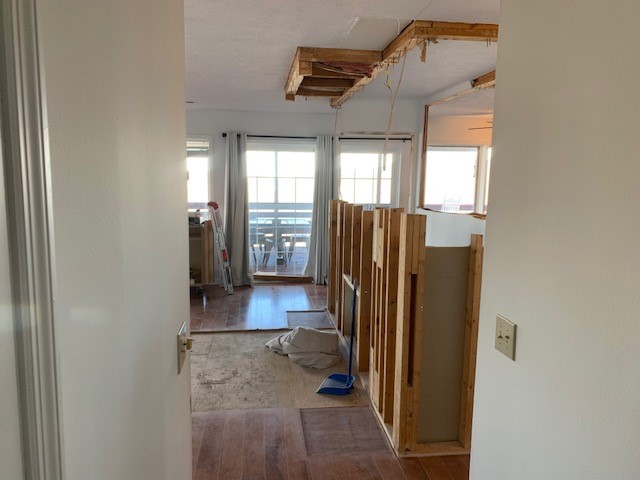
Now on to the progress that has been made since I last blogged. First, let’s take a peek at the flooring. Remember that we basically gutted the middle of the house, removing a brick fireplace, pantry and laundry closet. That left a LOT of missing flooring. But thanks to Kevin, our handyman extraordinaire, you can’t even tell that we took anything out! Just to remind you, this is what it looked like just a few weeks ago.
The floors after taking down the brick fireplace area
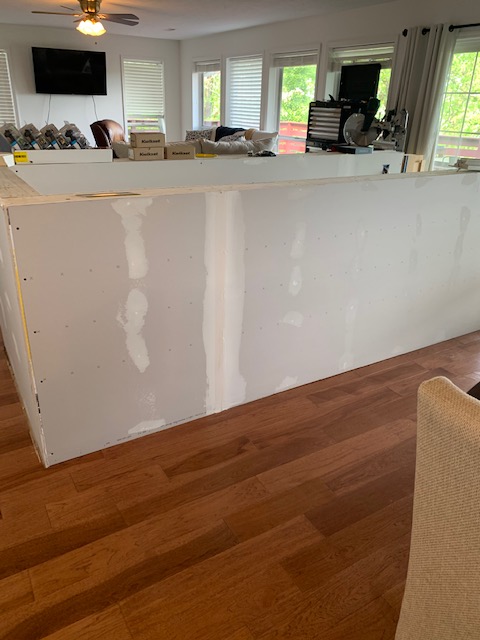
And now look how great the floors look!
We had my aunt and uncle, our first visitors, up here this weekend, which was fun. My uncle earned his keep by helping Keith finish hanging the interior doors! You may remember that the first door took us a very long time to hang and Keith was probably ready to kill me for not buying pre-hung! Well, Keith (with some help from me) hung 2 doors on Friday and he and my uncle hung 6 on Saturday. They were in full beast mode and killed it! There are still a couple of door knobs to go in, but they’re on doors that I started painting. Take a look at how great the (unpainted) doors look!
I have started the process of painting the interior doors. It’s been a bit of trial and error to get the right way to paint them, but I think I’ve figured it out and they will look great when they’re all done!
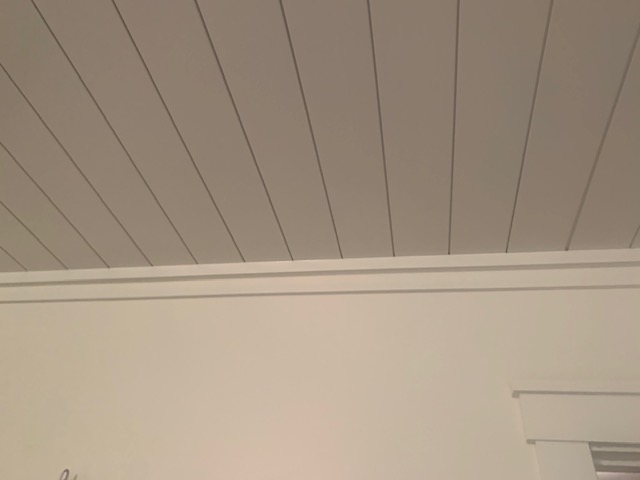
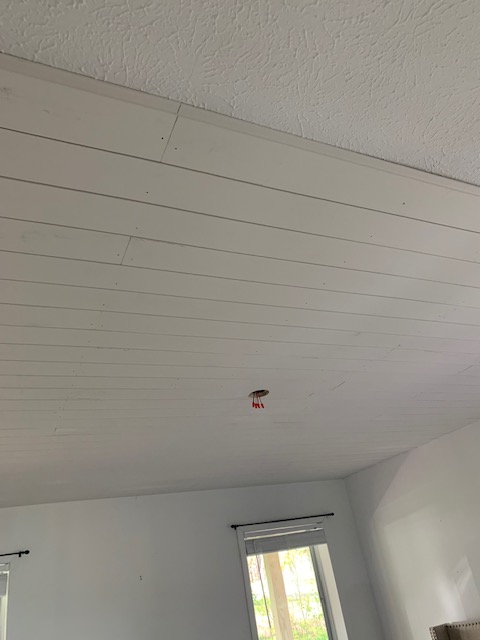
You may have noticed our ceiling trim in the picture of the two doors above. We played around with different options for our ceiling trim. We didn’t really want to do traditional crown molding, since it didn’t really fit with our vibe. We are really pleased with what we came up with! I hope you like it as well.
Back to doors. One of the things I spent considerable time on this weekend was our new front door. It is a gorgeous mahogany door, and we toyed with staining it. But it looked so pretty we decided to just put polyurethane on it. It was a lot of elbow grease to sand, poly, sand, poly, sand, poly! But it looks great. This isn’t a great picture of it, because of the glare, but you’ll get to see it up and in place on my next blog and I can’t wait!
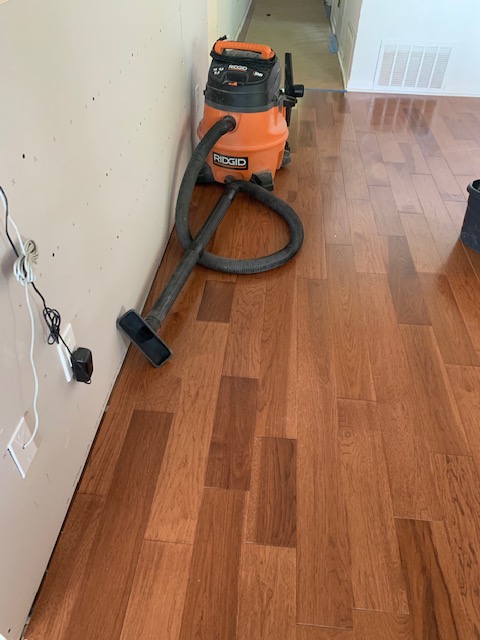
This isn’t such an exciting thing for you as the reader, but one thing we also accomplished this weekend was getting all of the construction materials off the floor and onto our rolling shelves which had been sitting in pieces in our basement. It is now easier to find everything and a lot easier to keep the floors cleaned!
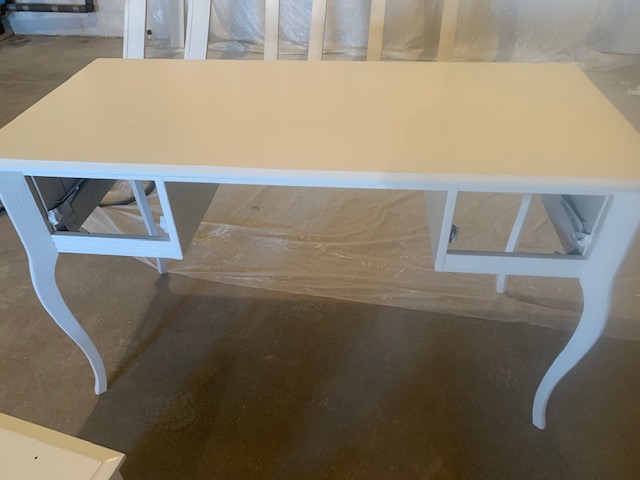
Last but not least, I was able to finally start working on my desk again. Because I’ve needed it to work my day job when we’re up here, I hadn’t had a chance to get back to painting it. I’ve been working on it in its primed state for the past two months and I finally had time to work on it. After sanding it, I started using my fancy paint sprayer which SHOULD have done a great job on it. Instead, it kind of looks like orange peel. Keith & I have played with the settings, read the instructions repeatedly, and we just can’t get it to work well. So, I may end up back with my little hand sprayer you hook up to the air compressor. You can see that I set up a spraying station in our unfinished basement.
Now let’s talk a little bit about what’s coming up this week and next weekend. We have ordered a direct vent fireplace for the den which should arrive tomorrow. We’re very excited to get this framed up and built out. We’ve picked out the style, tile, etc. and it will be fun to get this project started. We’re also getting new carpet in the bedrooms tomorrow. And we’ve mapped out the board and batten design for the front hall. And of course there’s still plenty more trim work to be done. Oh, and let’s not forget that the new front door will finally get installed! It’s still super busy here but we’re having fun and that’s what matters! Until next week…..
Hi everyone! Sorry it’s been so long since I posted. We’ve had a lot going on these past few weeks as many of you know. But a lot has happened and I can’t wait to share the changes with you.
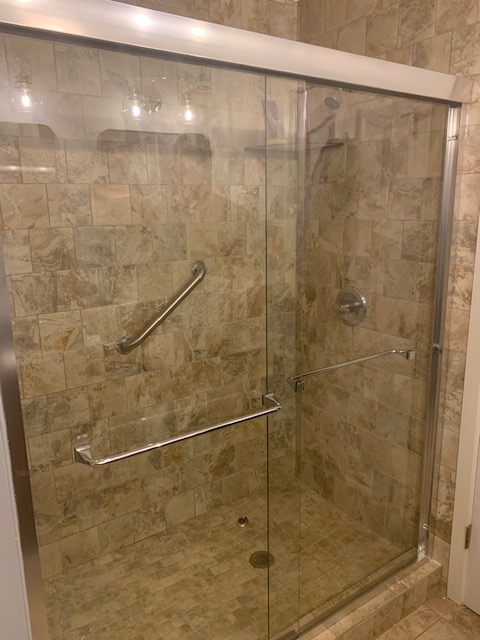
So let’s start with the master shower. It’s finally complete with functioning shower doors and we couldn’t be happier. It’s easier to get in and out of and looks a little fresher. Just as a reminder, I’ve included a before and after!
The “before” shower door opened into the bathroom door
The “after” shower door slides! Huge improvement.
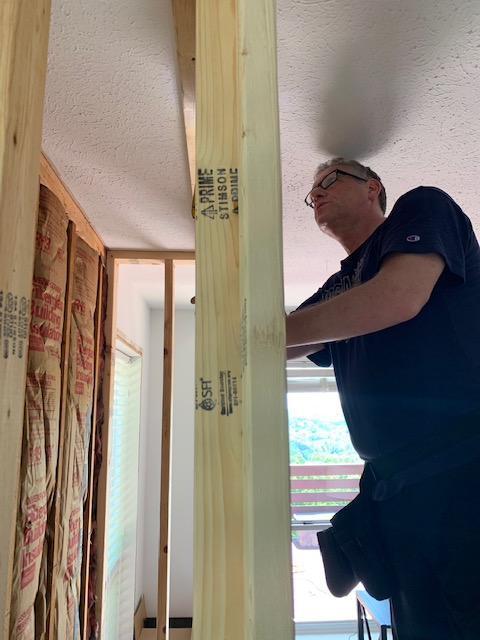
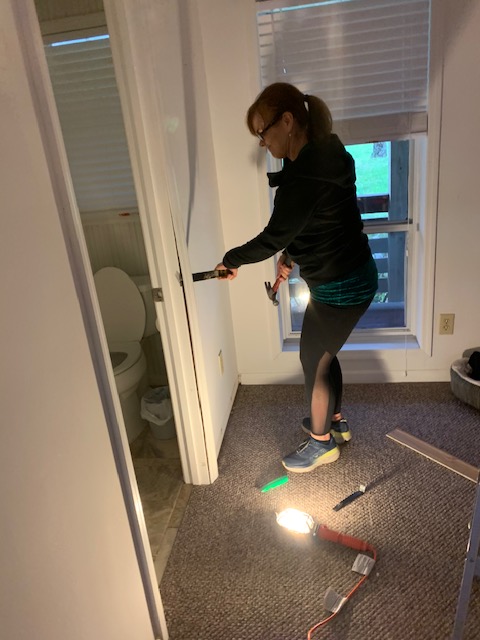
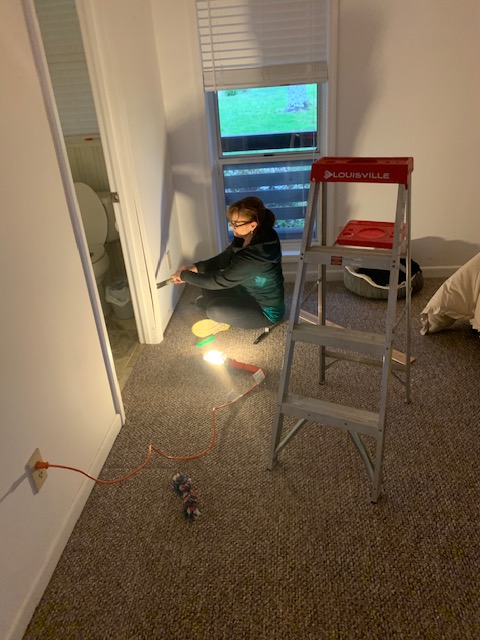
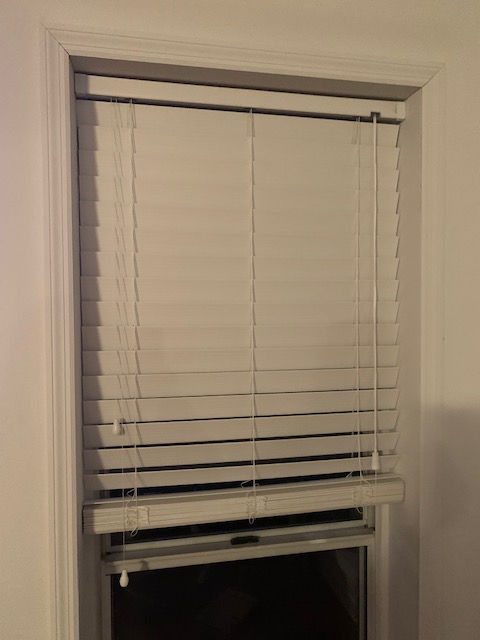
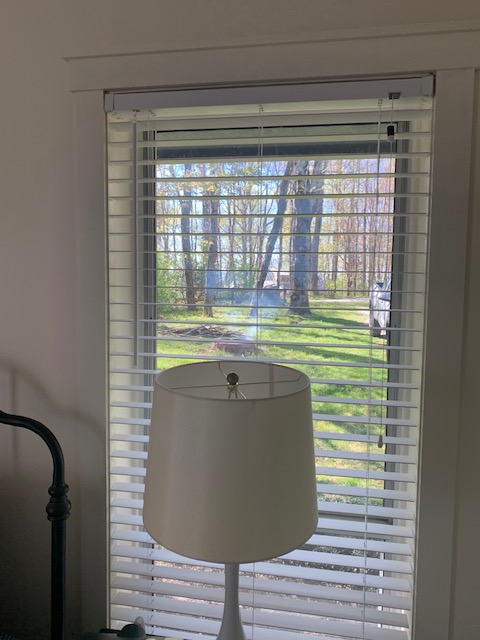
We’ve also managed to get everything wrapped up in the guest room, affectionately known as the “Dot Suite” for my mom who has been quarantining with us! I only have one thing left to do and that is to paint the trim we put up on the ceiling. I’ll share those pictures with you next week. In the meantime, I know many of you think Keith does all the work around here, but I do a fair amount as well! I’ve included a couple of gratuitous pictures of me ripping out old trim after work (there was no overhead light at the time, hence the lamp). As you enjoy seeing the “new” room, please note that if you’re looking at my desk (the Dot Suite is also my home office when we are in the mountains), it is a work in process. With no progress made recently!!! The room is rather bland right now, but I hope to get some additional bedding and art work if I can ever find time to do some more shopping.
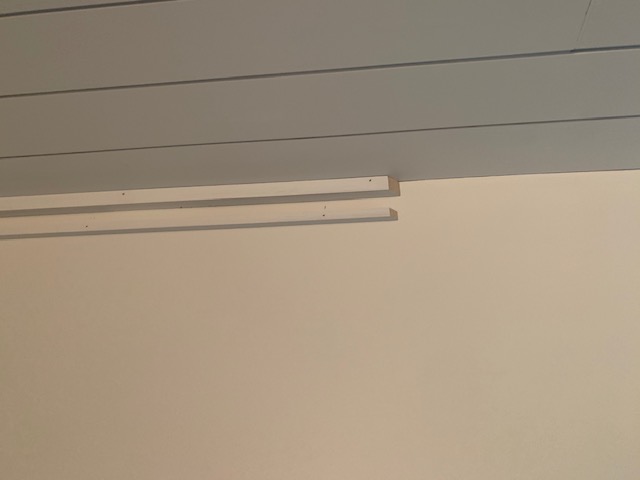
Now, let’s move over to the front hall for a few minutes. We haven’t decided for sure yet if we will put up board and batten trim or not, but we have made some progress. Keith put shiplap ceiling up while I was still in Atlanta a few days ago, and today he added two can lights. And hopefully by my next blog, you’ll get to see our new front door installed. We are super excited about that, and just to whet your appetite, I’ve included a sneak peek of what it looks like!
Our beautiful new mahogany door!
Can lights look so good!
Another view. I’m not going to miss that door!
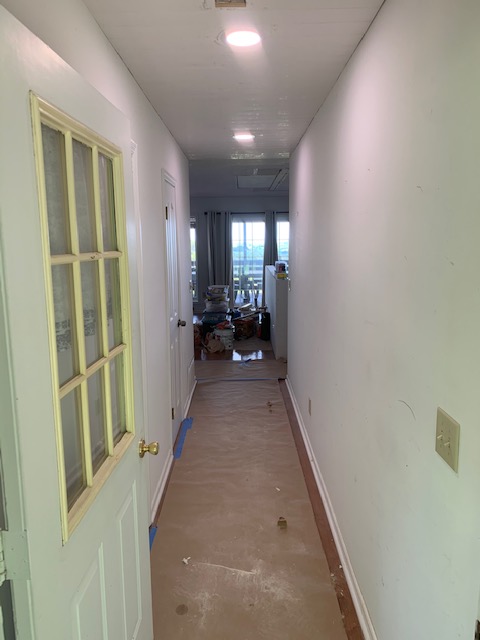
We also wrapped up a little project on the hall closet. Because we demoed the middle of the house and will be demoing the kitchen soon, we needed the hall closet to be more functional. As you can see by the “before picture” below, it was a bit of a mishmash of hooks and such and wasn’t very functional. Adding to the complexity of it, it’s also got our furnace as well as the only interior entrance to the attic (which you have to get a ladder to get into). So, we couldn’t put up a rod or anything like that.
Not very functional
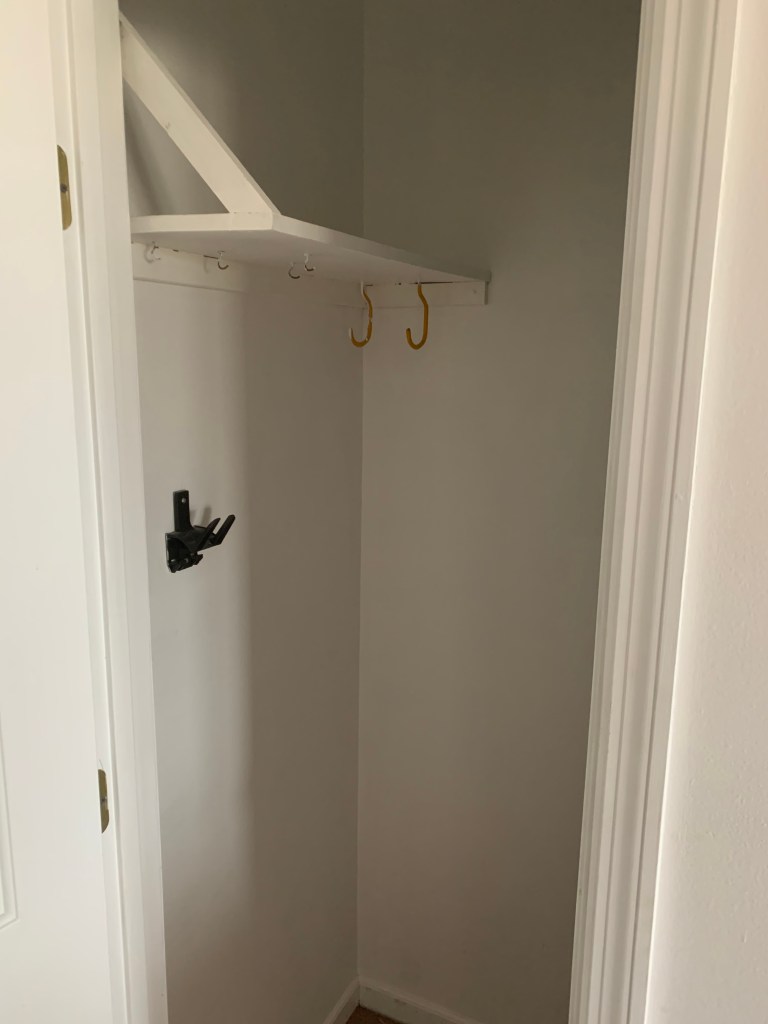
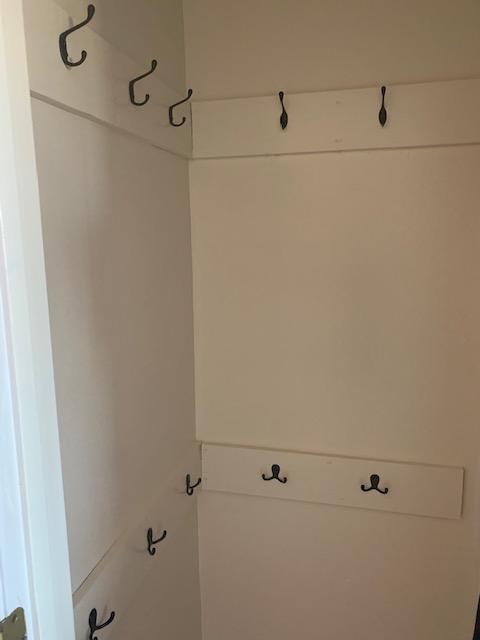
It was a simple but effective change to rip out the weird shelf thing and add a bunch of hooks to it. I think it looks fabulous for very little work or money! And now we can easily hang our coats up. Which will be key for the winters up there. It’s WINDY!
So much better!
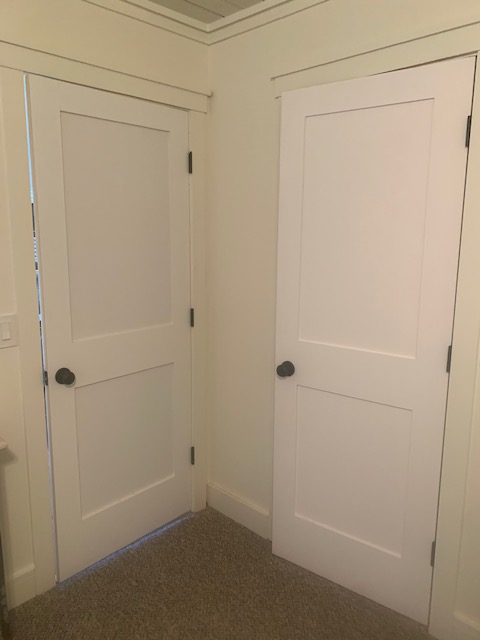
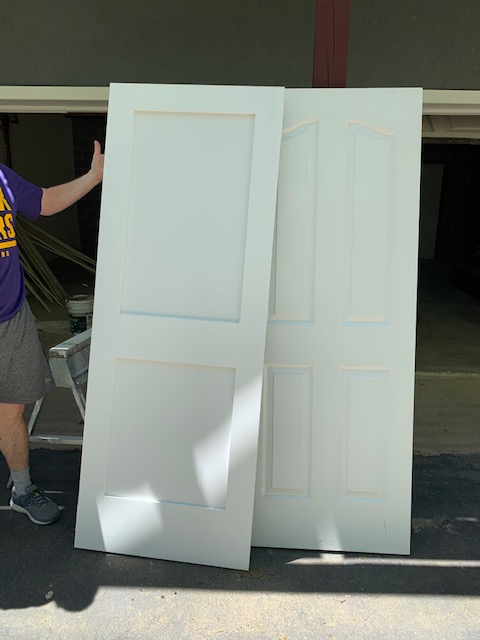
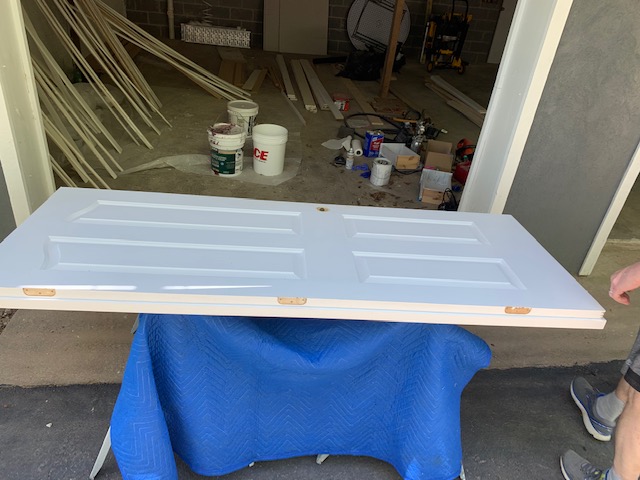
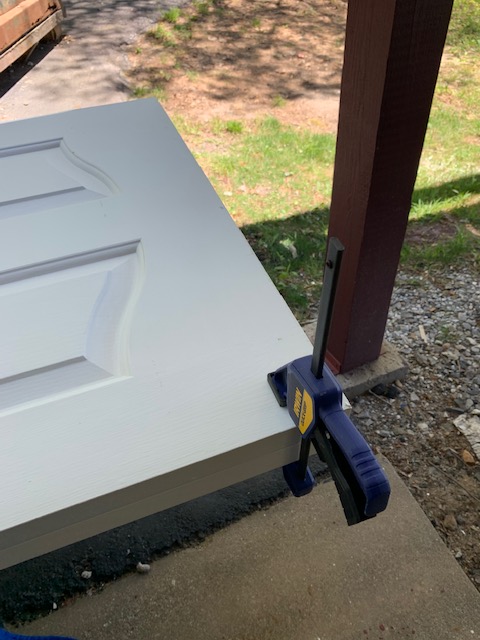
Now, let’s talk interior doors. First, let me just complain about how expensive they are! In order to save money (remember, I’m thrifty), we decided to go with slab doors instead of prehung. It’s easy, I said to Keith as I researched it. Well, it’s not quite as easy or as quick as we thought, but hopefully we have the system down now. We managed to get one up and it’s not painted yet. I’m going to use my fancy sprayer to spray all the doors once we hang them all. Let’s talk about the steps it took for this bad boy to be hung. First, we had to line the new door up with the old one to make sure they’re the same size. Then we had to trim it up to match. And to add to the fun, we found that the doors had to be beveled by 3 degrees to make sure that the door would close properly. Not so easy. We were clearly flying by the seat of our pants with this part of it!
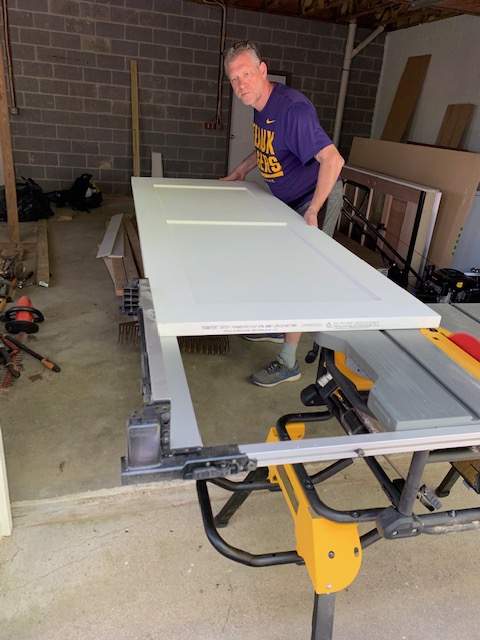
Keith used his fancy Kreg straight edge which rides on a sled (essentially a track saw) to trim up the bottom of the door. The length is what we did with the table saw.
So after we trimmed it up, then came the fun of hanging them. We needed to match the old mortises for the new door hinges. We have a jig for that but it didn’t cooperate so well with the door trim. After a lot of consternation, we figured it out and we have our master bedroom door hung. Again, it’s not painted yet but we love how it looks! Hopefully the next 8 doors will go a little quicker than the first!
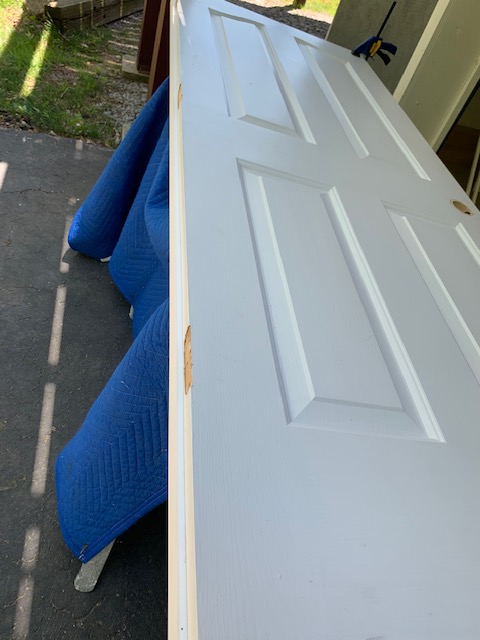
I love our shaker doors!
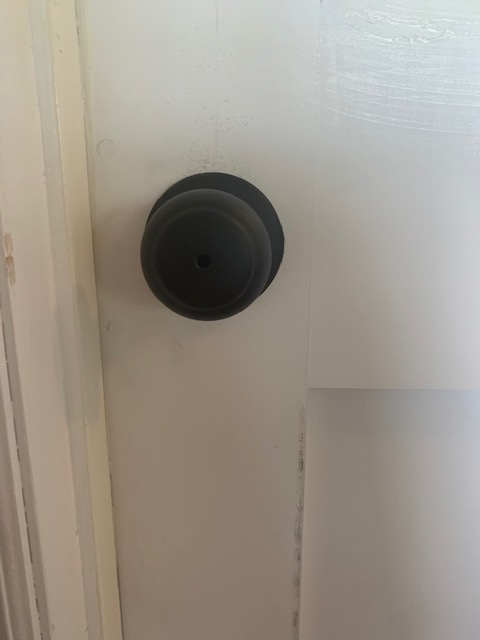
New hardware looks amazing!
We are almost done with the final ceiling trim in both bedrooms and I will show you the final pics of that next week. This week should be a big week as our handyman will be back to put hardwoods in where we removed the old hearth and closets. He’ll have to do a little more when we demo the kitchen, but Ikea is still not open so I’m not sure when that will be.
In the meantime, I’ll leave you with a few pictures of how lovely spring time is up in the mountains. We have what Mom thinks are wild blackberries growing along our little road.
Yesterday morning I woke up to the coolest cloud formation off our back deck.
And last but not least, our wild rhododendrons are in full bloom now.
Well, almost done with the master suite, that is! Oh happy day … the new top rail of our shower doors arrived today so tomorrow we’ll be able to shower in our own bathroom again! I’ll take pics of that this weekend, but in the meantime, I can finally show off our (almost) finished master suite.
Before I get to the big reveal, let’s talk trim and doors. We will be replacing all of the trim throughout the house and have already done so in the master suite. To give you an idea of the before and after, here are a few pictures.
Base trim before (left) and after (right)
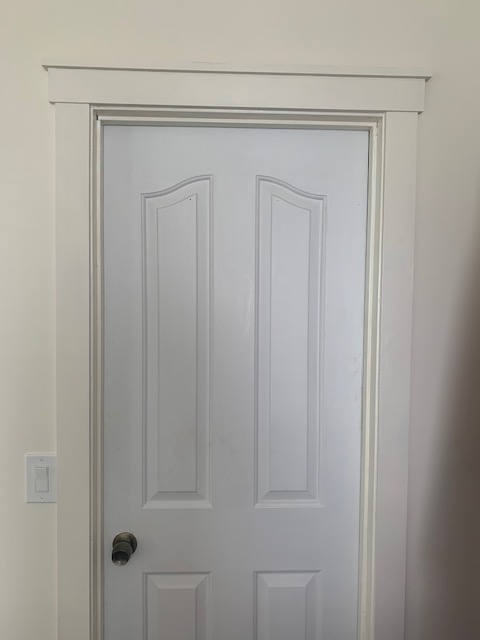
Door trim before (left) and after (right)
Window trim before (left) and after (right)
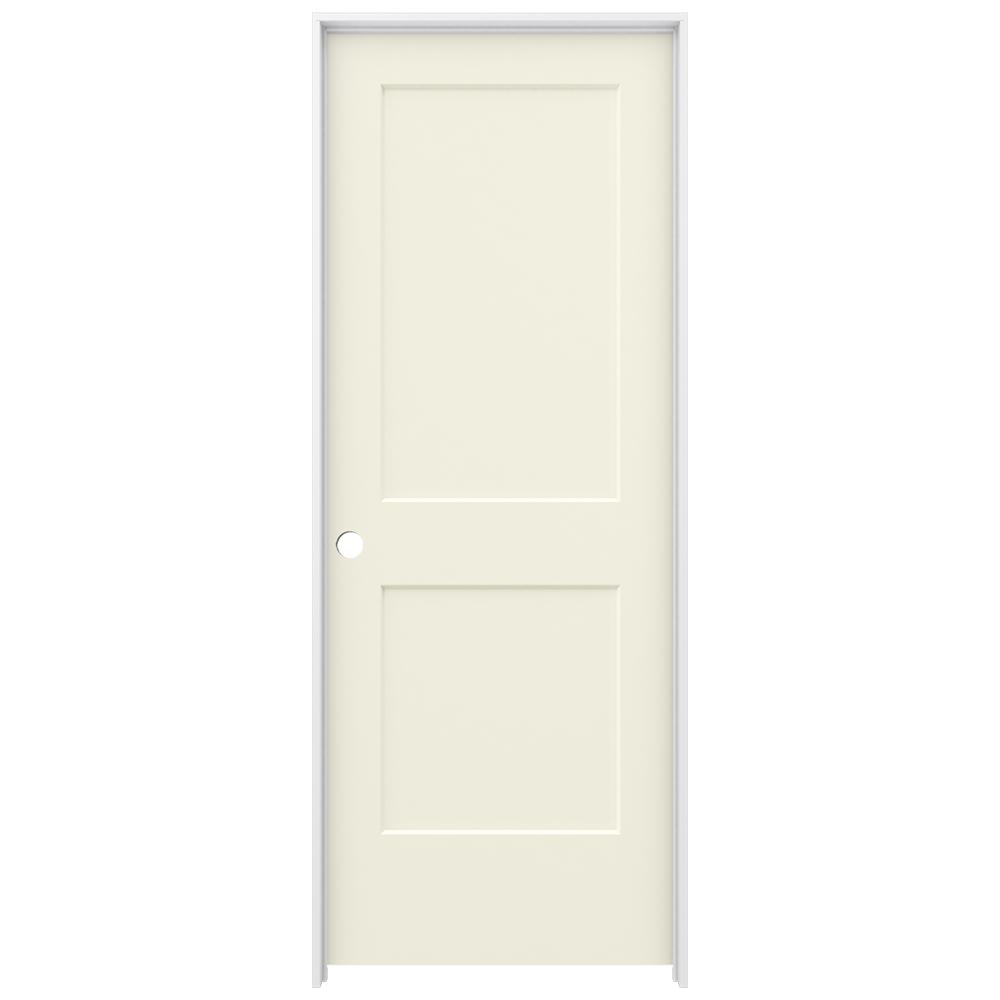
We haven’t yet gotten our doors, but will be replacing all of the interior doors and the front door soon. We want to replace them with solid core doors similar to these. Solid core doors are so much nicer and keep sound from traveling, which will be great.
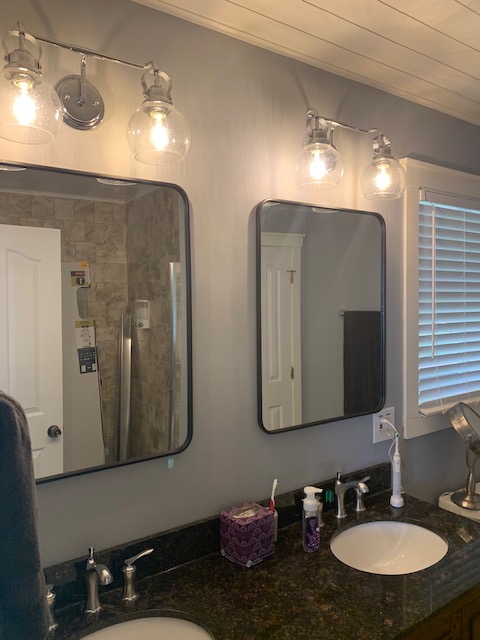
Now, let’s review what we have done in the past 4 1/2 weeks in the master suite. We have replaced the master bath vanity (turning it from 1 sink to 2), lights (going from 1 to 2) and mirrors (going from 1 to 2). Additionally, we’ve replaced all of the hardware, pulled off all of the old trim, put on new trim and painted. What’s left to be done is just the last few steps of the new sliding shower doors and replacing the doors to the linen closet and bathroom. I’m also dying to get to Home Goods and buy a decent trash can, tissue holder, etc. but that will wait. In the meantime, here you go!
I am so glad to have a mirror back up! Yay!
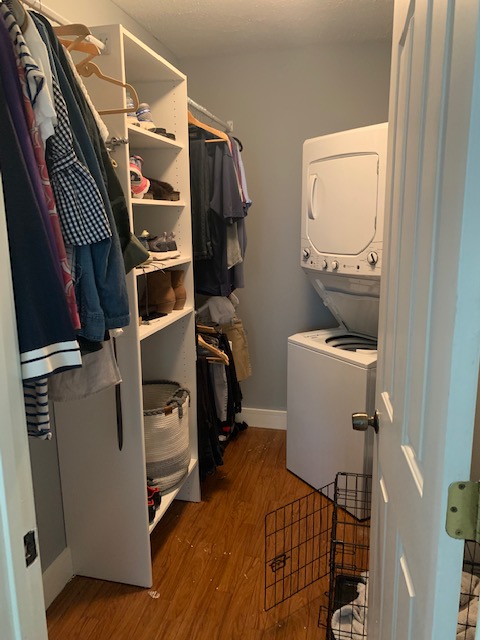
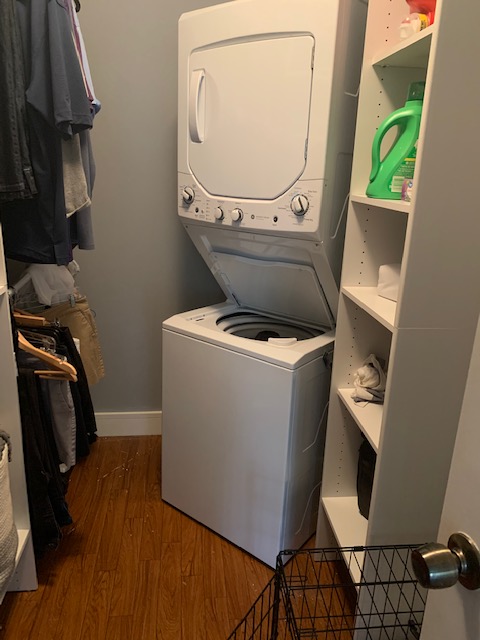
Next up is the master closet. If you remember, we demoed the laundry room and moved it into the master closet. It is definitely a little tight but works and was worth it to be able to open up the center of the house. Last time you saw the closet, it was drywalled but not finished. Here’s the finished product. One note – when we were putting in the laundry, we went on and ripped out the carpet from the closet. Underneath the carpet was vinyl which was a hardwood look, so that’s what you’re seeing. When we carpet the bedroom we will also carpet the closet. Oh – you may also see Chloe’s crate – the closet is also her bedroom here!
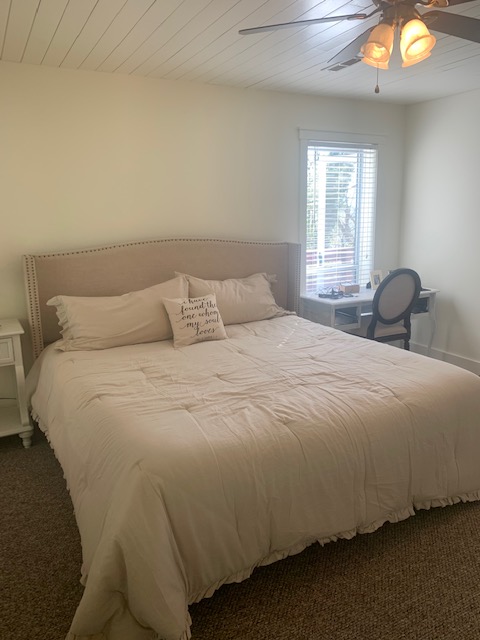
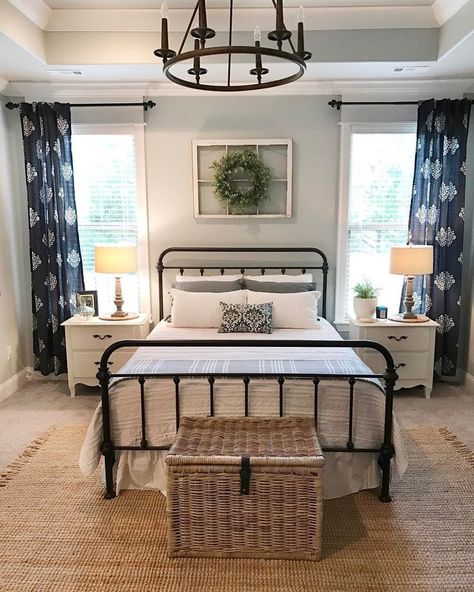
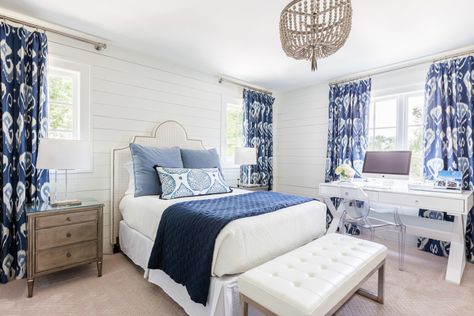
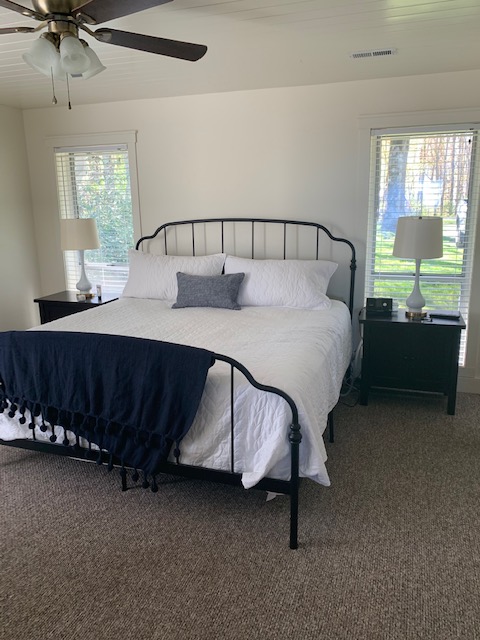
Now on to the bedroom. Again, I need to do some shopping but have been waiting for the stores to open again. I need a long bedskirt, window treatments, etc. but it’s perfectly livable as is. Here’s my vision for the master bedroom and then the actual bedroom as it is for now! The only thing we have left to do here is replace the doors and the carpet and put up the cove molding on the ceiling (which we will do this weekend if not before).
Vision pics are the two on the left, actual bedroom is the far right picture.
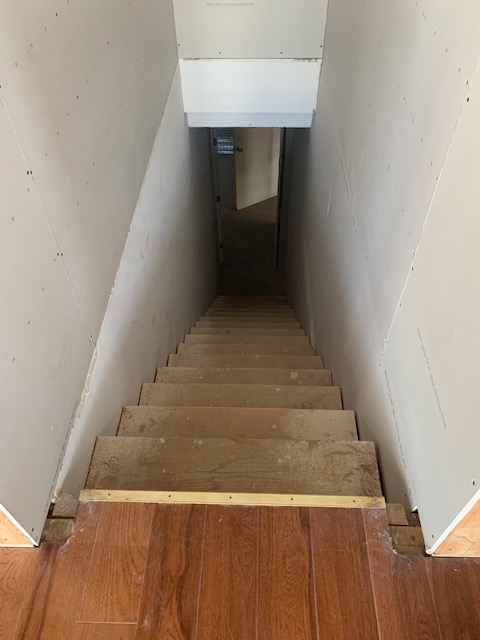
The guest room started getting the shiplap ceiling today, thanks to our handyman having some time to come back. He also wrapped up the drywall down to the basement and ripped up the carpet going down the stairs. When we repair the flooring where we demoed the center of the house, we’ll deal with those stairs. I’m still deciding how I want to handle those, so stay tuned for a decision on that soon!
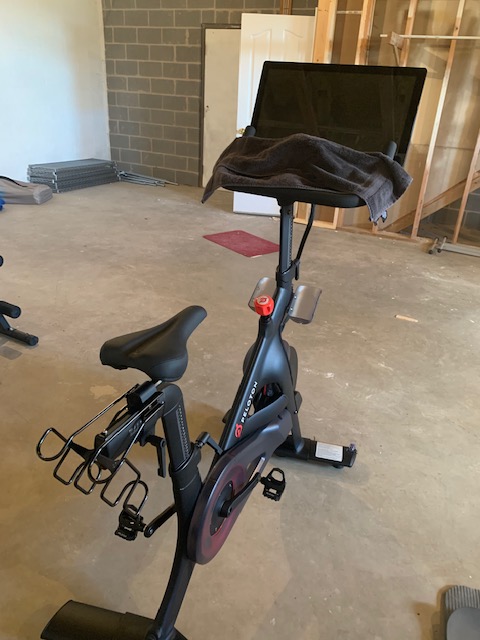
Next is a special delivery that arrived today. I love to do Peloton rides with my co-workers during the week. It’s motivating and makes it a lot more fun than just riding on your own. I had found a free used spin bike which we brought up here and it just sucked. I could ride using the Peloton app but it wasn’t the same. So we sucked it up and this baby is now in the unfinished basement, ready for me to ride with my coworkers tomorrow at lunch!
Last but not least, we just changed out the post light out front to go with our new front door lights. Check out the awesome new light! One note … I have since spray painted the little brass looking knob things black.
Before and after!
That’s it for now! Look for a new post this weekend where I’ll update you on the latest changes here!