Let there be light!

Hi everyone! This will be another relatively short blog as there’s getting less to show you and less to write about. We both had busy work weeks so didn’t get a lot done during the week. But what we did accomplish looks fantastic!

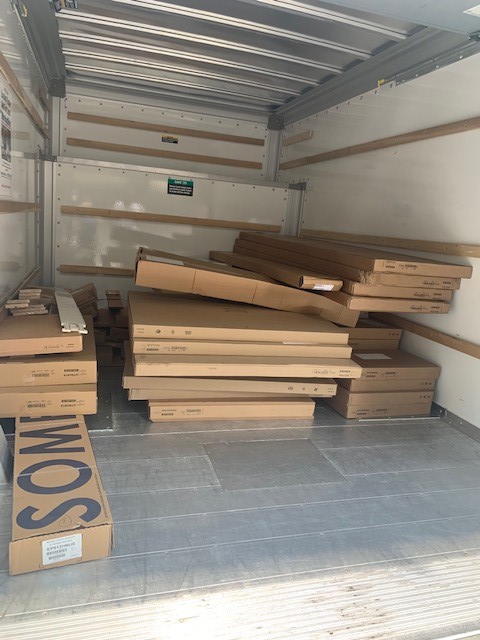
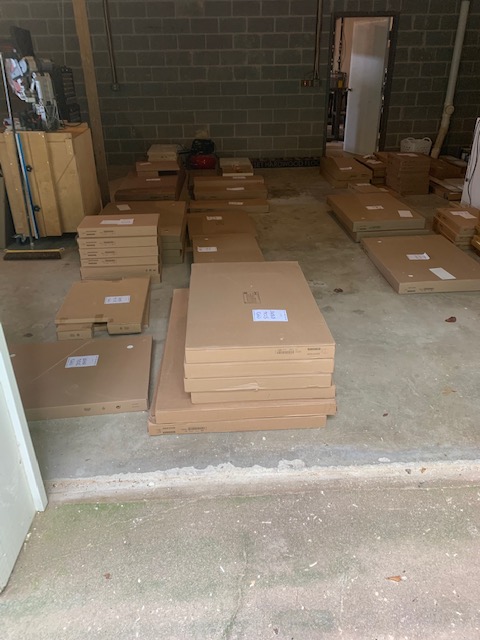
There were a few big accomplishments this week. First and foremost, I managed to somehow get a delivery slot of next week for the last of our doors and drawer fronts we were missing. Woo hoo! They all suddenly were in stock and a small miracle happened with one slot open for delivery next week, otherwise it would have been early November. So now we have the light at the end of the Ikea cabinet tunnel! In a couple of weeks I’ll be able to show you the final product.

We have also approved our granite slabs and they have started fabrication. I’m really hoping they’ll be ready and installed in the next couple of weeks.

One of our slabs of granite

We also took delivery of our dishwasher and the disposal that cannot come fast enough for me (I hate emptying the little drainer thing it is so gross). But those won’t be installed until our counters are in.

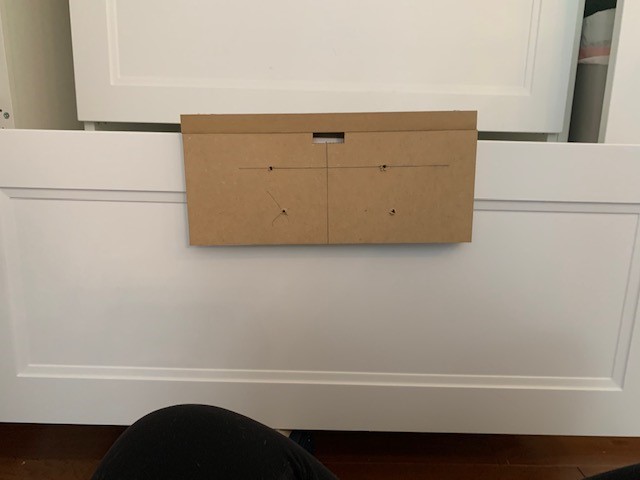
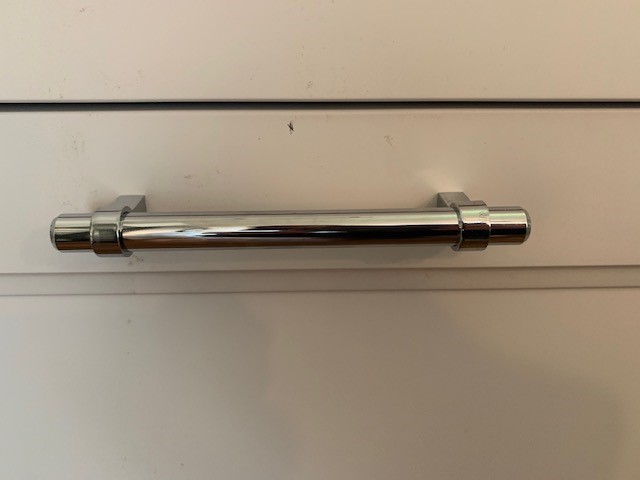
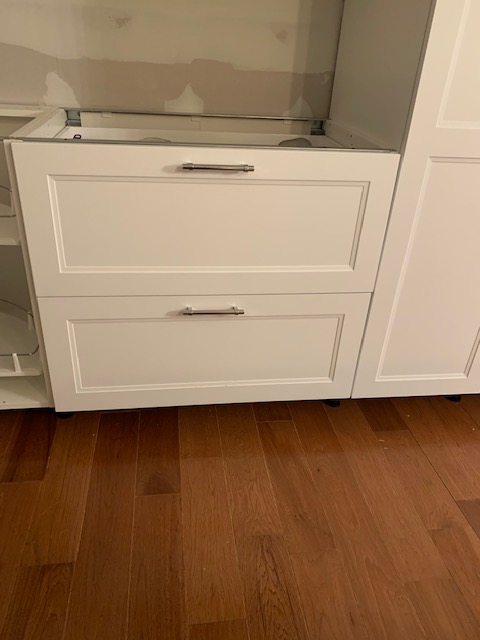
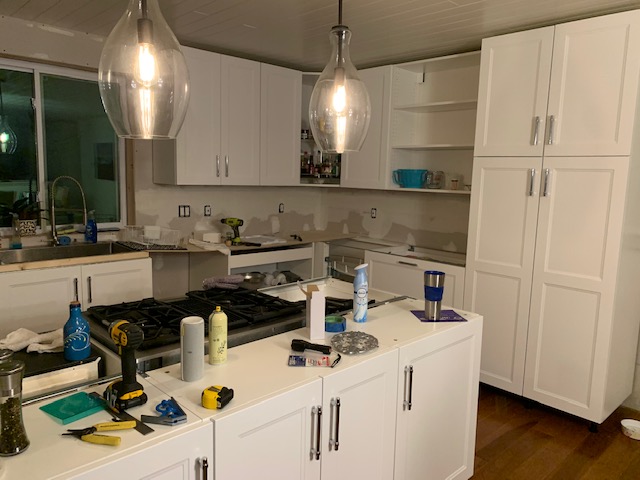
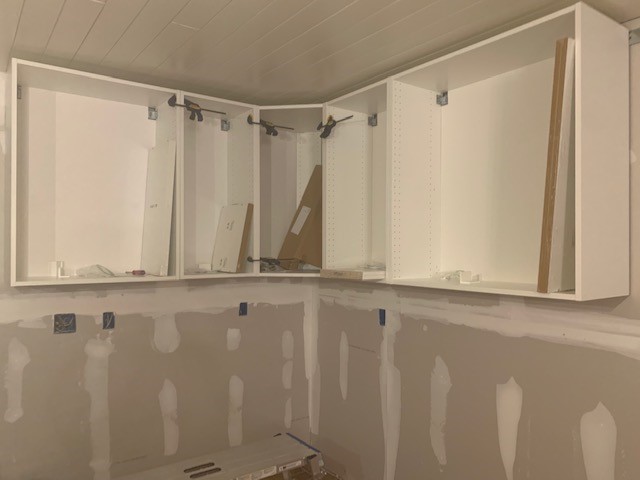
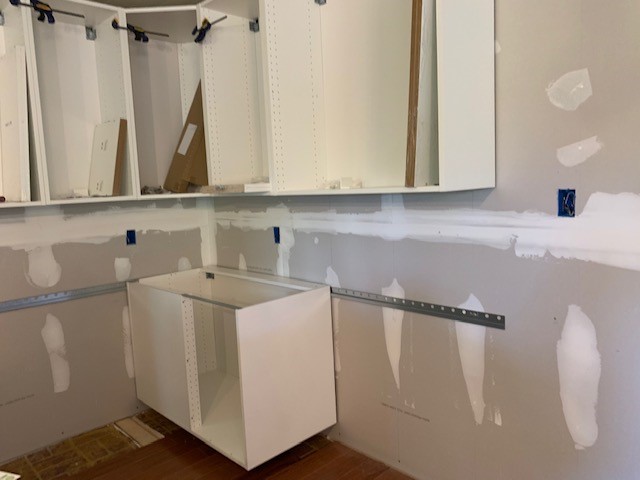
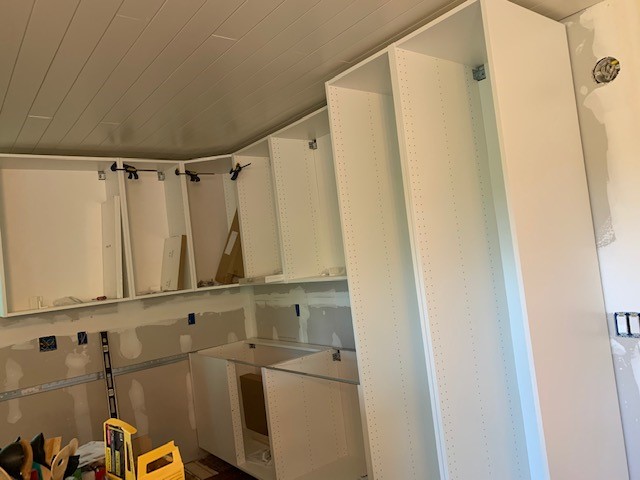
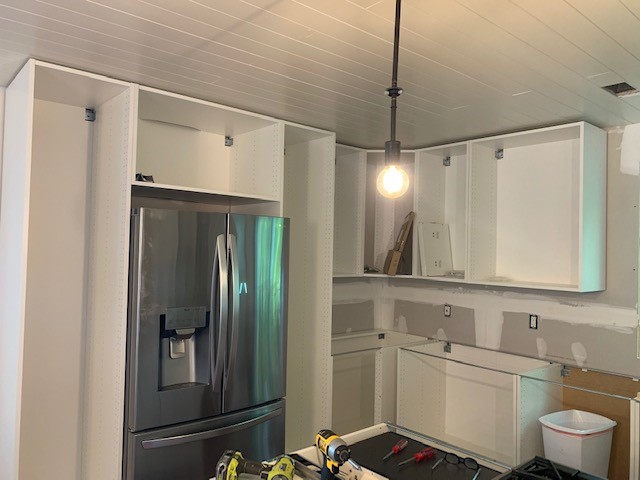
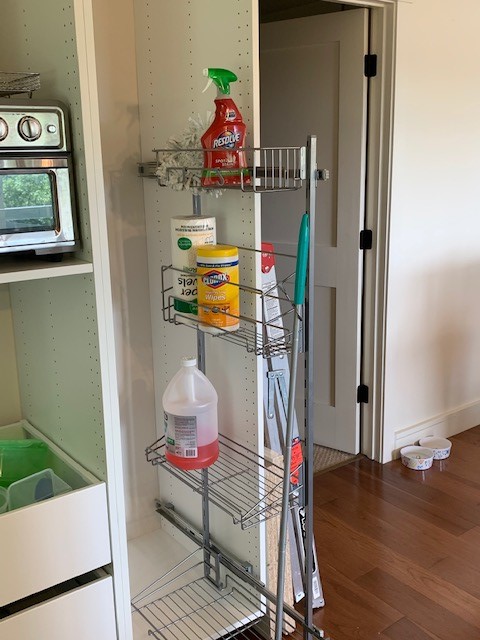
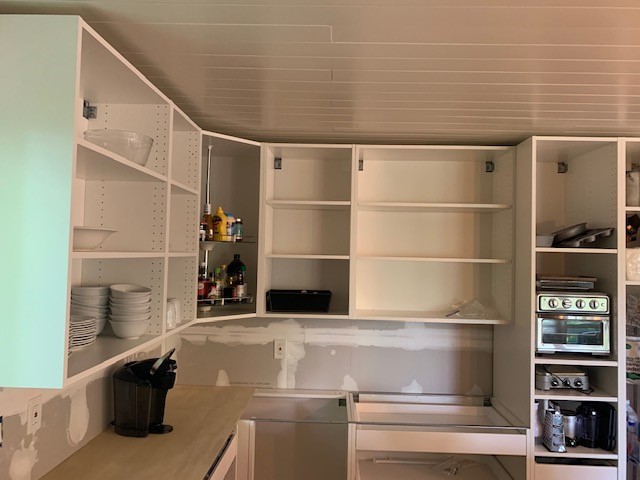
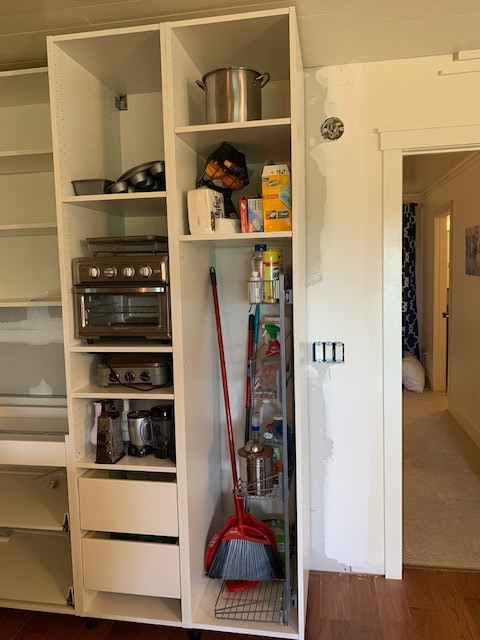
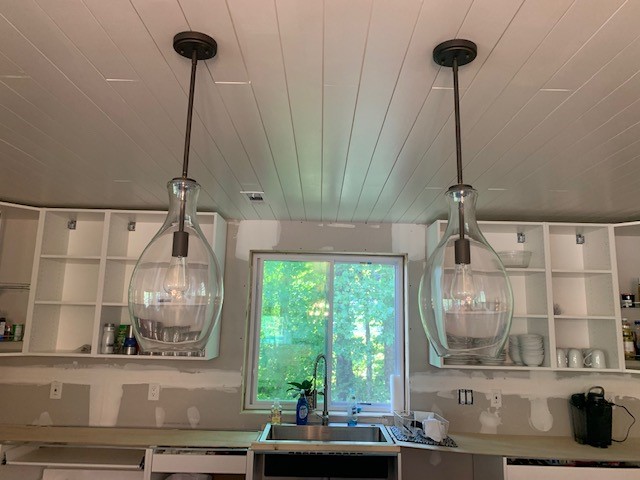
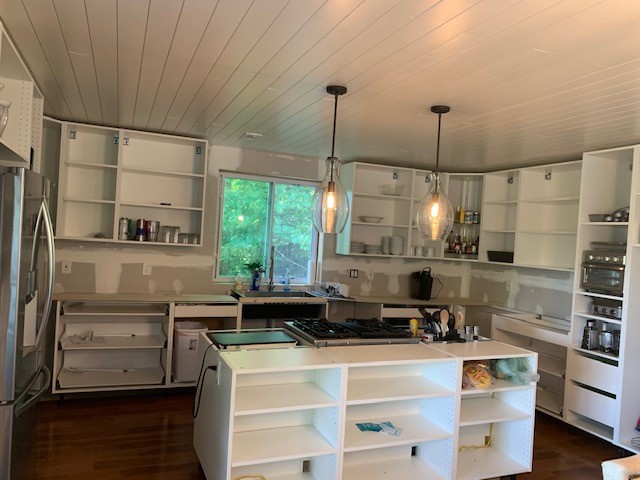
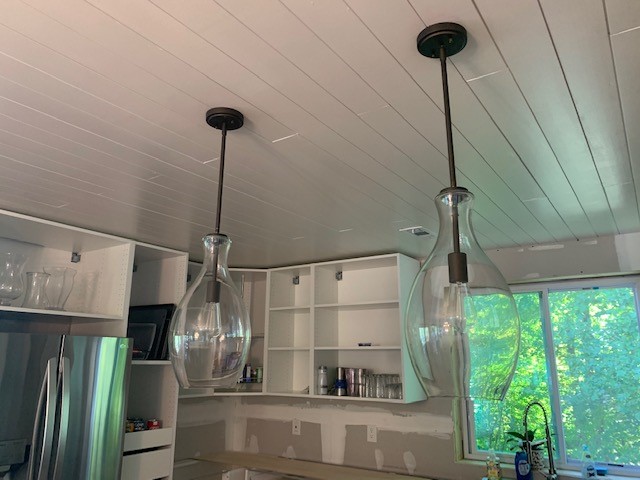
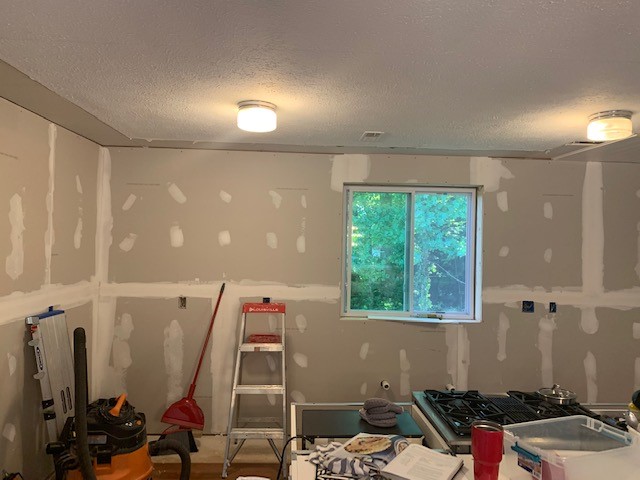
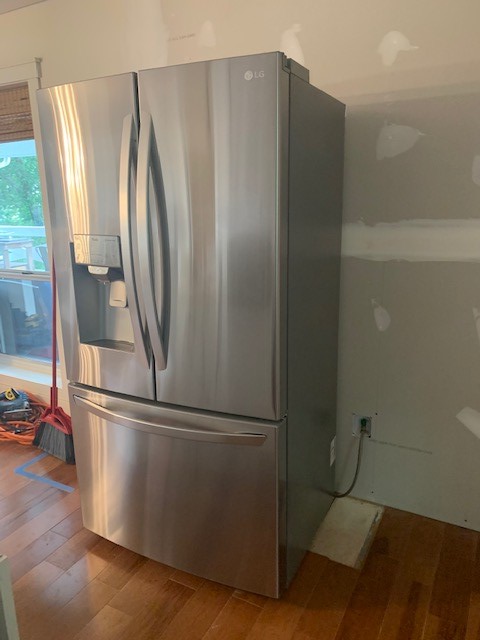
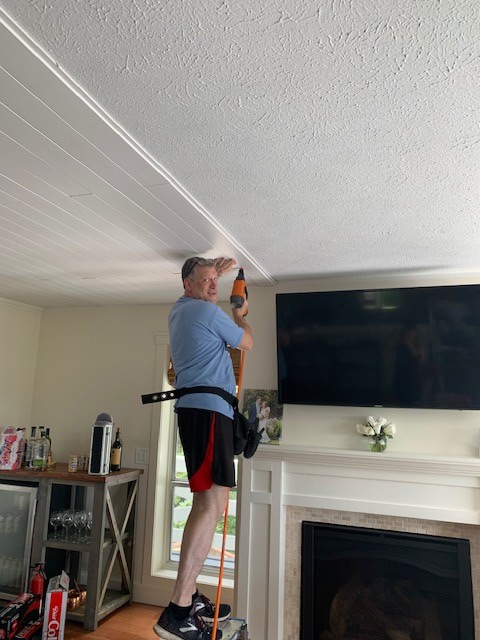
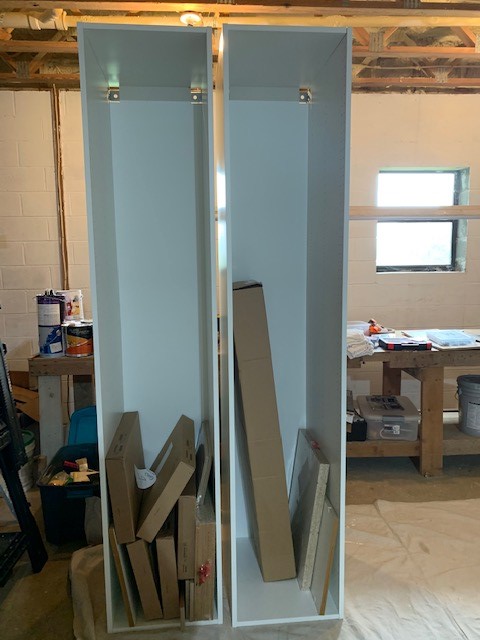
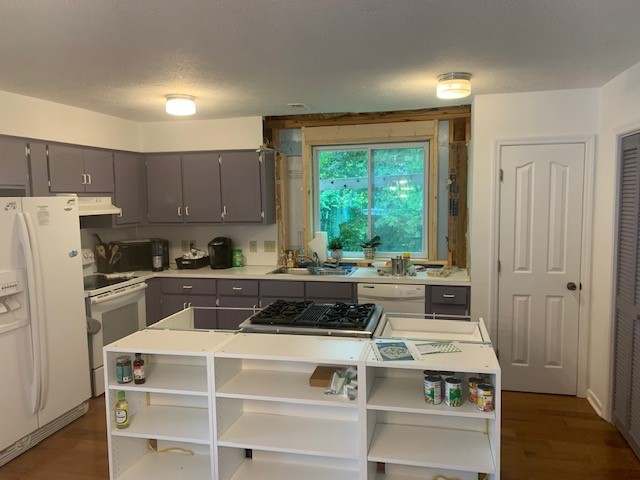
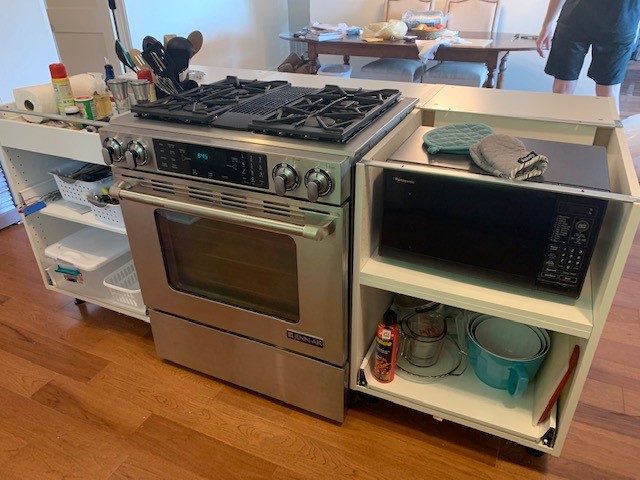
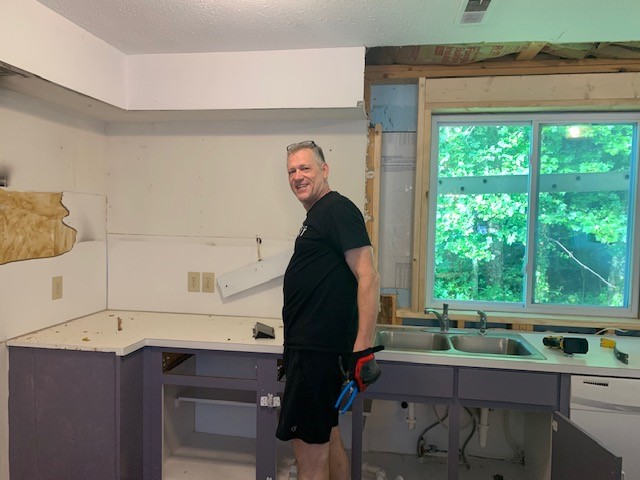
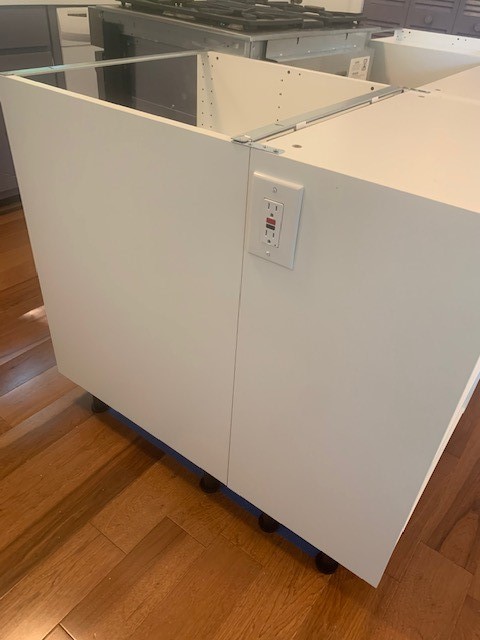
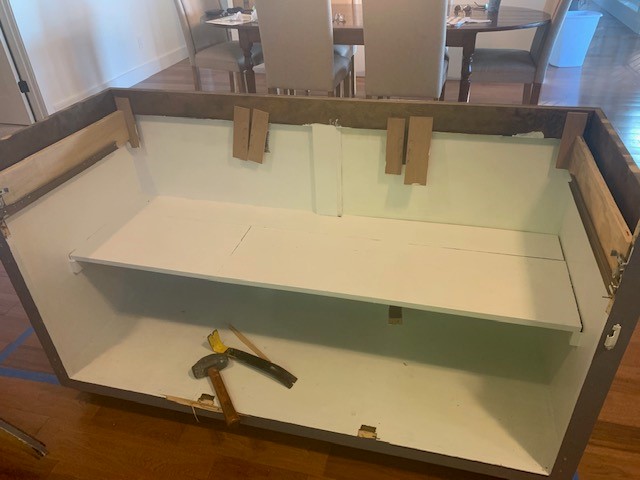
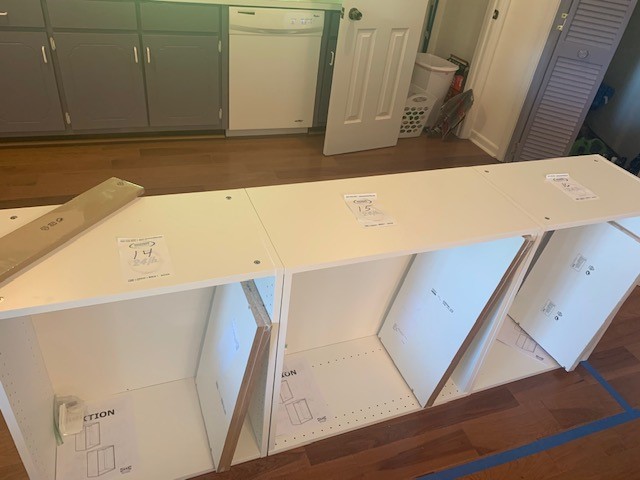
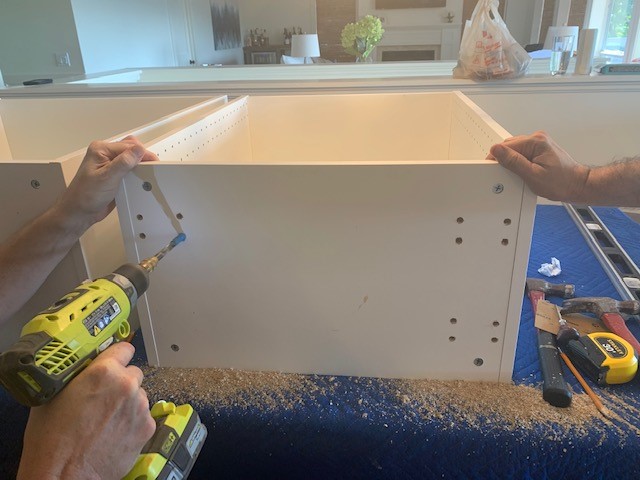
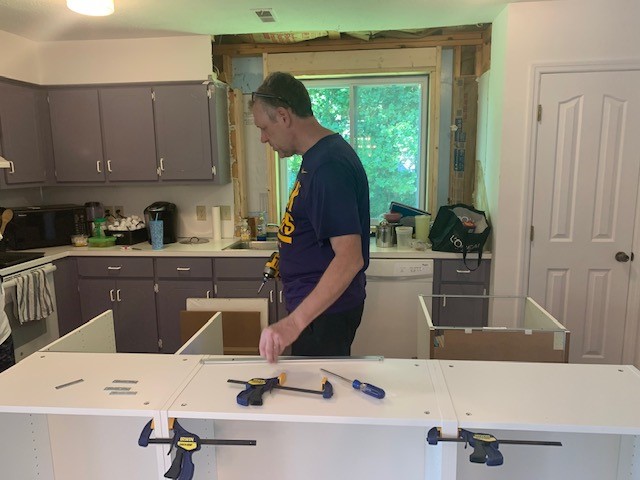
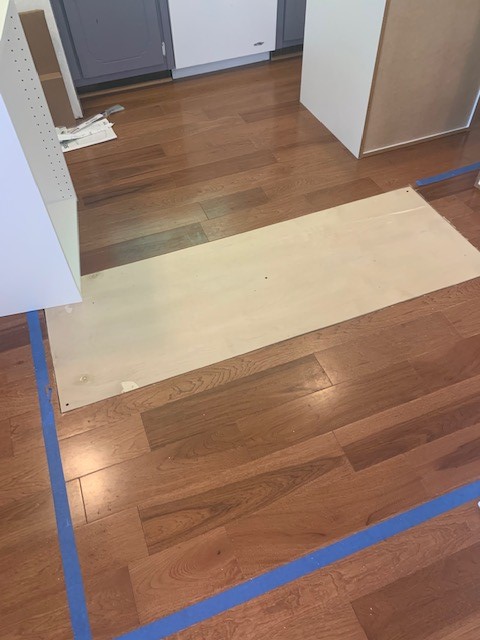
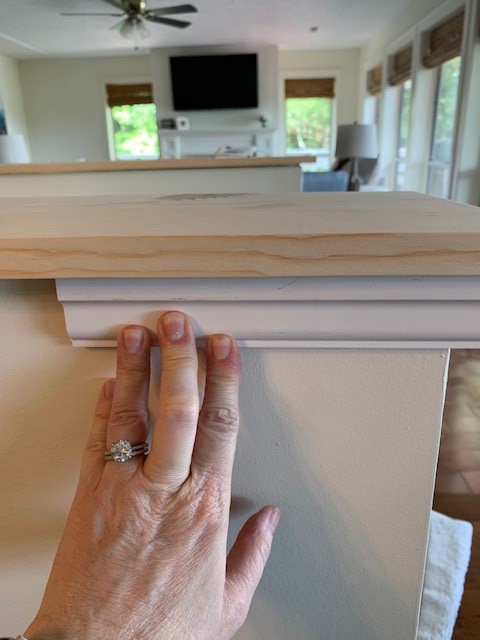
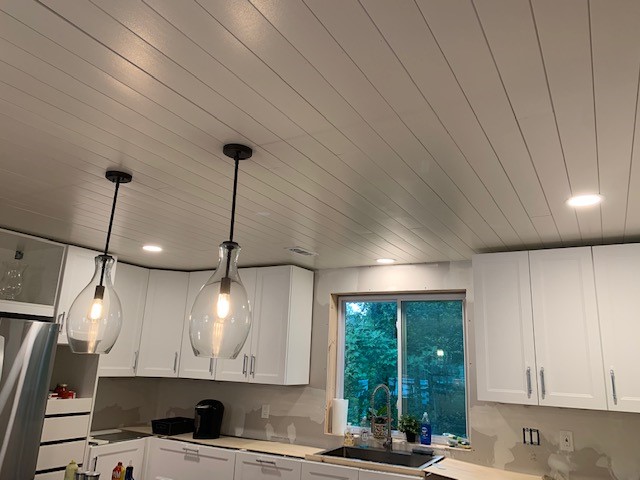
Now, on to the current kitchen status and a few pics. We put on the last few doors and drawer fronts and installed filler pieces in the gaps where the side walls meet the back wall. We installed the last of the hardware for all of that as well. So now we just wait on those last 7 doors/drawer fronts and the cabinets will be DONE! Keith also put in a light over the sink and two in the kitchen so now it’s a lot easier to see while cooking. He really does spoil me ;)!

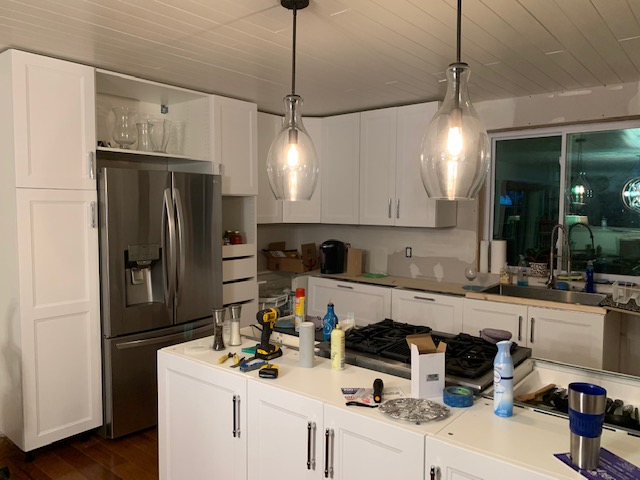
Here are a few pics of the lights. Nothing exciting but super functional.

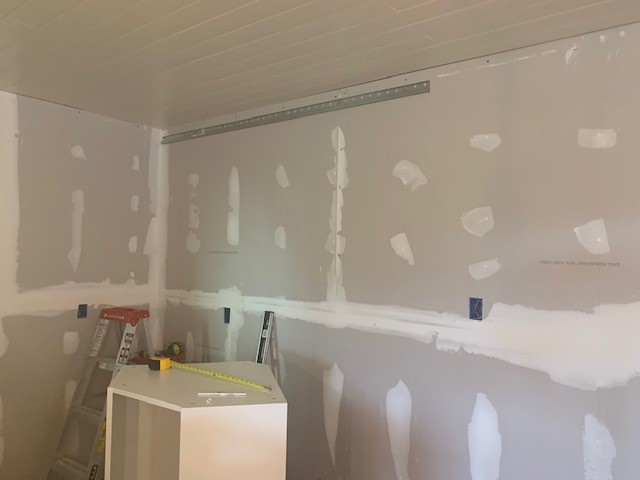
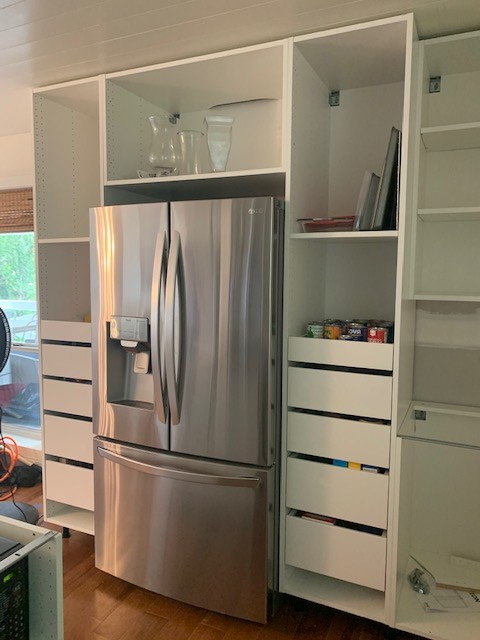
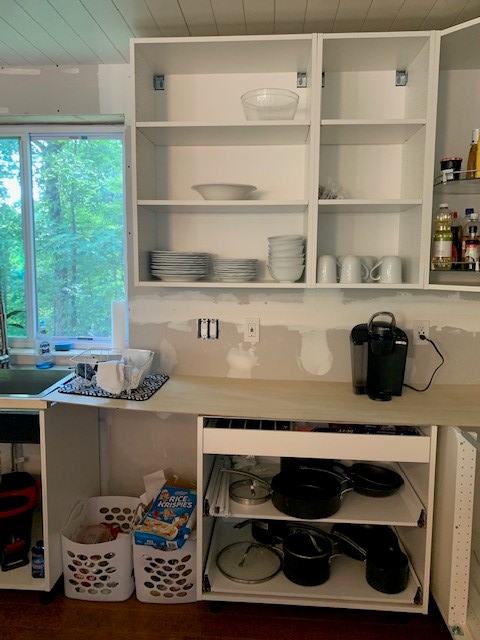
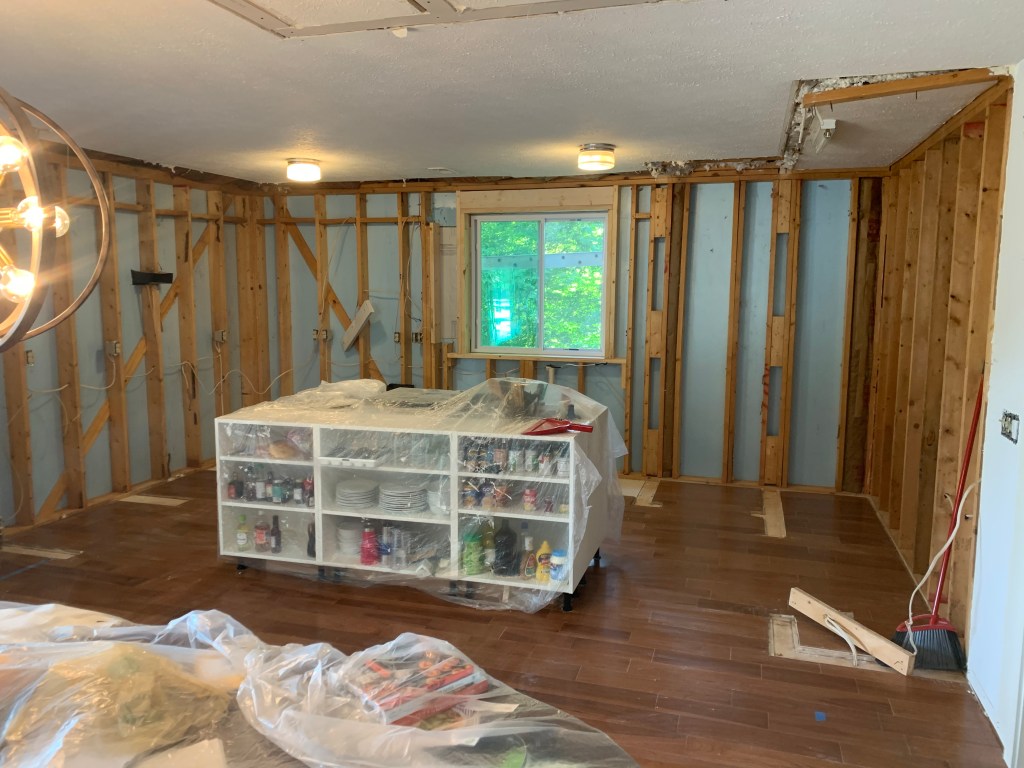
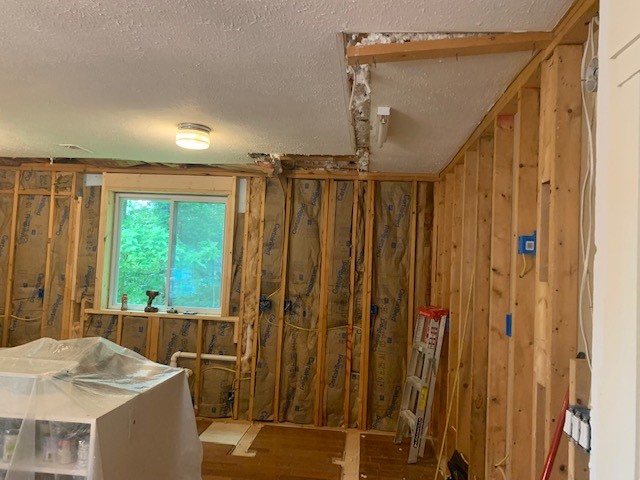
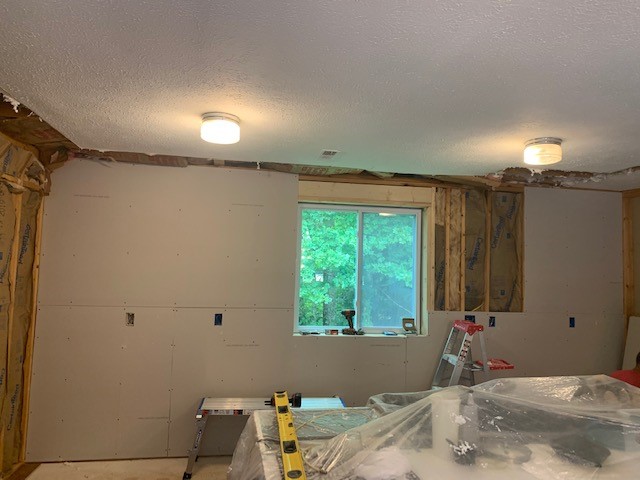
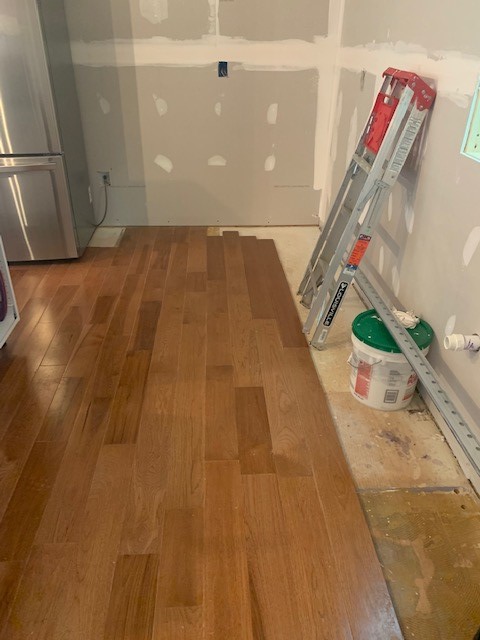
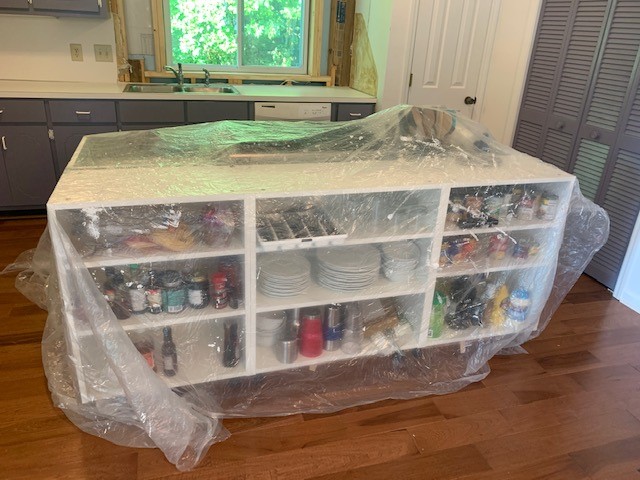
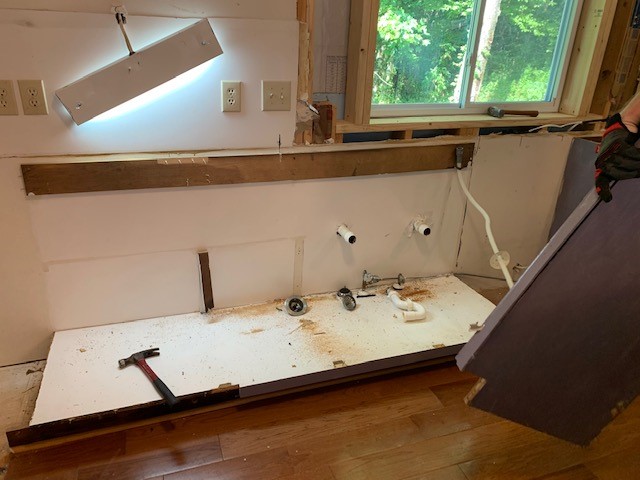
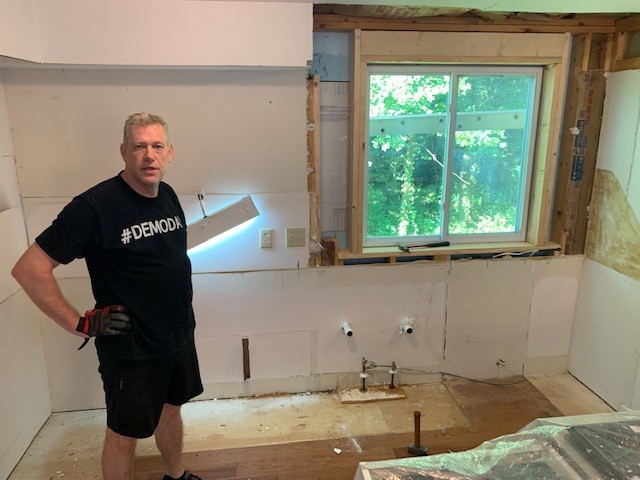
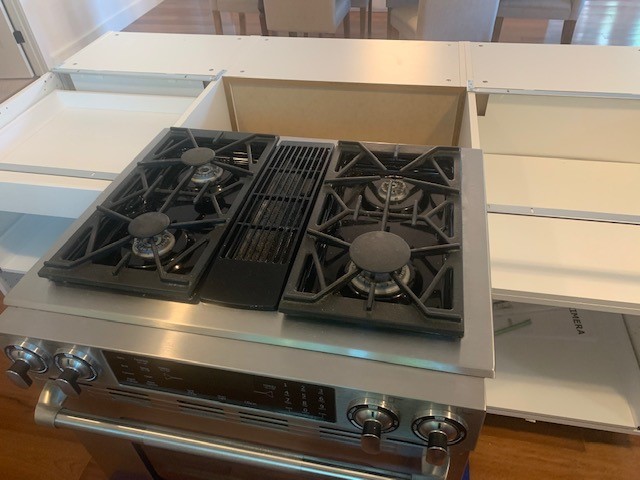
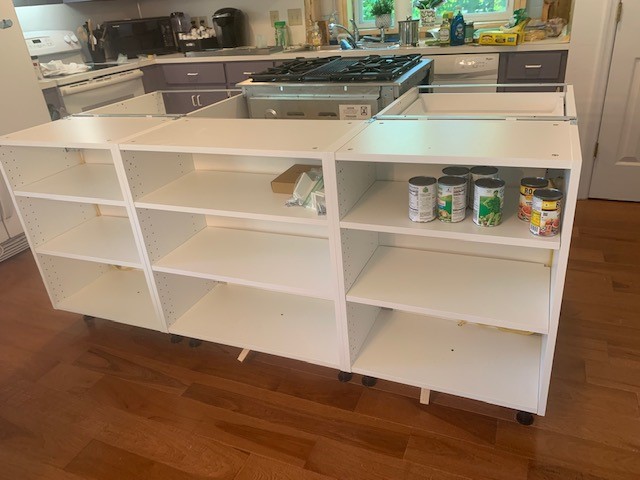
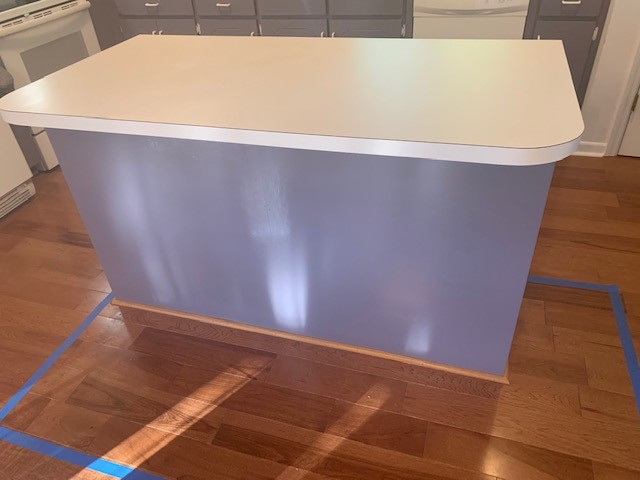
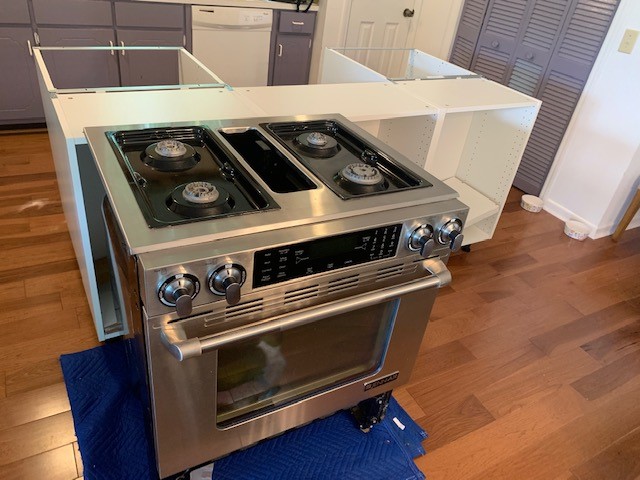
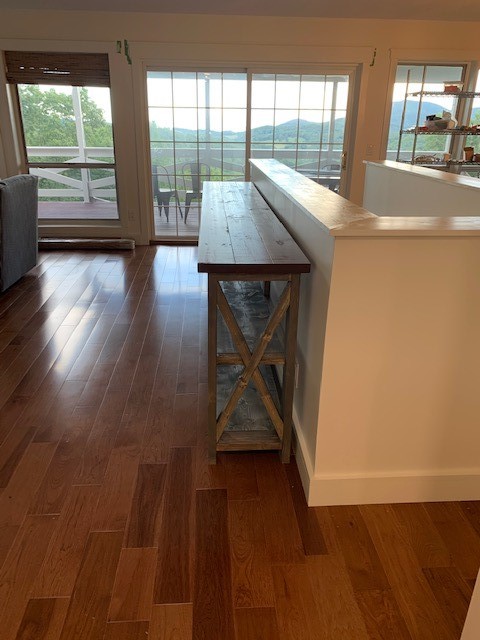
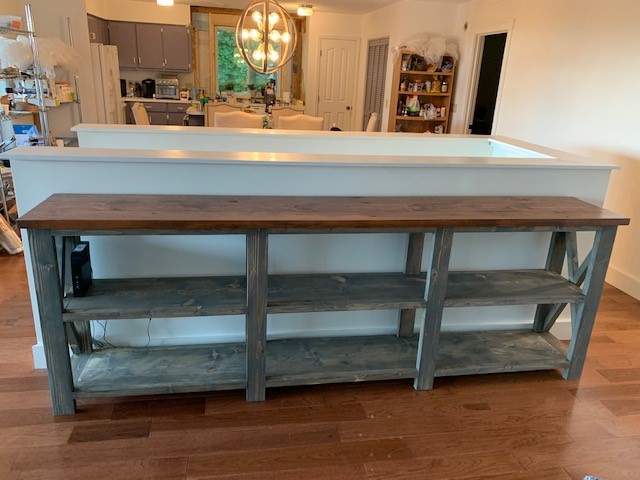
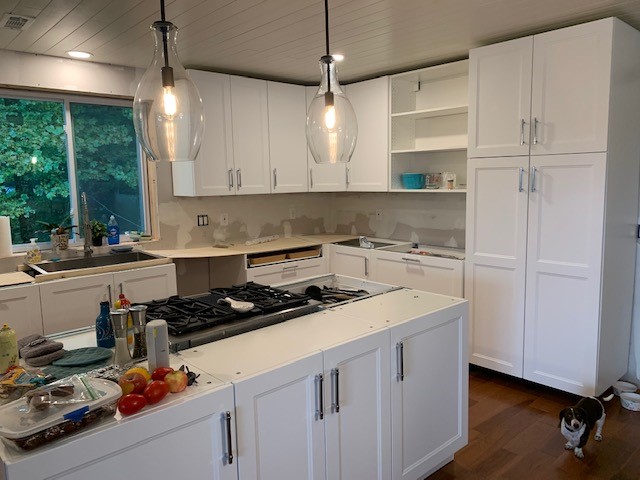
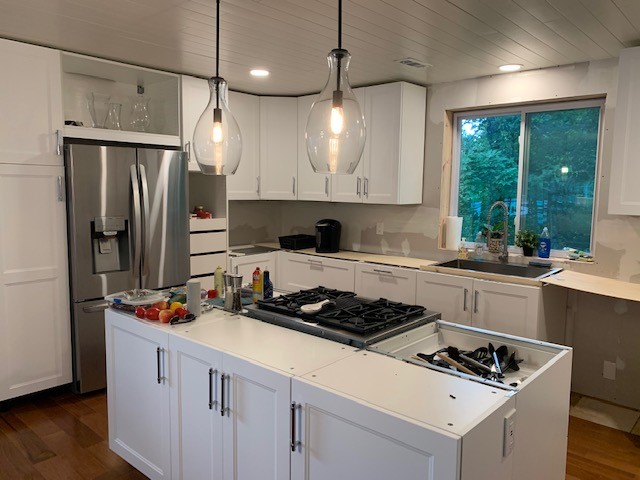
And now a couple of broader pictures of the kitchen. It’s pretty obvious where we’re missing the doors and the one drawer front!

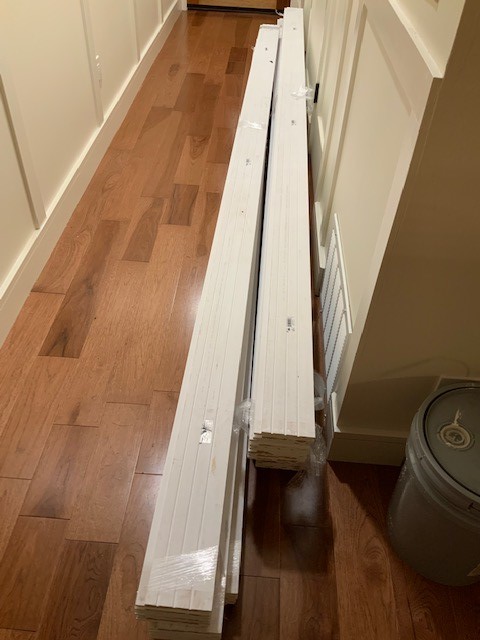
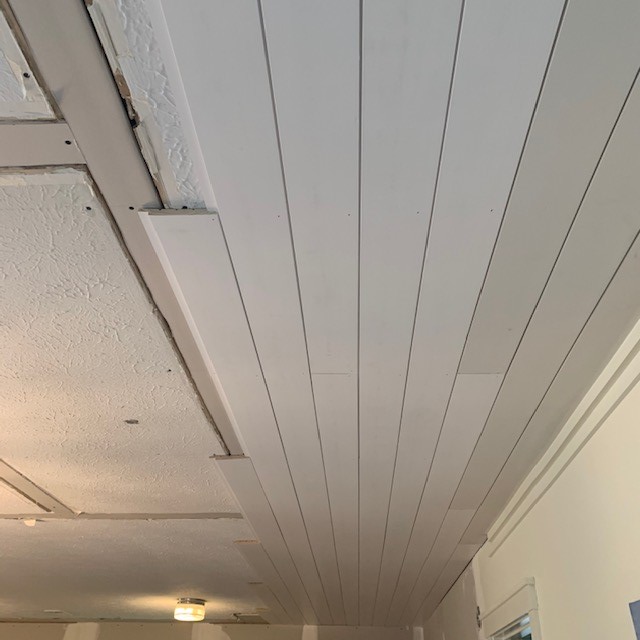
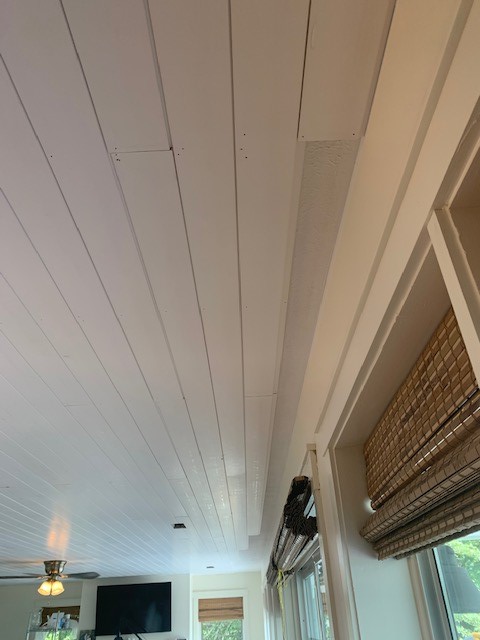
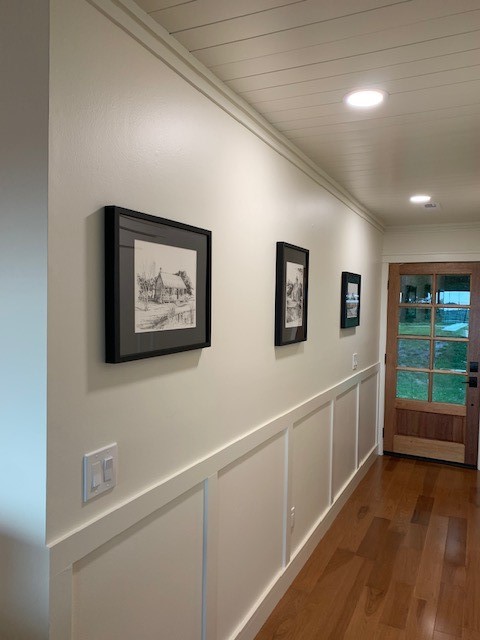
In case you are worried that my blogs will stop soon, have no fear! We still have a lot to do. They may be spaced a little further out but we’ll still share as often as there’s something to write about. Short term, we still need to finish up the last 7 boards on the ceiling where we ran short, and finish up all of the trim along the baseboard and ceiling. We need to trim out the sides of our pantries where they end so there’s not a gap along the wall. Once the countertops are in, we will trim out the window above the sink and we’ll install a backsplash. Since we have dark countertops, we’ll be putting in a white beadboard backsplash. We’ve done one at my mom’s house and at my aunt and uncle’s house and it looks great. It’s also inexpensive and easy to do, so that’s a big plus. If you paint it with semigloss paint and properly caulk it, it’s an easy and durable backsplash.

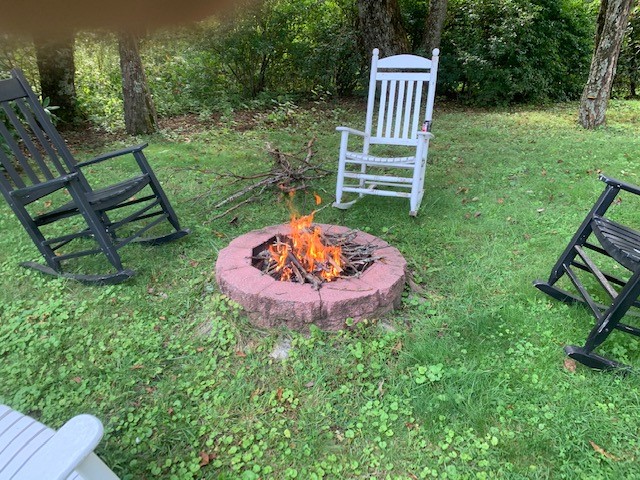
Since we don’t have as much to do in the house, we’re able to have a little fun now. Keith was able to bring out his inner pyromanic a couple of times this week and we even made s’mores!

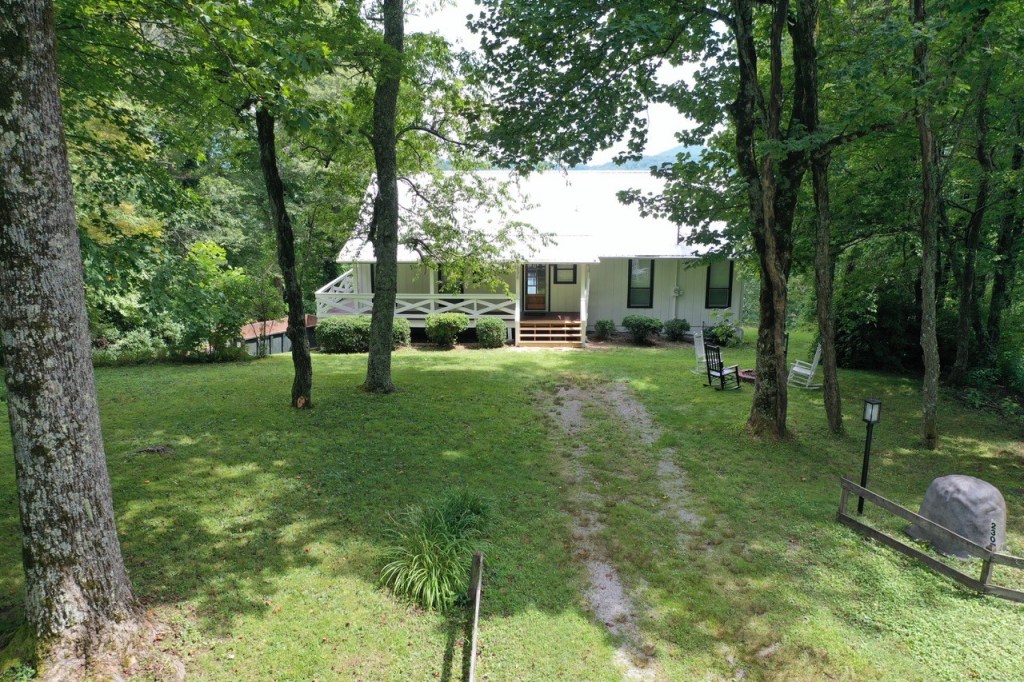
And we were able to take a lovely hike yesterday. It’s nice to be able to enjoy our gorgeous surroundings!

Well, that’s it for now! I probably won’t have an update next week but will be back with you as soon as we get the rest of the doors/drawer fronts and counters! Have a great week!

Short and sweet

Hi everyone! This is going to be a fairly short and sweet blog as there’s really just one primary topic for it – doors and drawer fronts!

I didn’t blog last week because we spent a lovely week back in Atlanta. We were able to do some lovely socially distanced socializing and catch up on some things with our house there. We had a not-so-fun visit to Ikea to return a bunch of extra cabinets we didn’t need. It took an hour and a half to get waited on, and we were both close to losing it. Ikea saves you a lot of money but it definitely adds to the stress level! But on a more exciting note, we took delivery of our Ikea Akstad doors and drawer fronts, which was pretty exciting and went flawlessly! We loaded them straight from the delivery truck into the Jeep and it all fit easily. When we made our order, there were five fronts we weren’t able to get because they didn’t have them in stock online. So we are forced to wait until they come into stock locally. We do have them on “reservation order” at the Ikea in Atlanta. Which basically means they’ll be put aside for us when they come back into stock in Atlanta. I’m hoping they actually show up soon as right now our kitchen is a little “checkered” looking!

Now on to those doors and drawer fronts. First and foremost, we are thrilled with the way they look. They don’t have any sheen to them and are a nice matte white. I think they look awesome and I hope you do too!

Keith ended up having a bit of a free day on Wednesday so he got to work putting them up and got them all on! We still need to adjust some of them to make them line up, and we also need to switch the hinges to the other side on a few. After living with them for a few days we decided that several of them need to open on the opposite side of what I initially thought. So those (all upper doors) don’t have their hardware on them.

This weekend, I was able to put the hardware on the doors we are happy with and all of the drawers. To make that easier, we built “jigs” (templates) to make sure that our placement of each of them was perfect and they would look. Then I took the jig and set them on the door/drawer. It took a few minutes to make the jig but saved time in the long run.

Notice that we have a line for center and a little “peephole” to allow me to see through where I marked center on the drawer so I could set the jig in exactly the right space.

Here are a couple of pictures of the hardware now that it is on. We ordered the hardware from Amazon and I am very happy with it. It’s very heavy and was very cost-effective!

And last, here’s a view of the entire kitchen. Please ignore the mess! I wanted to get the blog out and obviously didn’t take the time to neaten things up! 😉 Notice that we are still missing some fronts and some hardware. As soon as Keith can switch out the hinges (the doors are too heavy for me to do on my own), then I’ll finish up the hardware. And hopefully we’ll have the rest of our fronts by early October.

A few other things did happen this week. We had our countertops measured and hope to have them installed in two to three weeks. At that time we’ll also have our new dishwasher installed, which we are both looking forward to! One other thing I’m looking forward to is getting a disposal. I really miss one! But honestly, after washing dishes outside for two weeks, I won’t complain too much.

As I said, short and sweet and not a lot of pictures. As we wrap up the big renovations, we’ll start working on some of the fun projects we’ve got in mind. One of the early ones will be to build our banquette for the kitchen. We’d also like to build a coffee table for our outdoor furniture, build a little “candelier” for our outdoor table, build the cover/planter for our well, etc. So we’ll be busy for a while! Oh, and we have to build a table for my sister Susan’s new house. That will be fun and I’ll be sure to share that when we do! But for now we’ll try to finish up the kitchen and all of the little punch list items like ceiling, lighting, painting, trim, etc. Since color season is about to begin here, we’re also looking forward to some family visits!

Have a great week and I hope to have more to share with you next weekend!

Our bitchin kitchen!

OH MY GOODNESS!!! We have made so much progress in the past two weeks since we’ve been up here and I can’t wait for you to see it! Just a reminder that it was just two weeks ago yesterday when we demoed our kitchen. Last weekend we focused on the ceilings since they had to be done prior to the kitchen install. This week it was time to MAKE IT HAPPEN! And that we did!

During the week, we worked together and separately and assembled a lot of the cabinets. It’s not super glamorous work but thankfully it isn’t really hard. Once you’ve assembled one Ikea cabinet, most of them are the same. The only exception is the corner cabinets. They’re a little more complicated but as long as you follow the picture instructions, you can assemble them fairly easily. By the time we built our last cabinet, it probably took us less than 8 minutes to do one together.

I also started assembling some of the drawers during the week. We have a LOT of drawers in this kitchen. Again, they’re not super hard to assemble, but there are a few steps. In case you’re interested, I took pics as I assembled one of the last pantry drawers today.

Before I get back to the cabinets, I’ll tell you what we think is honestly one of the hardest things to do with Ikea cabinets. It’s not assembling anything and it’s not even installing anything. It’s hanging the rail that the cabinets hang on! It is much harder than you’d think to find the studs in the wall with the weird rail and then to actually get it level. And level is kind of important for cabinets!

We eventually got the hang of it but it took a laser level, a 4′ level and a lot of fun marital discussion to get those rails up. Keith was convinced we would run out of rail and we wouldn’t be able to hang everything. But Ikea knows best and the kitchen planner had us buy enough for us to even have about 4′ left over!

Once we got the first few rails up, it was time to hang the first cabinet. We’re such nerds but we were excited and high fiving each other when we hung that first corner cabinet!

Truly, hanging the cabinets takes about 2 seconds once you get that pesky rail hung!

As we moved our way left in the kitchen, a very exciting moment happened! I got indoor plumbing back in my kitchen! It’s just temporarily set, but we installed the sink cabinet and have two 2×2’s holding the sink up. Oh happy day!

Yep – that’s a plywood countertop we’ve got going there now. Keith really spoils me! 😉

Back to the rest of the cabinets. We hung them intermittently throughout the weekend, as we had my aunt and uncle up for a visit. While they were here we took off some time to play. I went on a little excursion with them to Cashiers on Friday and yesterday we all went to a beautiful spot in Clayton called Bull Sluice. After our outing yesterday, we finished assembling the last few cabinets and hung them. Woo hoo! We had a kitchen!

While I had gotten a really good head start on the drawer assembly, we still had more work to do. Keith started installing the drawers I had assembled and by the end of the day yesterday we had a really good start on the interiors of the cabinets on the right side of the kitchen. We called it a day at a reasonable hour and enjoyed some amazing pizza from a place we discovered only 5 minutes from here!

This morning, we got a leisurely start to the day and worked on assembling and installing the rest of the drawers. Chloe was apparently feeling very left out of things, as she decided to try to “help” me assemble some drawers!

We finished installing the drawers early this afternoon and then I moved ALL of the food and cookware off of our rolling shelves into the kitchen! There is a crazy amount of storage in this kitchen. I don’t see me ever filling it up, but that’s okay. It’s a bitchin kitchen! 😉

And here’s the reveal!

One last thing we did before calling it a day was to finally hang the glass for our pendants above the island. You may remember that I bought these (used) a few weeks ago from a Facebook exchange group I’m a part of. I think they work perfectly in here!

While we still have a lot to do, we feel REALLY good about how much we’ve accomplished in such a short period of time. We are headed back to Atlanta for a week or so and will take delivery of our doors and drawer fronts. By the way, we were insane for ever thinking we could make those ourselves!

When we return, we still have a lot to do but nothing terribly daunting. After we hang our doors and drawer fronts, we’ll make decisions about how to trim things out. We’ll need to install the toe kicks, a backsplash, some additional can lights in the kitchen, finish up the ceiling and paint the rest of it, etc. But we should be able to spend time enjoying ourselves up here as fall color season begins!

We did take a couple of pictures the other night when we went to watch the sun set with my aunt and uncle. It was a little cloudy so not the perfect sunset, but it was beautiful nonetheless!

Since we’ll be home in Atlanta next weekend, I doubt there will be a blog post, but I’ll write more in a couple of weeks when we get our doors up! Until then, stay safe and healthy!

Rinse and Repeat

That seemed to be the theme of this weekend’s work! It was a LOT of repetitive work but we got so much accomplished. If I’m honest with you, though, we both totally feel our age tonight!

But before I get to that, I’ll share with you the fate of the fake rock. It met an untimely death at the hands of Keith with his sawzall. It will not be missed! It will be a few weeks before we get to the new planter box which will cover and insulate it. In the meantime, it looks like we’ve got an above-ground grave in our front yard! We also made the decision to completely remove the fence and not replace it – at least for now. We only have our dumpster through tomorrow so it was time to make those kinds of decisions.

We’ve come a lllooonnnggg way since last week’s demo. During the week, our handyman was here and worked two days on insulating and putting up drywall in the kitchen. Not very exciting, but a necessary prerequisite to hanging cabinets.

I might note that before they insulated and put the drywall in, Keith went full beast mode and ran all of the wiring for the electrical and finished up the plumbing. I swear, he can do almost anything if he puts his mind to it.

One other exciting thing happened this week, and that was the delivery of our new fridge. It is so much easier to find things in than our old one, and it will look great with the new cabinets. Additionally, Keith is super happy because it makes two kinds of ice. Traditional ice and cocktail “balls”. I’m pretty sure we paid a lot extra for that feature, but it’s a fun addition and he’s happy! 😉

Friday evening, we went to Lowes to see their countertop options. There aren’t a ton of options of places to go look around here, and the local places are overpriced. So, we were recommended to get them from a big box store. We had looked at Home Depot and neither of us were really in love with the options. Thankfully we found something we both liked at Lowes, so we have that decision made. With that decision came a deadline…to finish the cabinet hanging…by Friday. They have about a 4 week wait between measuring and installing, so we needed to get measured ASAP. Plus, we’ll be back in Atlanta during the week of Labor Day. So, Friday it is! The pressure of that deadline is a little bit daunting, but we’ll make it.

I mentioned that drywall was a prerequisite to cabinets. Unfortunately, we had a few other prerequisites that we spent the weekend working. First up was ceilings. You may remember that we put up shiplap everywhere in the house EXCEPT for the den and kitchen. We couldn’t finish putting it up until demo was done and the final walls were removed. Now that all of that was done, it was time to put up shiplap. And put up shiplap we did. Rinse … repeat … We had a delivery of 160 shiplap boards delivered to the house last Saturday and we put up every single one of them. AND WE DIDN’T HAVE ENOUGH! We are sooooo close – only about 7 shy of what we need. But thankfully we had enough to get the kitchen side of things done. We will wrap up the den later this week or next weekend after we meet our cabinet deadline.

Because we had so much fun doing the time lapse video last week, we did another one yesterday with us putting up a “row” of 3 shiplap boards which I’ll share in a minute. Each one of those “rows” took us between 30 minutes and an hour, depending on obstacles (such as light fixtures, etc.) in our way. We used two platforms and a board to hang twelve foot shiplap boards. Up and down and cut and glue and up and rinse and repeat!

And here’s the video!

Here are a few still photos of how far we made it this weekend. You may notice a section in the back corner of the kitchen with no shiplap. All of that will be hidden by the upper cabinets. We were thinking we might just be able to finish the ceiling with the remaining boards, so we left that empty trying to conserve boards. Sadly it didn’t help us, but it will never show once the cabinets are up. Tomorrow’s fun will be to paint the kitchen part of the ceiling. In prep for that, I caulked every one of the holes (in the kitchen) that we made when putting up that shiplap. That is some good fun, let me tell you!

While I was caulking, Keith was up in the attic putting the boxes in for our pendant lights over the island. We haven’t hung the glass part of the pendants until after painting, so you’ll have to wait until next week to see what they really look like!

The other big thing we had to finish prior to hanging cabinets was the floor. Because we removed walls and because the floor had been put in well after the old cabinets had been, we had to pull out some of the old floor and weave in new boards. Just like the ceiling not needing to go all of the way to the walls, the flooring just needed to go back far enough to where all of the cabinets will go. Since lower cabinets are 24″ deep, we went about 18″ away from the wall. It wasn’t glamorous work, but it had to be done.

During the week, we also managed to assemble some more cabinets. Honestly, assembling them isn’t as hard as we thought. Because Keith organized everything so well in the garage, it’s as simple as looking at our matrix of cabinet components, going and grabbing them, looking at the instructions and assembling. We may make another time lapse of that for next week’s blog!

Next week’s blog should be a good one! We’ll have all of the cabinets hung and I’ll finally be able to move the rolling shelves down to the basement. If we have time, we’ll finish up the shiplap and I’m not sure what else. Crazy idea … maybe we’ll just have some fun and go hiking or do other relaxing things in the area!

Since it was national dog week, here’s a picture of Chloe napping while Keith & I were putting up shiplap. Chloe had the right idea!

Have a great week!

The fake rock dilemma

A big thanks to all of you who gave me ideas for the fake rock dilemma. I thought I’d give you an update and get your opinion on what I think I may do with it.

First, we’ve made the decision to not replace the fence. So we’ll be pulling up the posts in the next couple of days before we have our dumpster removed. Keith was able to pull one out with his bare hands, so that tells you how sturdy they are (NOT)!!! The fence was part of my dilemma as the fake rock was only about a foot away from the fence. With the fence no longer being an issue, I don’t have to worry about that.

So here’s the big reveal on the well head. To be honest with you, I was thinking it was a round well head, as that’s what one of our neighbors’ well head looks like. This is what ours looks like.

Most of you know I’m from south Louisiana, and this looks like it belongs in a cemetery, doesn’t it? It’s a rectangle! Who knew?!?! To give you a perspective of how HUGE the fake rock is, here you go!

Since we’ve got the dumpster for a few more days, we’ll take the sawzall and cut the fake rock into pieces and be done with it. We won’t get to our well-head project for a few more weeks probably, but honestly the well head looks better on its own than with the rock! And the rectangle works well with what I think I want to do.

We do believe that the fake rock functions as insulation and protection for the well head, so we need to make sure whatever we do serves well for that. We also need the well head to be accessible should it ever need servicing. Several of you suggested landscaping around it, but that wouldn’t keep it insulated and I understand you need to be careful about keeping anything with deep roots away from it. Keeping all of that in mind, I had seen something which I thought might work, but it was for a round well head.

Not bad, right? But it’s not round, it’s a rectangle. My sister Susan found something similar which we should be able to adapt to a rectangle, and I think it will work well.

This is a little more rustic than I’d choose, so I’ll probably use pressure-treated plywood rather than slats attached to pressure-treated 2×4’s. Then I’ll paint it all white. If we ever need to, we’ll be able to take the top off and access the well, but otherwise we would have an attractive planter.

One other thing I wanted to accomplish with this was to put some house numbers out by the street. Today there’s a small piece of wood with our house numbers which is attached to the fence, but obviously that goes away with the fence. So I am thinking I could kill two birds with one stone and attach house numbers to the planter/well head cover to look something kind of like this.

I hope that gives you an idea of what I think will work well. Give me your opinions, folks! I love them!

#demoday

Five months and two days after closing on our little mountain house, it was time for (kitchen) demo day! For those of you who’ve been following along from the beginning, you know that this is the last room for us to tackle. We’ve accomplished a lot and now it’s time to finish things up!

Prior to doing demo, we got our basement and garage as organized as possible, since we will be assembling cabinets down there. For some Friday fun, we did go on and put together two of our four pantry cabinets. We Heffrons really know how to have a good time on a Friday night, don’t we?

Saturday morning, we woke up on fire and were ready to GO! This was the day we’ve been waiting for! We donned our cheesy #demoday t-shirts (clearly my idea, not Keith’s) and after a hearty breakfast we got to work.

We had gotten the kitchen island as organized as possible so we could have a functional kitchen for the time that we will be without wall cabinets.

We covered everything with plastic tarps and got ready to get to work.

Now for the fun! We did a time lapse video of the demo. It’s broken into two videos because we took a much needed lunch break as we were both ravenous!


You know I always have to include a random picture of Chloe in here. She was a trooper for all of the noise and mess we made yesterday. She spent a good portion of the day outside while we were going in and out in seemingly a thousand trips. She’s a good little construction dog!

In addition to the video, I took some “still” photographs to let you see how the progress went. I am sparing all of you the DEAD MICE that we found in the walls. I nearly had a heart attack when I realized I was sweeping up mouse carcasses. SO GROSS!

One note on that top upper right picture. That was the dead space in the cabinets where there was a corner. I don’t know who designed this kitchen but whoever it is should be shot for wasting that much space in an already small kitchen! But enough of that. Here’s the “after” picture! All of the old kitchen is gone and the only thing which remains is our new island.

It was a lot of work but we are so happy to have it done. And in case you’re wondering how much I moved on Saturday, here you go!

I’m pretty certain we were in bed asleep by 9:30. We were exhausted! But very happy to have made such good progress. With the exception of the dead mice, we didn’t really find any unwelcome surprises, which is always a win.

This morning we woke up a little less on fire but not as sore as we thought we’d be. After a breakfast and Home Depot run, Keith got to work on the plumbing. Right now, we are using a utility sink ON THE FRONT PORCH for our kitchen sink. Yep, you read that right! And if you don’t believe me, here’s proof! 😉

We are keeping it classy, aren’t we? Ha! The plan is to move this in and connect it to hot and cold water and actually have it drain somewhere other than directly to the ground. Keith has about an hour more of plumbing work to do in order for that to happen. But he’s got our water line for our new fridge up and ready to go, since it’s arriving on Tuesday. I’m sure glad he knows how to do plumbing and electrical!

While Keith was working on the plumbing, I was busy doing a few other things. Besides the not so fun mopping to get up the drywall dust from yesterday, I finished up the first coat of paint on the deck. I still need to roll another coat on, but the first coat was put on with a paint brush to get into all of the nooks and crannies. I am so much happier with the gray rather than the old “barn red”. Like everything else about the house now, it’s lighter and fresher looking.

The last project I worked on today was a quick one. We are going to have our dumpster removed this week, and there was just enough room in it to fit our front fence into it. It was rotted, falling apart and had moss growing on it. I’m not sure when we will replace it, but today was the day to demolish it. We left the posts for now just because we’ll use the holes when we replace it. But all of the fence boards were super easy for me and my sledge hammer to remove. It looks a little weird now but in the fairly near future we will build a fence with X’s to mimic what we have on the railings.

Now, last but not least, I would LOVE ideas from all of you as to how to cover the well head that is currently covered with the GIANT fake rock. I cannot tell you how much I loathe that rock, but I can’t find any good ideas on Pinterest for how to cover a well head. And please don’t suggest building a fake wishing well. That’s just not my jam…. But if you have any good ideas, please send them my way!

We’ll see you next week! Until then have a safe and healthy week!

Getting ready for some demo!

Happy Sunday everyone! It’s been a busy week for us. As I mentioned last weekend, my mom, sister and brother-in-law came up last weekend. We did some work at the mountain house but also managed to have a little fun. My brother-in-law took some AMAZING drone videos of the house and property. If you feel like seeing our little slice of paradise from a birds eye view, take a look at these videos. Thanks Jeff!

We headed back down to Atlanta for the better portion of the week so my mom could have a surgery which will hopefully give her use of her left shoulder again. So please pray it worked! We won’t know for about five months but the surgery went well and she did great. They left yesterday to go back to Baton Rouge, but before they left we also got some house things done. My sister loves Ikea so I went over there with her and mom on Friday and managed to get a super helpful Ikea person in their kitchen department who “reserved” the cabinet door fronts and drawers which weren’t available for me to order online a couple of weeks ago. I didn’t even know that was possible so it made me super happy that I don’t have to keep checking inventory. They’ll call me when it’s all ready. Woo hoo! Ikea for the win!

One other thing my sister did for me while I was home was paint over a canvas I had ordered. Long story short, I had used this app called Waterlogue to take pictures and make them look like watercolors. It worked really well on most of the pictures, but one picture of our view here came out super pixellized (that’s not a word but I hope you know what I mean). It looked horrible until she painted over it with acrylics and it looks amazing now! Susan is quite talented, isn’t she?

Here’s one of the other Waterlogue canvases I had ordered and we hung over our bed in the master up here.

I also did a little “hunting and gathering” while I was in Atlanta. I love Facebook Marketplace and several exchanges I’m on, and I am constantly looking for a deal. I found two pendants for over our island, which I can’t show you because we wrapped them in bubble wrap. But we’ll have them up in a few weeks! I also found a really pretty rustic looking mirror which is now up in the guest room and looks terrific.

Little by little our walls are finally getting some art and such on them!

Keith and I came back up yesterday morning and managed to unpack the car right before the skies opened. While Keith began working on electrical and venting for the island, I trimmed out the stairs. You’ll remember that we put the new treads and risers on a couple of weeks ago. We had caulked and painted the risers, and I had stained and sealed some cove molding, but we hadn’t gotten around to putting up the molding. That is finally done.

It’s nothing too exciting but at least it’s done. I’ve also painted the stair railing but we haven’t gotten it up yet. It’s on our list of to-do’s, but isn’t a super high priority.

Now back to that island. Keith has installed two outlets for the sides of the island and one for the microwave and range. He’s also installed the fan for the downdraft. One of the reasons we were so excited to find our slightly used JennAir range was because it had a downdraft. Since we are putting it in our island, we didn’t want a hood for it and this solves that problem! We have our gas company coming out tomorrow to hook up the gas for it, so hopefully it will be fully functional tomorrow and we will be ready for demo. I’ve already started putting some things in the island for the weeks we are without a full kitchen.

One dilemma we’ve had about the kitchen demo was what to do about a sink to wash dishes while we’re without a dishwasher or a real sink. We don’t have a bathtub and don’t really want to attempt to wash dishes and cookware in a bathroom sink. We will eventually build out the basement and when we run plumbing for it, Keith wants a utility sink for the garage. We went on and bought the sink and will hook it up to a garden hose on our deck for the time being. It should be super classy looking! 😉

I feel like I’m babbling here, but we got a lot done this weekend and are getting ready for the big kitchen project. Today I spent the better portion of the day painting our porch/deck boards. We love our handyman but it’s taking them longer to get the house painted than we wanted, so I am helping out by painting the easy portion of it. The first coat has to go on with a paintbrush so it’s a slow process, but I made a fair amount of progress today. I got all of the front and the better portion of the side done. I wanted to go further but just ran out of steam at the end of the day. I am so happy to get rid of the barn red and replace it with a lighter and brighter gray.

While I was outside painting away, Keith was finally able to put the blower and decorative front on our fireplace. We finally got the pieces from the guy we bought it from three months ago. I wouldn’t recommend buying anything from him, given that we essentially had to threaten disputing the charges with Amex since he hadn’t given us everything we paid for. That got him off his butt and we now have a beautiful and FINISHED fireplace! It has a remote control, a blower which puts out great heat and it looks great.

That’s about it for us, folks! We are planning on Demo Day being next Saturday. Our plan is to make a time-lapse video of it. We’ll see if we’re successful with that or not, and if we are you know where you’ll see it. That’s right! On next week’s edition of “At Home with the Heffrons”!

Have a wonderful week.

And so it begins…

It’s official. We are starting the kitchen! Sorry you missed a blog last week, but we were back in Atlanta to take delivery of the cabinet boxes since Ikea doesn’t deliver to the mountains. We also made a big decision to not try to be overachievers. Initially we had thought we’d buy the boxes from Ikea and make the drawer fronts and doors ourselves. Then sanity prevailed and we realized that we would have to be SOOOOOO exact and it would be really hard and incredibly time consuming to make everything work. So, I did a little research and we went and looked at Ikea, and there is one door style we like. The reason we haven’t loved the Ikea fronts is because they are a little shiny and most of them are a color we aren’t as crazy about. They have a little-known front style called Akstad which they don’t even really have sample kitchens of in their Atlanta store, but it’s more to our style and we think it will look really good. https://www.ikea.com/us/en/p/axstad-door-matt-white-00426079/ is a link to them. They’re matte white and we have officially ordered them. They won’t show up until September so we will just focus on boxes for now. And Ikea is still out of stuff even online so it’s a little bit of a gamble as we are hoping the four door fronts/drawers we weren’t able to order will come back in stock sometime soon! Darned Covid is impacting so many different things.

As I mentioned, we took delivery of all of our boxes. They were supposed to come on Monday but in typical Ikea fun, they weren’t delivered until Tuesday morning. All 137 of them, but who’s counting! And that’s before the doors show up! We rented a U-Haul truck to carry them up to the mountains since there was a chance of rain. Loading them in the truck was so hot but we got it done.

When we got up to the mountains, I ended up being on a work call which lasted for close to two hours, so poor Keith had to unload them by himself. After he unloaded them, he organized them by Item # so we can easily find each part we need as we start assembly.

137 is a lot of boxes, isn’t it? The plan is for us to get the island installed and functional, since it will have our range and allow us to have a semi-functional space. Once the island is functional, we will demo the rest of the kitchen. Then electrical, plumbing, insulation, drywall and flooring repair will be done. At that point, we can finish up our shiplap ceiling and start cabinet installation. While Keith is working on electrical, plumbing, etc., I will be able to assemble cabinets and get them ready to go. And then we will install them. That’s probably 2-3 weeks away, so don’t expect pictures of that too soon.

Back to the island. Keith had some spare time during the week so he went on and assembled the island cabinets. He and I demoed the island yesterday and moved the assembled the cabinets up to the kitchen.

Last night, my sister and brother-in-law brought my mom back up here. This morning we were sitting outside on our new comfortable outdoor furniture enjoying the peace and cool temperatures, and lo and behold, there was an earthquake! The deck was shaking and we were all looking at each other saying, “is this an earthquake”? What else will 2020 bring????

Now back to that island. My brother-in-law wanted to help Keith with it, so I worked on some exterior painting (more on that in a bit) and let them have fun with the island. Plus, Jeff was able to help Keith get the range from the basement up to our kitchen, and I’m super happy I didn’t have to help with that!

We have to have our gas company come hook up a gas line for our new range, since it’s considered a commercial gas line, so right now it’s just sitting in front of the island. Hopefully we can make that happen in a week or so and then Keith can run all of the electrical and then the real fun begins!

Stay tuned for updates, but we are excited to be to this stage of the renovation. This week we were also able to finish up the trim on the stair surround, caulk and paint risers, finish hanging the bamboo shades, etc. None of that is too exciting so I won’t bore you with pictures.

One other big accomplishment this week was finishing up our beverage center. When I showed you the bookshelves a couple of weeks ago, I mentioned we were working on a similar piece for the house. Here it is! We are so excited about it!

Isn’t it great! We are really excited about it. We still need to organize it more and buy some more glasses, etc., but it is functional and we think it looks fantastic! We did have a little fun with some exploding diet cokes as we were loading the fridge, but we both have a little PTSD about that and can’t really talk about it!

Now, let’s talk exterior. Let me remind you what the exterior looked like on March 20 when we closed on the place.

From the moment we decided to buy the place, I knew I wanted to paint it white with black trim. It’s been slow going, and it’s not completely painted yet, but it is starting to really look great. I mentioned that my sister, brother-in-law and mom are here. My brother-in-law has a really amazing drone and took amazing footage and some great photos. He’s going to put a video together which I’ll post next week, but in the meantime, he got some great still photos as well. So here goes….here’s the “after” shot! Again, it’s not completely painted yet but what do you think? I LOVE IT!

Here’s another little before/after of the side of the house.

Here are a few other great drone pics that Jeff got. I can’t wait to see the video he’s making and share it with you! You may notice that the deck isn’t yet painted and part of the back and side of the house is still being painted. Hopefully that will be done in the next week or so and we can officially call the painting complete.

I hope everyone has a good week. For those of you praying for my cousin’s wife, she is out of the hospital, reunited with her baby and doing really well! We appreciate all of the prayers.

Until next week, I will leave you with this gorgeous shot of dusk that I just took right moments ago!

One Step at a Time!

Literally, one step at a time! This weekend was all about getting the stairwell done, and we made a lot of progress on that task. To get some perspective, when we started the renovation, the stairwell was enclosed and the door to it was at the top. Early on we moved the door to the bottom in order to open up the kitchen and den to each other. Once we did that, we pulled off the carpet to the stairs and were left with old and gross construction grade treads and risers. Here are a few reminders of how far we’ve come.

You may remember from last week that I was busy staining and prepping the stair treads for the big replacement. I finished all of the prep work for that during the week, and Keith painted the stairwell. Then came the real work…removing the treads and risers and putting the new ones on.

Once those were out, we started cutting the risers and treads to fit.

Then it was time to start putting the stairs back up … one at a time!

Once that was all done, we had to do the hardest part, which was transitioning from the engineered hardwood to the actual hardwood stairs. I’m not going to lie. We were pretty nervous about this! We talked through it and figured out the best way to do it. Because the transition piece we had was thicker than the engineered wood, we had to trim the inside of the transition piece to the same thickness of the engineered wood. We did this slowly and methodically and eventually got them to the same thickness. Then came another scary test of our skill. We had to cut the engineered floor to the depth of the transition piece. We did that with what we fondly call our “bad ass saw”, which has a real name of oscillating saw. But we’ve referred to it as the bad ass saw for so long, I had to actually ask Keith its real name! We started with it looking like this.

Then we measured and screwed in a piece of wood to follow to ensure we cut a straight line, and then we started cutting.

Here is what we ended up with. We are so proud of ourselves for this, which is probably silly, but it was definitely a challenge!

Here is a final view of the stairwell from the top down.

We still have a lot of trim and caulking and painting to do on the stairs, but they look terrific and we are pleased. Once we finished up the steps, it was time to put on the topper. We’ve been living with a raw drywall top for the past three months. We aren’t finished, but we got the topper on today. We were very limited as to the options of wood we could get in the length we needed, so we had to go with a prime grade pine. In order to minimize any of the knots and imperfections which are typically found in pine, I used a lot of wood filler to cover all of the holes. Then a lot of sanding had to happen to get them smooth for painting. Once that was done, we took the boards up and carefully measured them to get our miter cuts as perfect as possible. Then it was time to cut and install and get a primer coat on them!

Hopefully before we head back to Atlanta we can get the trim up and finish up painting the topper. The trim will end up looking like this.

For those of you who know me well, I am a bit of an energizer bunny with multiple projects going on at any given time. I mentioned last week that I finally finished sanding the outdoor chairs. I was able to get two coats of polyurethane on them this weekend, and they’re starting to look really good! I’ll probably put two more coats on before we put them outside.

One other project I’ve had on my to-do list was to finally put up the art I had planned for the long entry hall. I bought some prints from my very talented friend, Linda LeTard. Linda is the amazing artist who painted this picture of Chloe which Keith gave me for our first anniversary (aptly, a “paper” anniversary).

Linda had some beautiful sketches from Acadian Village, which is in Lafayette, LA only about 50 miles from where I grew up. I’ve admired these sketches and asked her if I could have prints of them, since I knew exactly where I wanted to put them in the mountain house. Since we’re on a budget, I bought inexpensive Ikea Ribba frames and some mats from Amazon and put them together. I am so happy with the end result!

Aren’t they gorgeous! Thank you Linda! You’ve made my long skinny hall a nice little gallery of your amazing talent!

Now, last but not least, the piece de resistance. You may remember that last week we were working on some bookshelves. We’ve got something else up our sleeve with the same general design, but in the meantime back to the bookshelves. Last weekend we got the frames put together and the shelves attached. During the week, we were busy adding the X’s on the side and doing some final sanding. Then it was on to staining and finishing them. We used a gray stain on the body of the shelves and the same stain from the stair treads on the top. Then I made a concoction of poly, linseed oil and paint thinner to apply to the top. I didn’t want anything as shiny as pure poly on the top, and this finish was perfect.

What do you think? Here’s the final version of it. I’m so glad we didn’t do built in bookshelves like my original plan called for. These are lighter and still allow for you to see from the front of the house to the back!

Obviously, I’ve got some decorating to do, but we’ll be using these bookshelves to house pots and pans and other kitchen wares during the kitchen renovation, which will start in a week and a half or so. We go back to Atlanta later this week to accept delivery of the bulk of our Ikea cabinets and then the kitchen will commence. Since we won’t be up here next weekend, there may or may not be a blog for you to read next Sunday night. It depends on how much we get done before we head back.

In the meantime, please keep praying for my cousin’s wife who is still in the hospital with Covid. It’s been 16 days since she gave birth to her baby and she hasn’t been able to see him in person or hold him. Please pray that she will improve enough to be able to come home to my cousin and their beautiful baby, Josiah. She is making small improvements and every prayer you say is appreciated beyond measure!

Stay safe and healthy everyone.

That’s a wrap!

The den and guest bathroom are officially wrapped up and I am a happy girl! We’ve had a productive five days since heading back up here Wednesday evening. Let’s take a look at what we’ve accomplished, and I’ll also share with you some projects in process.

Starting with the guest bathroom. I mentioned we had something special planned for the mirror. Originally I had wanted to create an overall shadowbox mirror, but we had to modify it some thanks to the lighting we had chosen. If we had stuck with a shadowbox frame, it would have blocked some of the light from our light fixture. I really liked the idea of having a shelf at the bottom of the mirror, so we modified our plans and built a mirror frame with 3 sides which were flat and the bottom as a shelf. Because we do have a fairly high faucet, we had to build the mirror a little shorter than typical, but unless you’re really short it won’t be a problem. Just like the countertop, we used the walnut plywood with the veneer edge banding. I’m really happy with the end result!

Moving over to the den, we have everything complete except for the ceiling and trim along the ceiling. We can’t do any more of the shiplap on the ceiling until we gut the kitchen because of the lengths of shiplap and how you stagger them. I did the final trim painting on the fireplace and the windows that I didn’t get to last week. We finally hung our tv, our cordless bamboo Roman shades and even hung some art in the house. And what a difference it makes!

As we get closer to the kitchen renovation, we are working on a few final projects. You’ll remember that we opened up the stairwell and moved the door to the bottom. Eventually we will finish out the basement but until then, the door will keep the winter cold down in the basement. In the meantime, the basement is my painting/staining/polyurethaning/Pelotoning workshop! We still need to paint down the stairwell and add our topper to the pony wall surrounding the stairwell, which we will get to sometime this week or next weekend, and we will change out the risers and the treads. Currently the steps leading down to the stairs are crappy builder grade pine which isn’t usable. We bought red oak stair treads and matched the stain as best we could to the color of the engineered hardwood floors upstairs. we will just use MDF for the risers and paint that white. Back to the treads … I had sanded all of them a few weeks ago and this weekend I started the multi-day process of staining and putting polyurethane on them.

I also made some progress on the two remaining outdoor chairs. I’ve got them both sanded down and ready to stain/polyurethane. I’m not going to lie – I am very happy I’m done with sanding these bad boys! I’ll work on them during the evenings this week.

You may or may not remember that one of the modifications to my original design was for us to not make a built-in bookshelf but rather make a custom sized very long bookshelf to go along the den side of the stair pony wall. Here’s a reminder of my original design then my inspiration design.

Yesterday we started on the custom bookshelves. We love Ana White’s blog as it has all kinds of great woodworking project designs with step-by-step instructions, cut lists, buy lists, etc. Since we’re customizing this bookshelf by making it taller and wider (to work well with the height and width of our pony wall) we had to adapt the plans. But it’s still a great plan and a huge time saver not to have to figure everything out from scratch. We are using construction grade pine 2×2’s, 2×4’s, 2×6’s and 1×12’s to make it. Because we cheaped out on the materials, partially because they’re easier to source, we did take the extra time to plane and joint the materials to make sure they were straight and smooth for our construction.

To give you a better perspective of what a difference using the planer and jointer makes, here’s a look at the before and after of the material.

Once we had our materials prepped, it was time to rip them to width and cut to length.

The bookshelves use pocket holes to assemble them without any visible screw holes. If you’re not familiar with pocket holes, here’s a good visual for you. Kreg has an adjustable jig you use to clamp the wood into, then you use a drill bit with a “collar” on it to keep from drilling too deep. When you use it, you have a hidden way to strongly join two pieces of wood together without any visible signs of the screw (at least from the top!)

To assemble the bookshelves, we started with building the “front” and the “back” of the bookshelves. We joined the 2×4’s to the 2×2’s at a 90 degree angle and created the first of three sections for each side.

Then we connected the three sections to each other, creating the front and the back pieces.

Once the two sides were done, it was time to attach the two sides together with the shelves. We butted the shelf up next to the 2×2’s lengthwise and screwed them together. It’s a good thing Keith has long arms because this was a little awkward to connect the middle shelves.

Once we had the shelves put together on the two sides, we put additional 2×4’s on the ends

At that point, we decided to call it a day. This week we will finish up the sides by adding the X’s and build our top piece which will just be screwed on from underneath. We’ve decided to stain the top a medium brown stain and the bottom a grey stain. I’ll work on those separately during the week once we finish up construction. By next weekend you should be able to see the final results. We also have a similar project up our sleeves but will wait to share that until we actually start on it.

Last but not least, for the past several weeks, something exciting has been going on outside. Paint. Yes, I’m excited about paint! I won’t show you the front yet, but here’s a sneak peek of what’s happening.

Cheers to all of you! Please stay safe, wear a mask and look out for others. And for my prayer warrior friends, please say a pray for my cousin’s wife who is in the hospital battling Covid.