Our latest project

Hi everyone! Well, it’s been a minute … or more realistically, about 6 months! Life has changed a lot around the Heffron house, but we are still doing projects. The only difference is it’s taking us longer to do them. Since I last wrote, I have retired from my full-time job and am now working part time for Shepherd Center, a rehabilitation hospital across Peachtree from our neighborhood. Now that it’s autumn, I can walk to work! Keith is still traveling to and from Miami a lot, and we are still going to the mountains as often as we can.

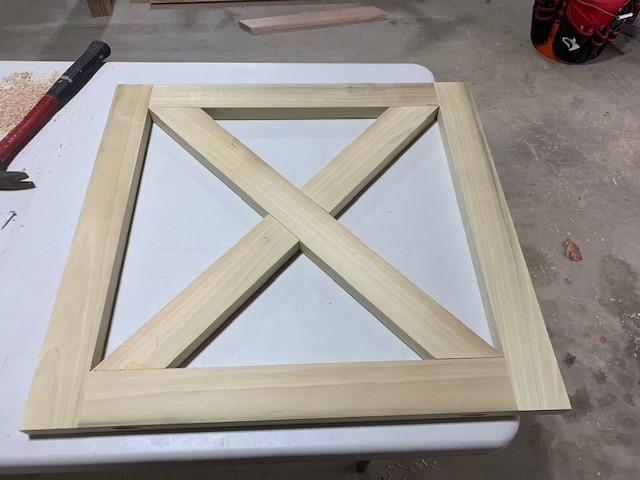
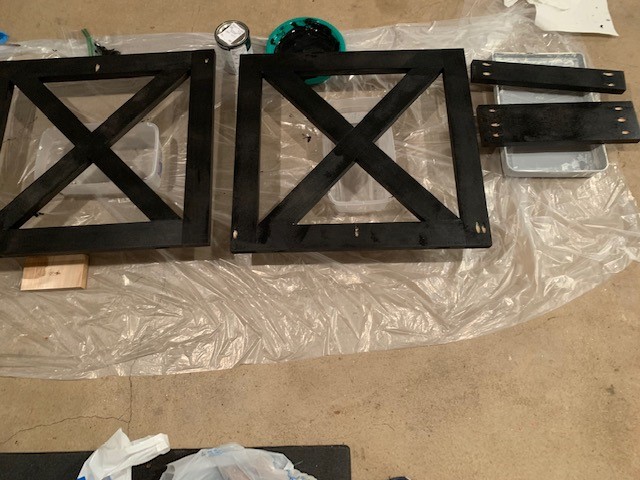
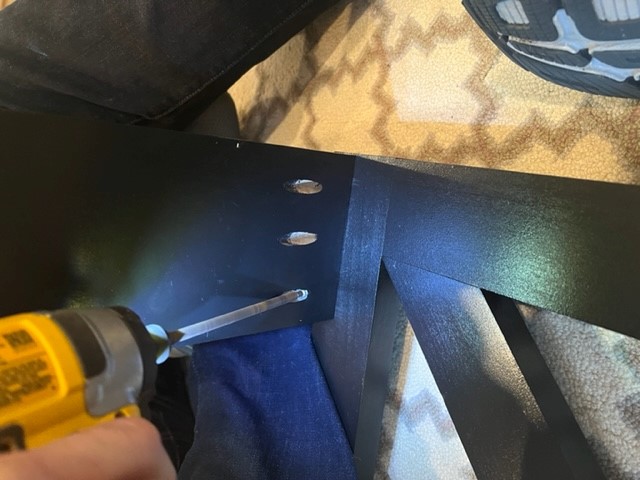
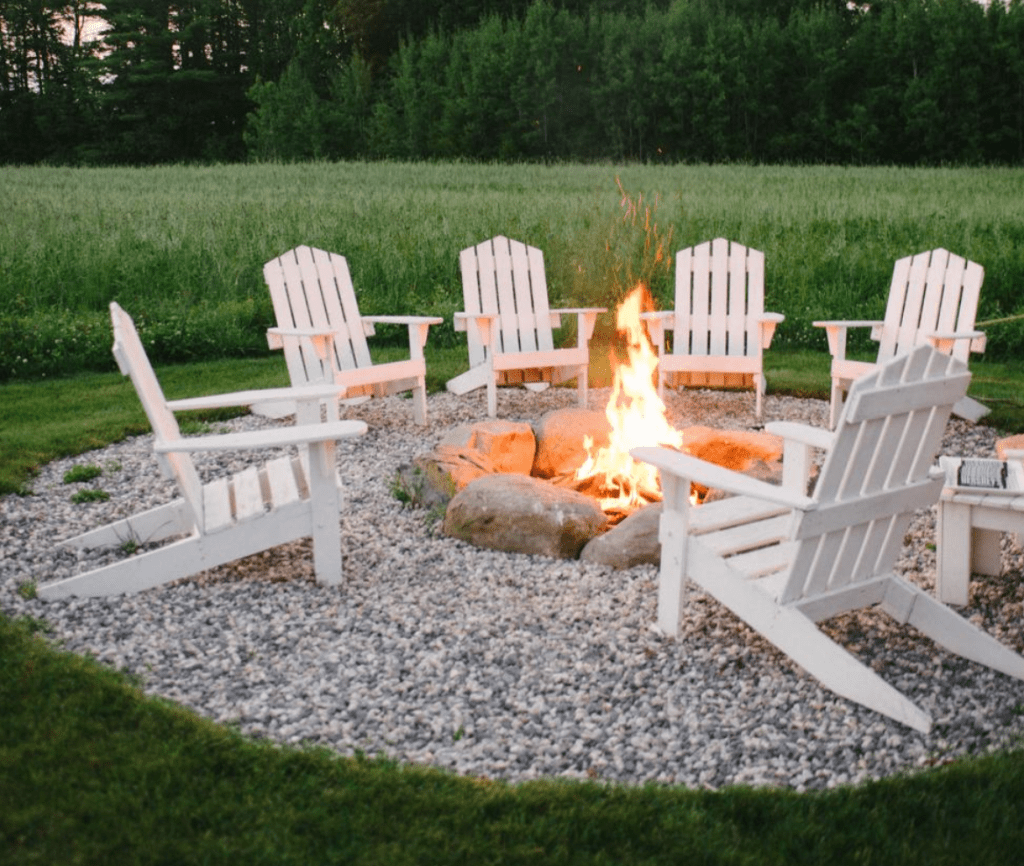
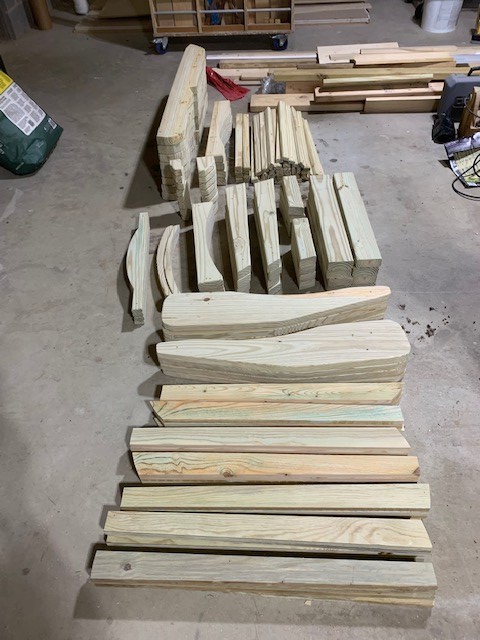
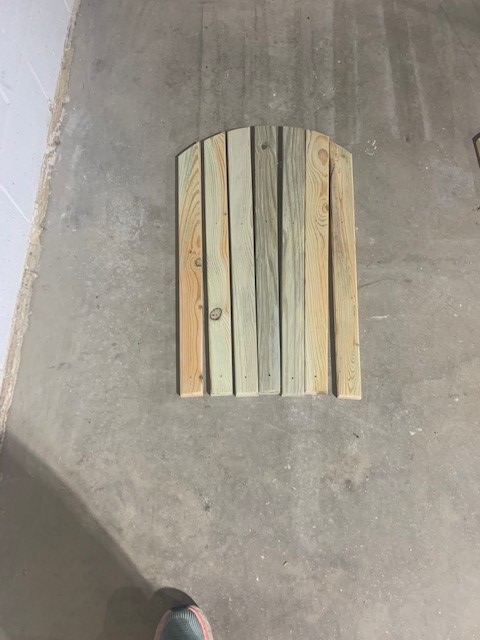
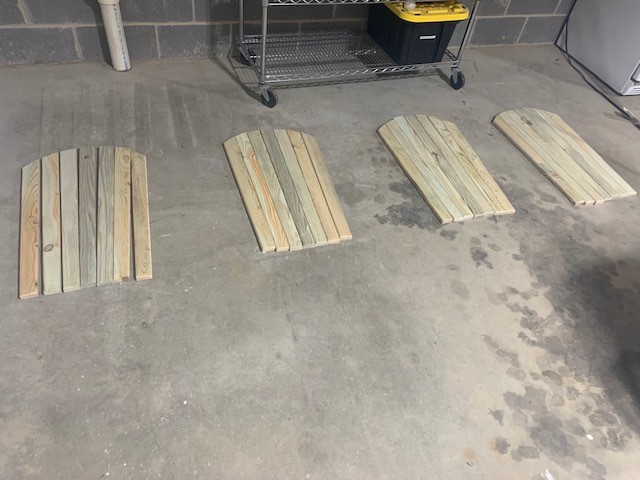
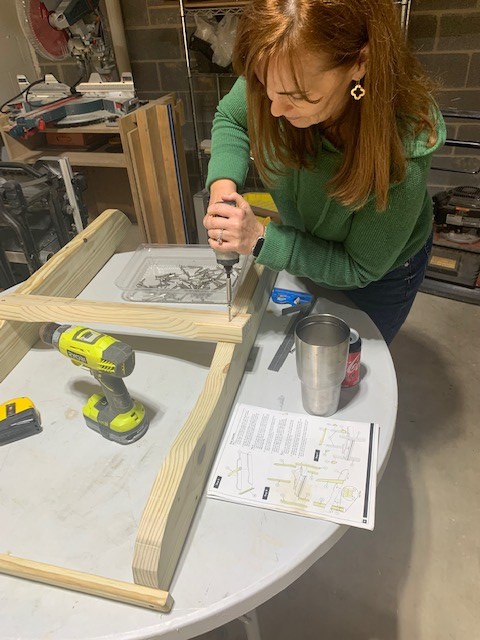
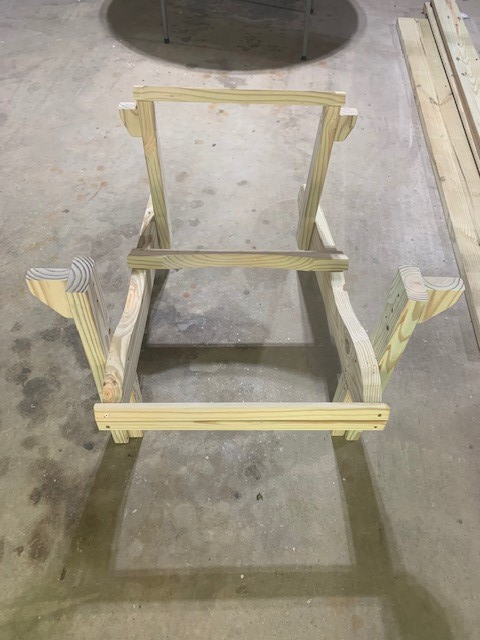
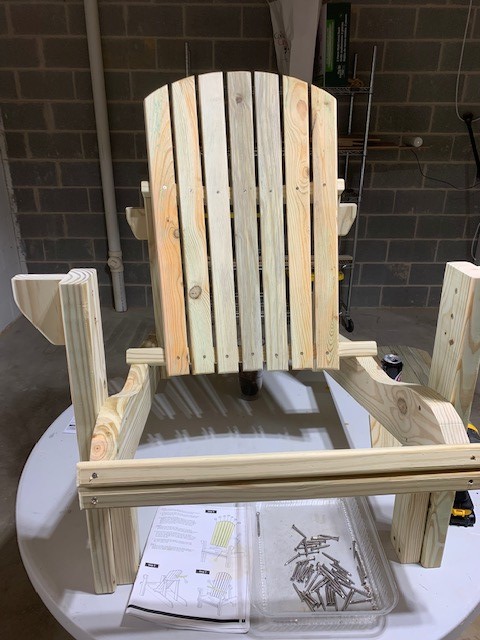
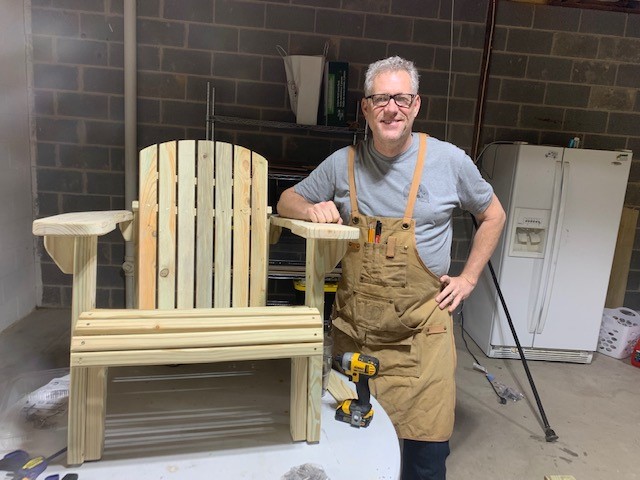
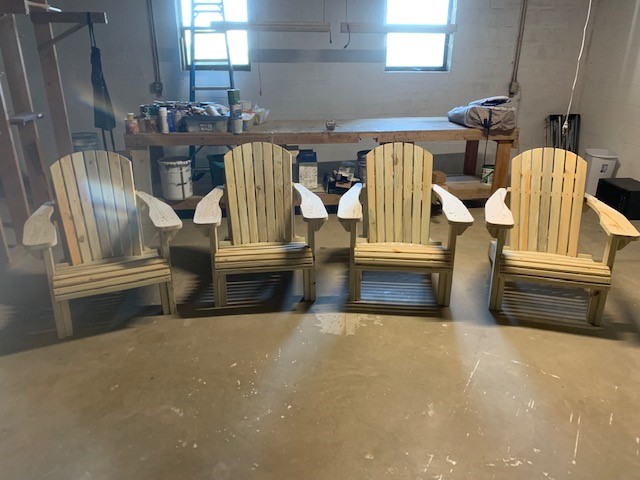
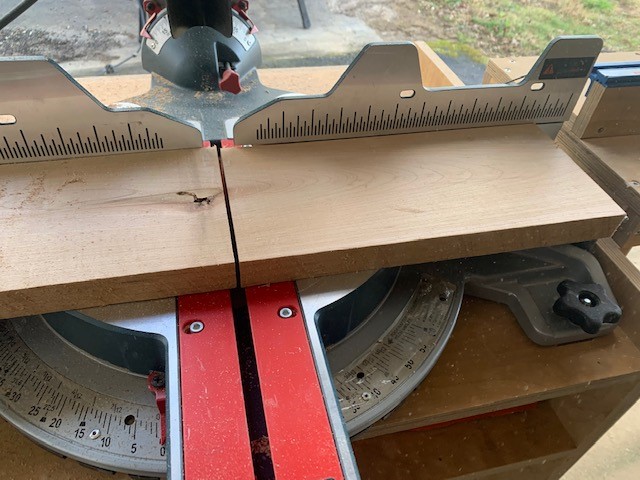
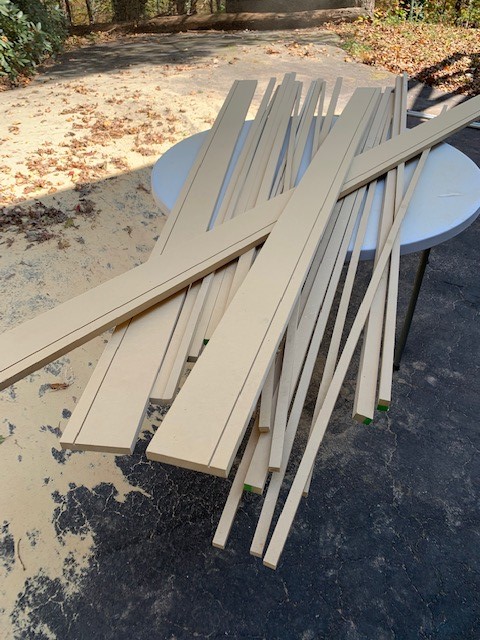
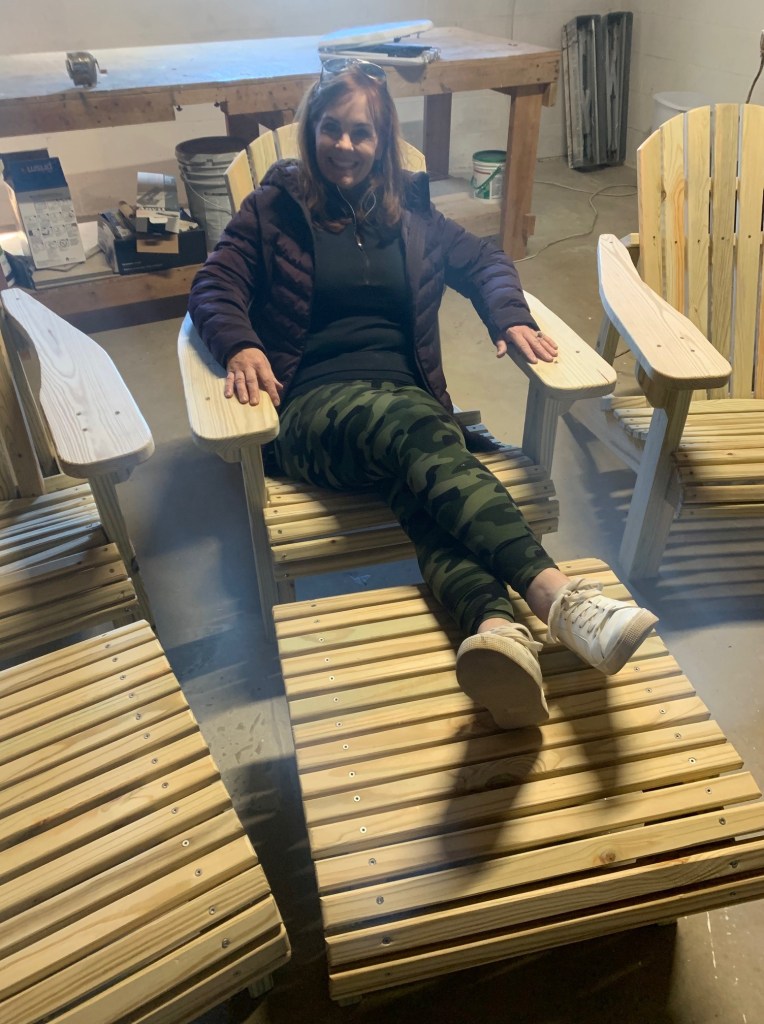
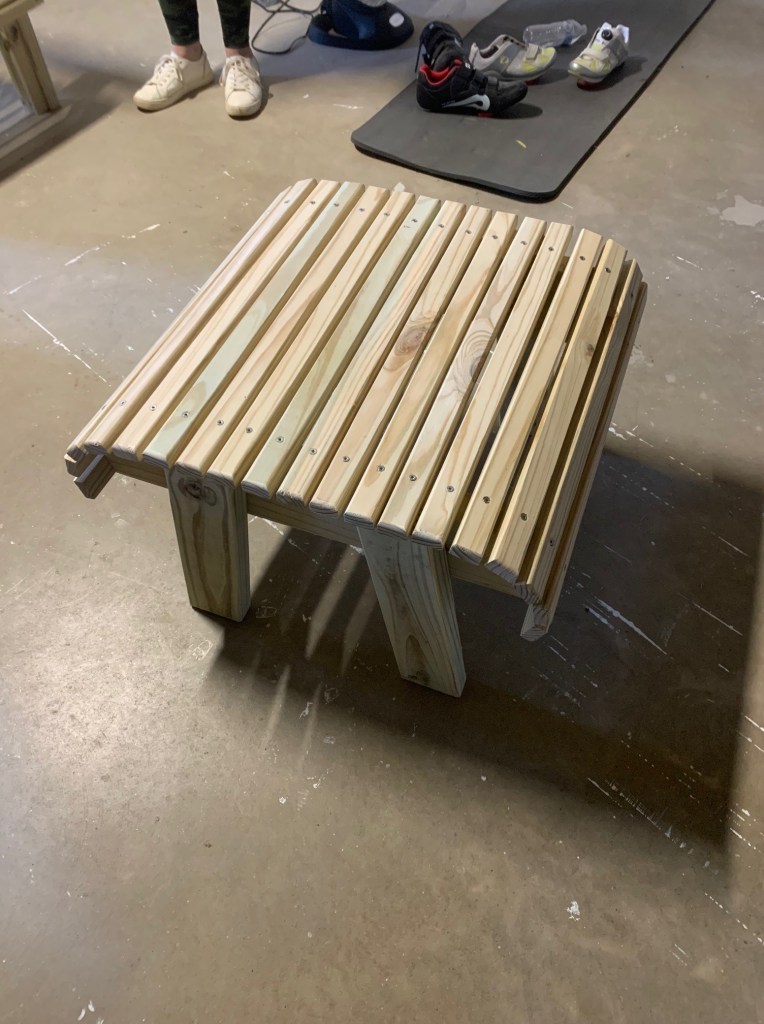
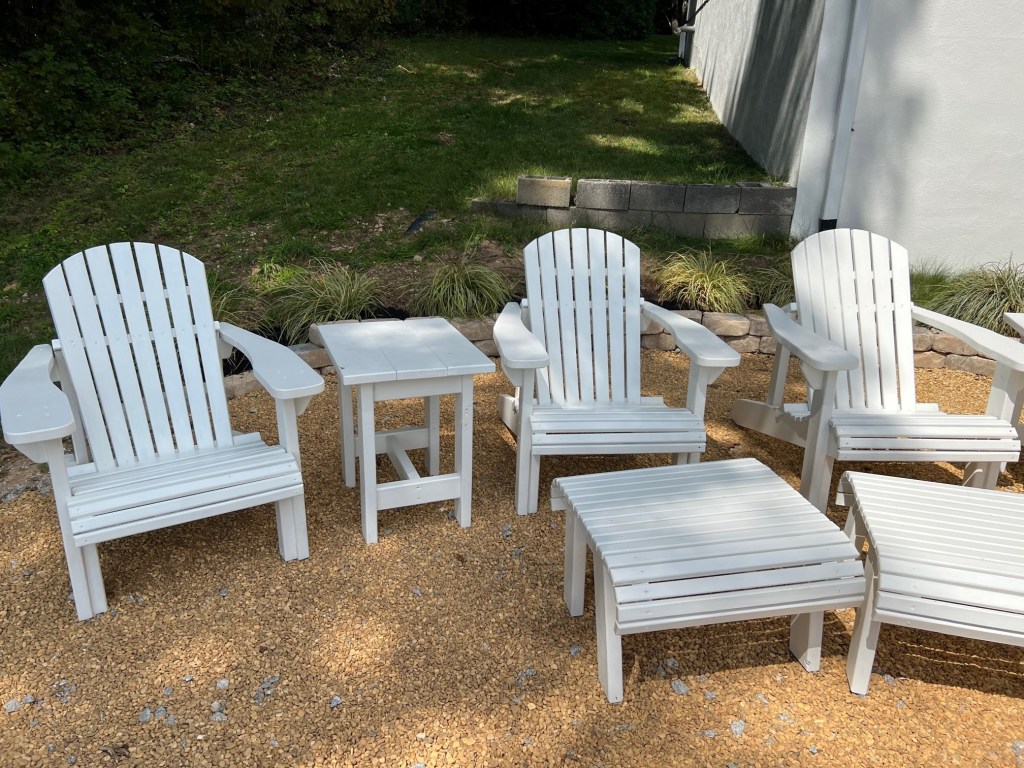
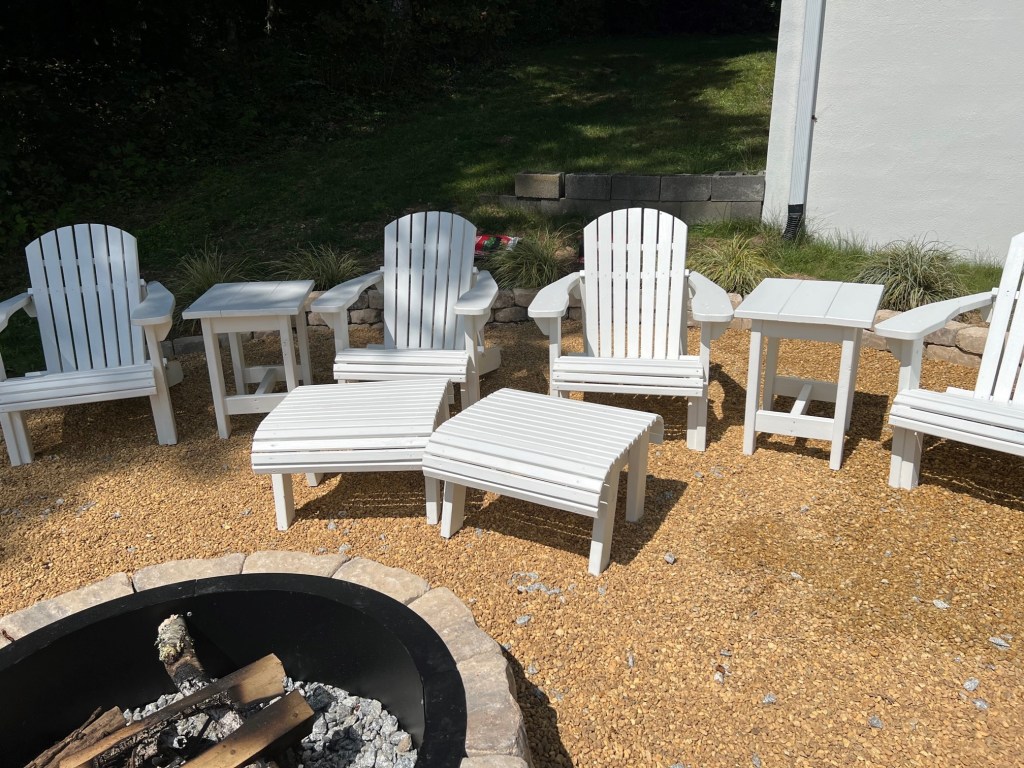
You may remember about 10 months ago, I revealed our Adirondack chair project. They turned out great and we were so pleased. We ended up building a couple of ottomans and end tables in addition to the four chairs. Painting them wasn’t very fun, but they look fantastic and you’ll get to see them in just a minute.

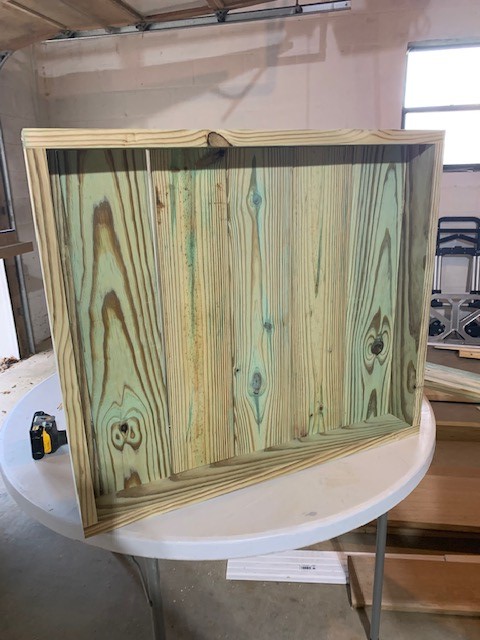
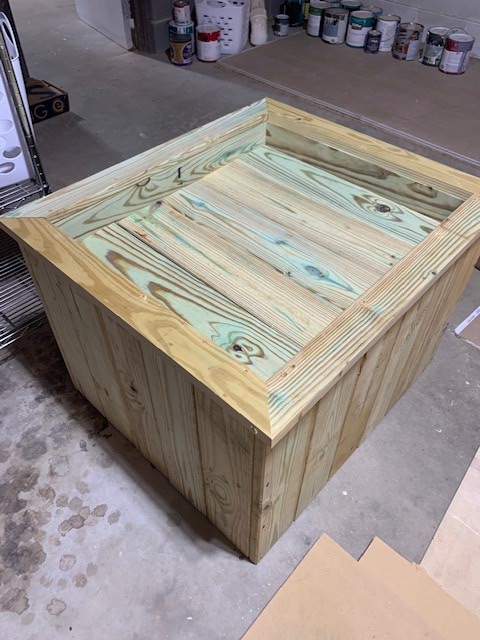
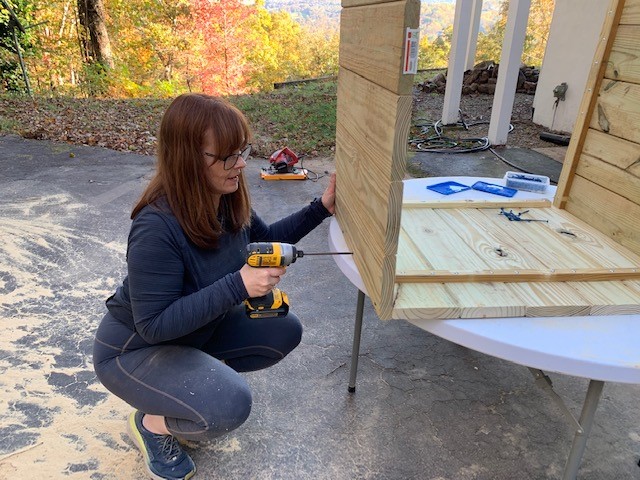
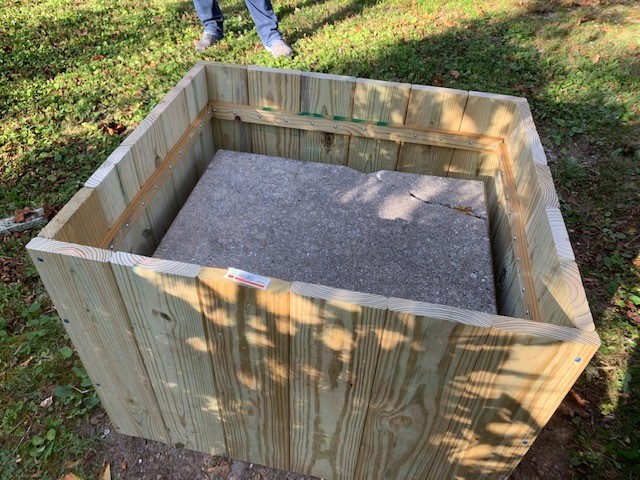
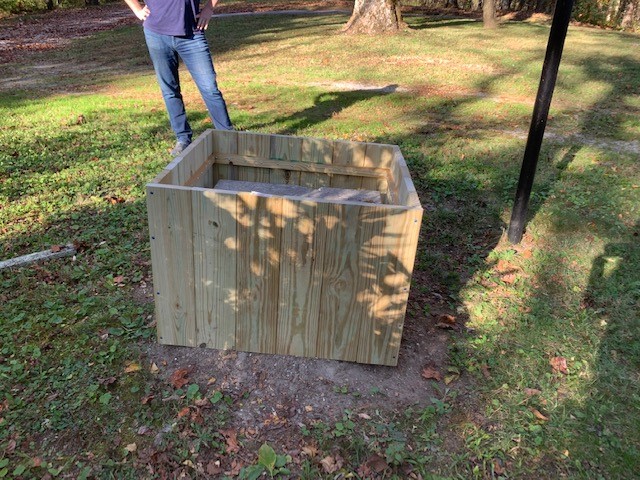
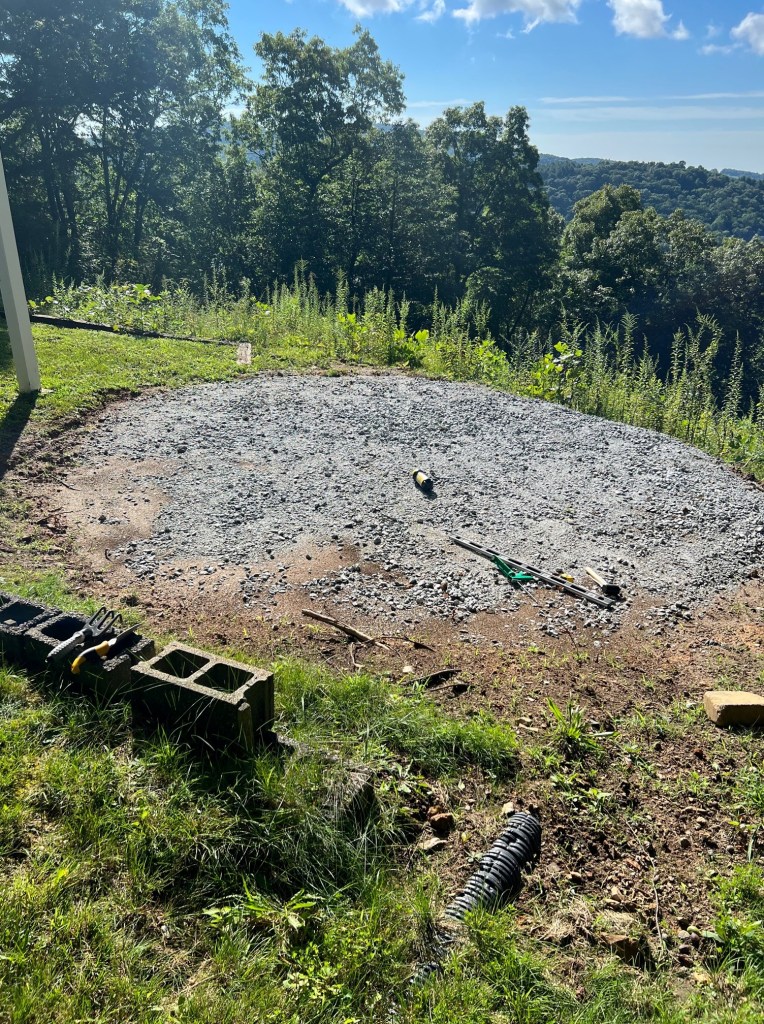
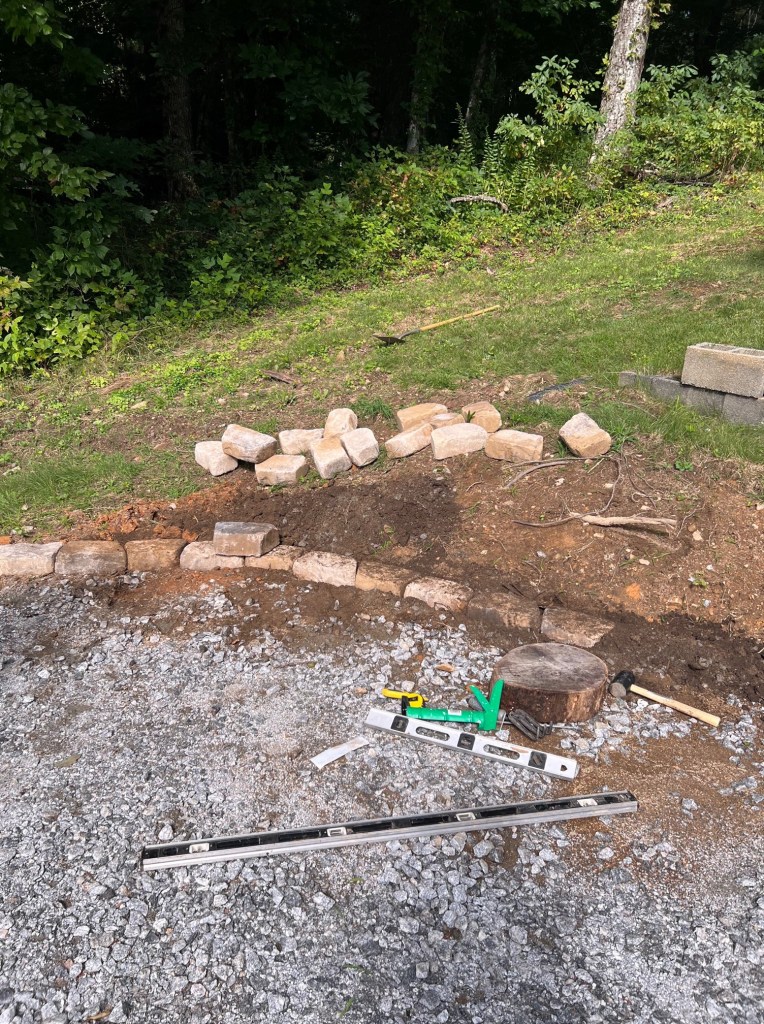
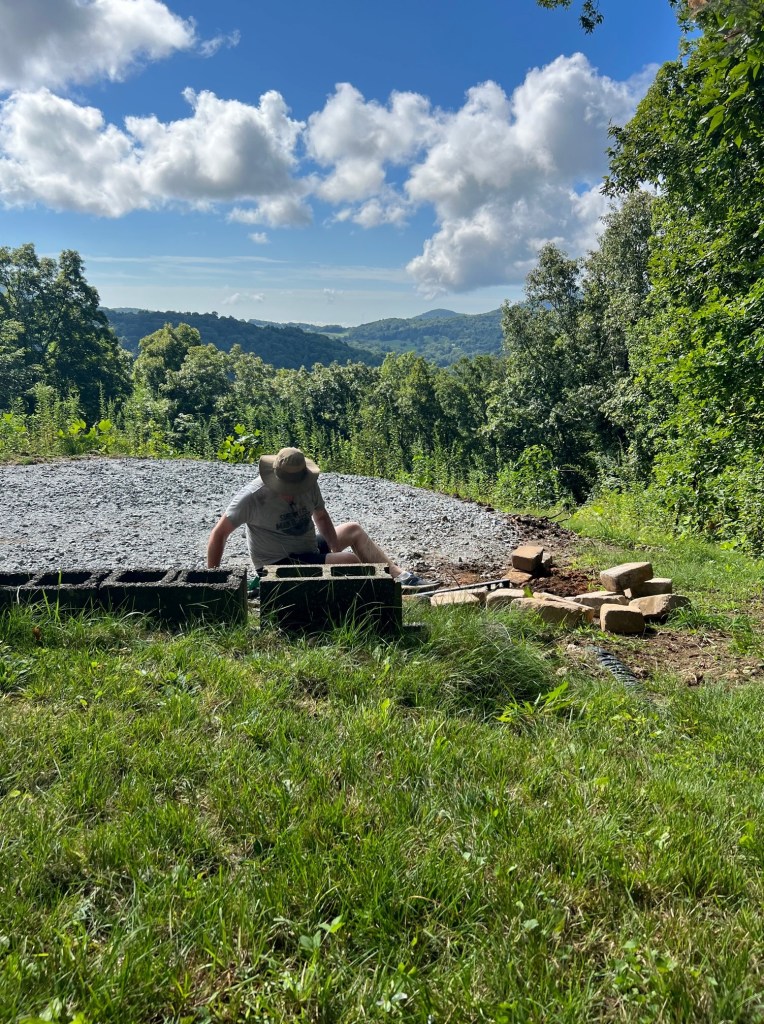
When we started on the Adirondacks, we knew we’d be moving our fire pit to the “back yard” of our house so we could enjoy a fire and a view. We had been waiting on when we could get a new gravel driveway in for them to also gravel out an area for the fire pit. Well that finally got completed in August and we were ready to go. Or so we thought! What I realized the weekend after they put in the fire pit gravel was that we needed to build a small retaining wall for the back of it to keep mud and dirt from washing into it. Scope creep! Oh well! It wasn’t that hard and we’re super pleased with the results.

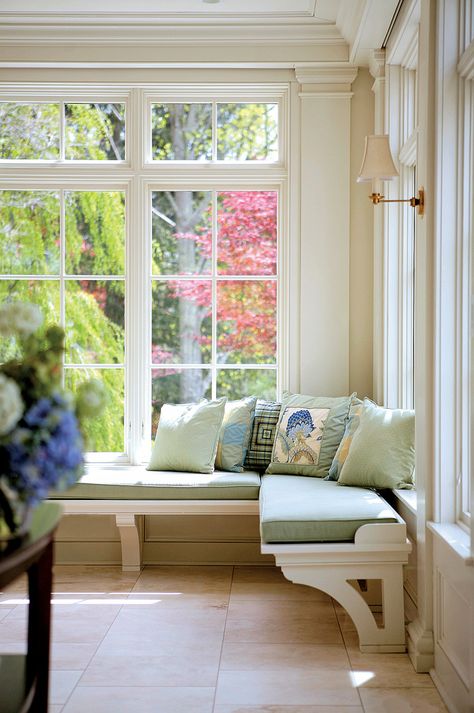
As a reminder, here is my inspiration design:

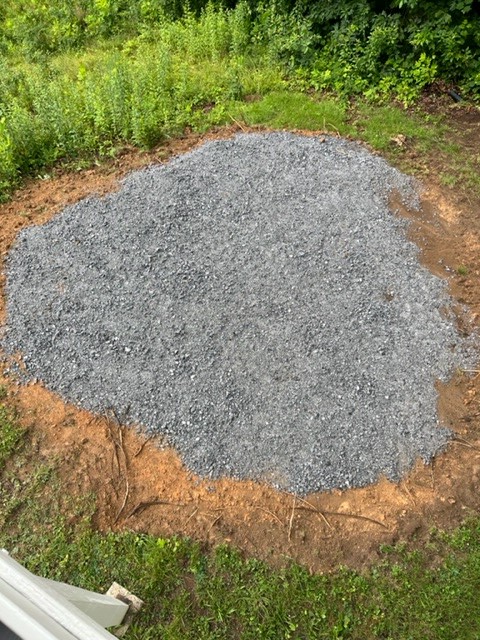
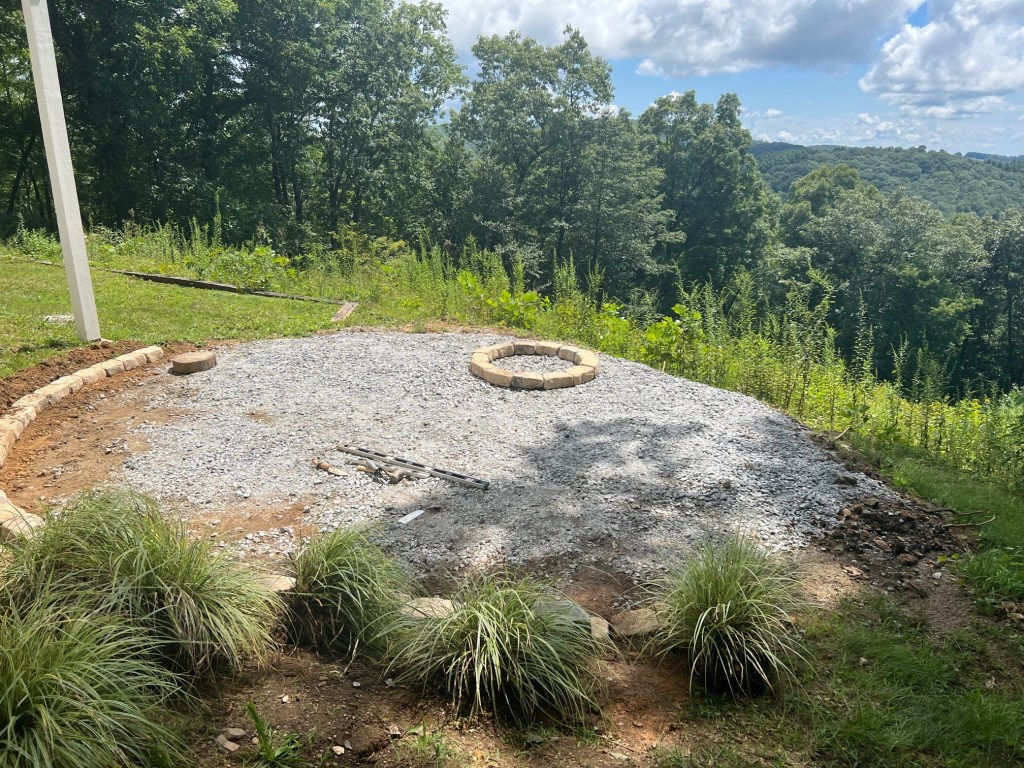
Here is what the gravel area looked like when I realized that we’d need to build a retaining wall. It started as a circle but wasn’t exactly looking like one after a couple of rains!

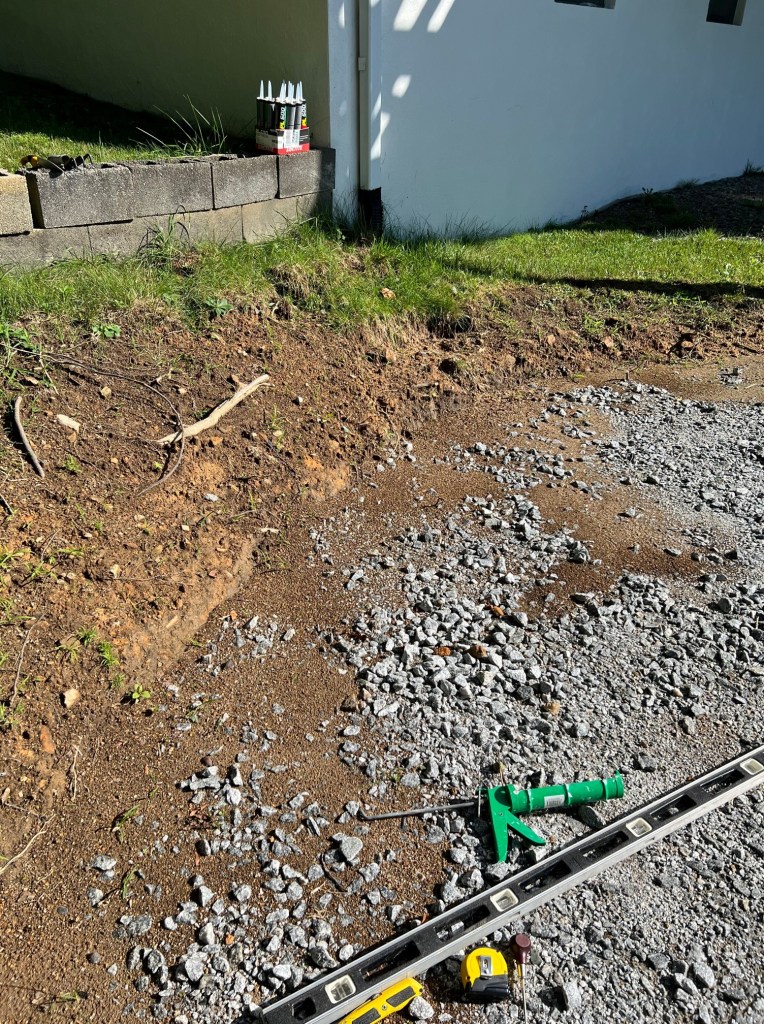
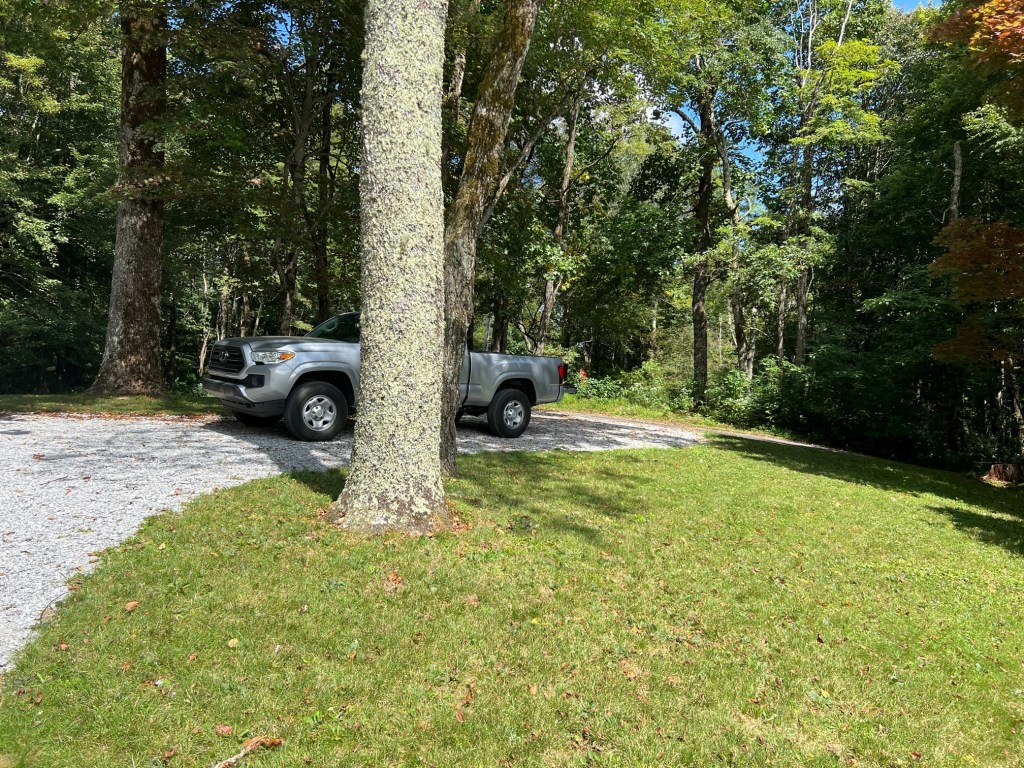
Needless to say, not only did we have to bring in stones for the pit, but we also needed pea gravel to cover the street-grade gravel and fill in where the mud was. That’s where our pickup came in handy!

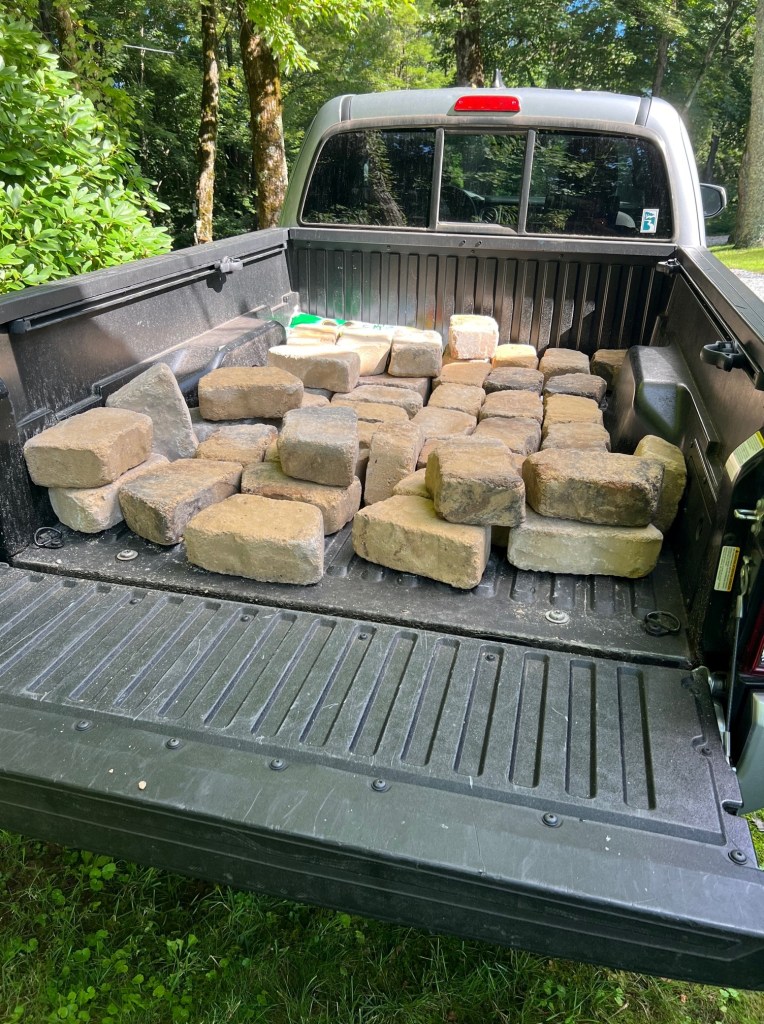
Let me tell you, those stones are HEAVY! I counted that as my workout for the day. I carried them down and Keith laid them.

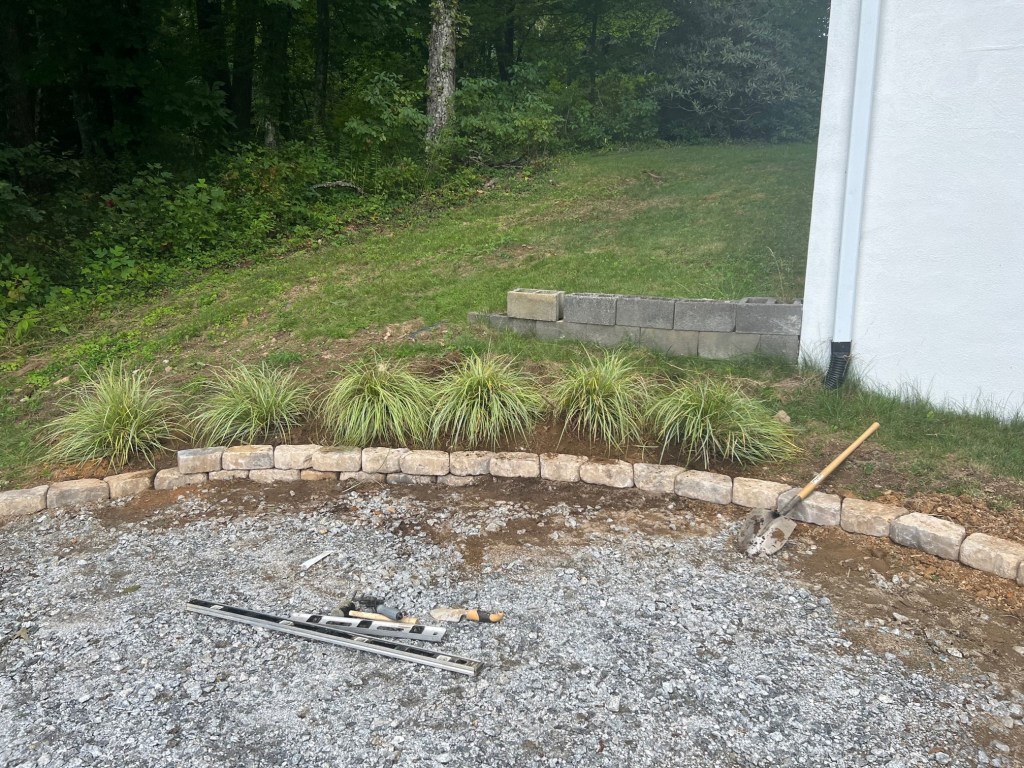
The ornamental grass is recycled from our house in Atlanta. We had to have a tree removed and those were near it so we went on and dug all of them out and transplanted them in the mountains. We’ll see if they survive the winter. I do also need to plant something in front of the other very unattractive cinder block wall. In due time! 😉

Now for the big reveal. One of my first friends in Atlanta from 30 years ago came up a couple of weekends ago with her husband and we wrapped up the project then. That’s when we built the actual fire pit, which in the scheme of things was the quickest project! Thanks Nita and Ron for the help! What do you think?

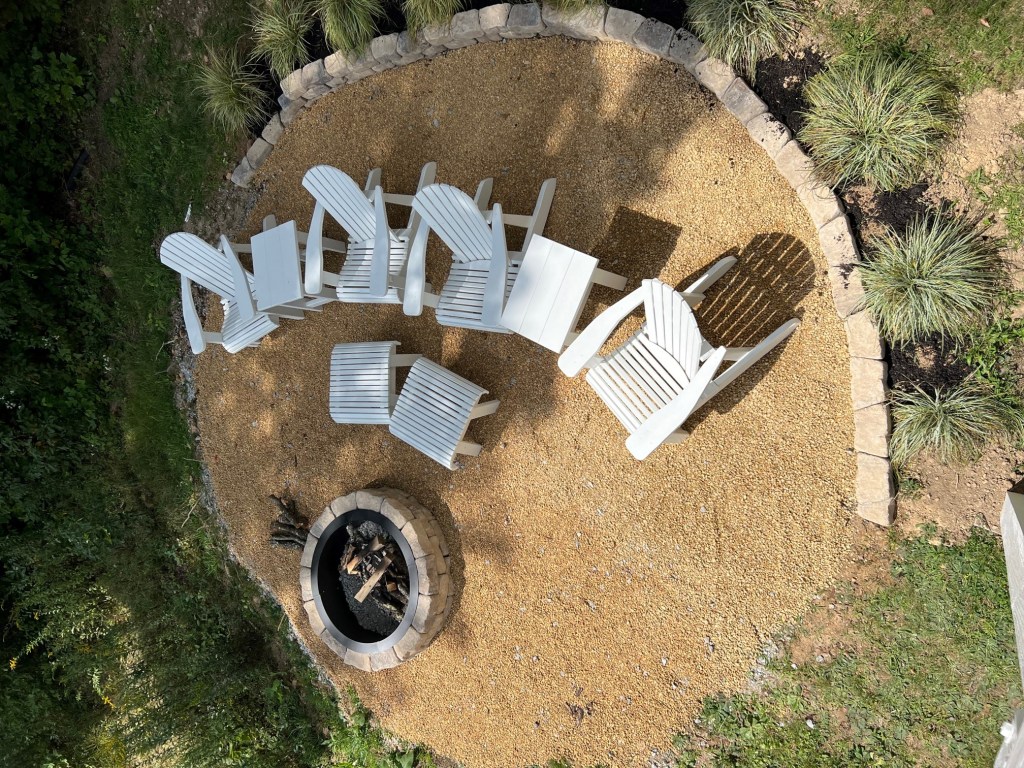
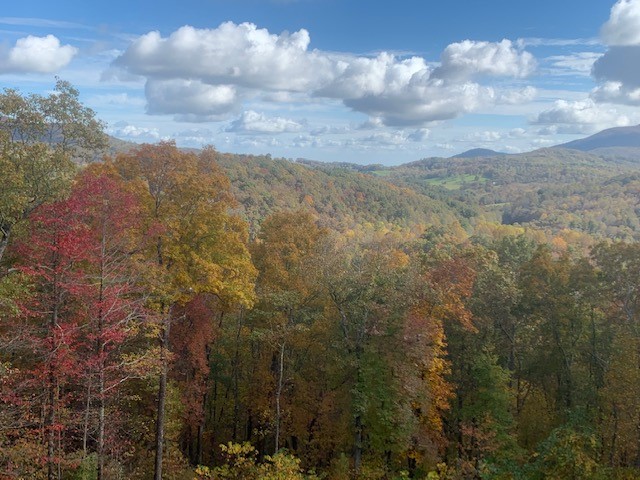
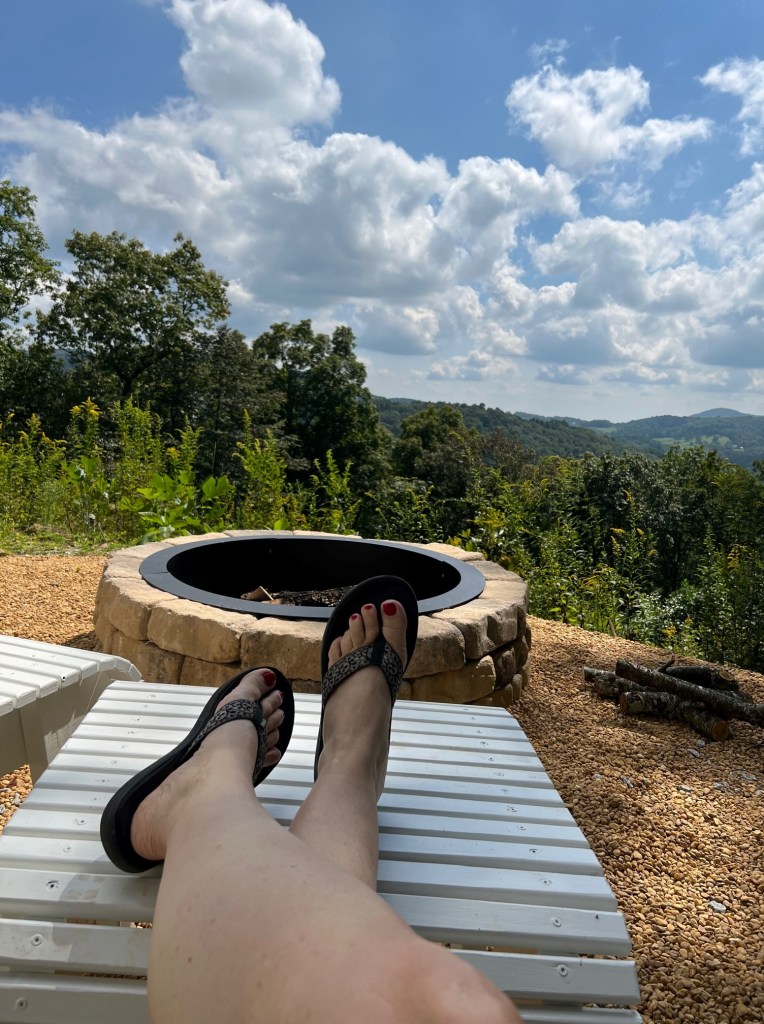
After all that work, it was time to enjoy the view!

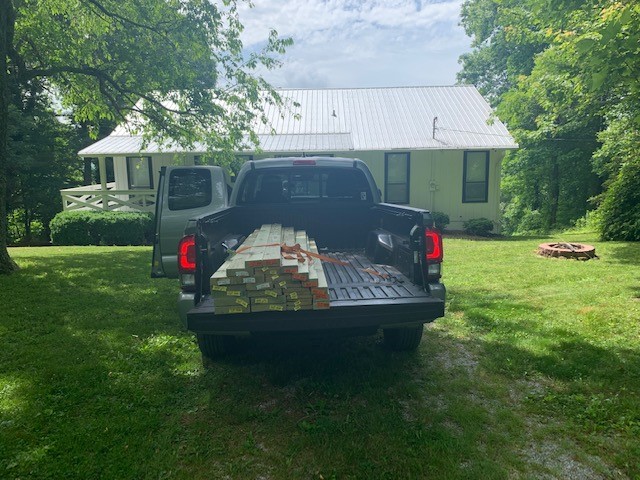
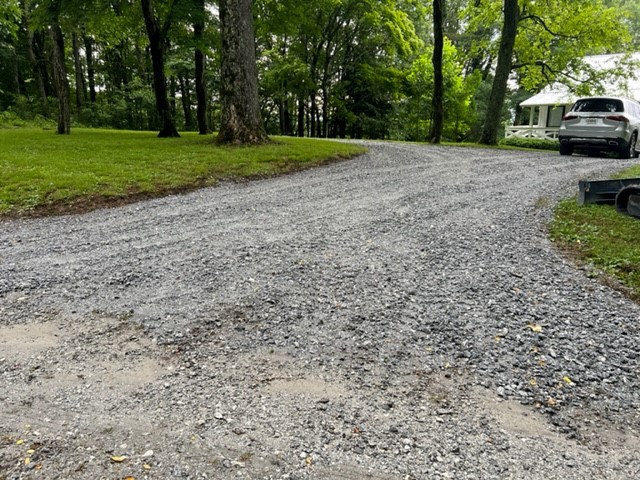
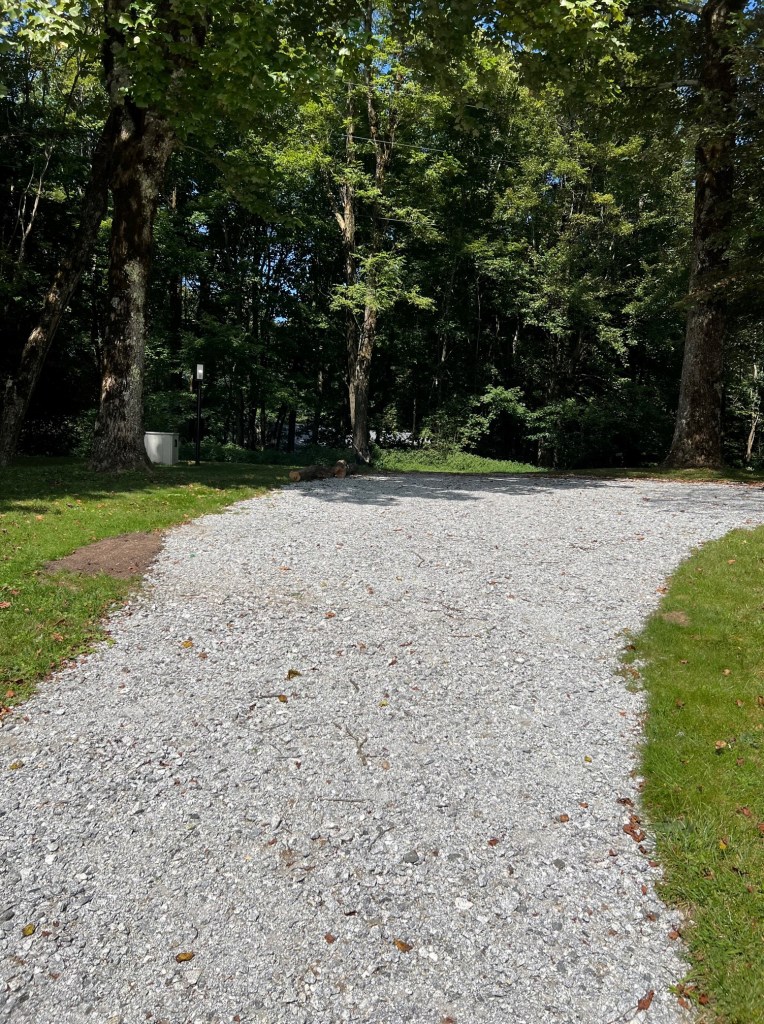
I mentioned that we also got a new gravel driveway put in. I’m so happy with it too! I’ve wanted to do it for a while but it took a long time to get on the schedule to get it done. Our real asphalt driveway is great if you want to go to the garage but otherwise it’s far away from the house and a treacherous walk to get in the house from it. I envisioned a driveway we could pull directly up in front of the house with and also a turnaround. It turned out so great and I’m thrilled I don’t have to walk through wet grass to get to the front door anymore. It also reduced how much I had to mow! 😉 Here are some pics as they were starting on the project.

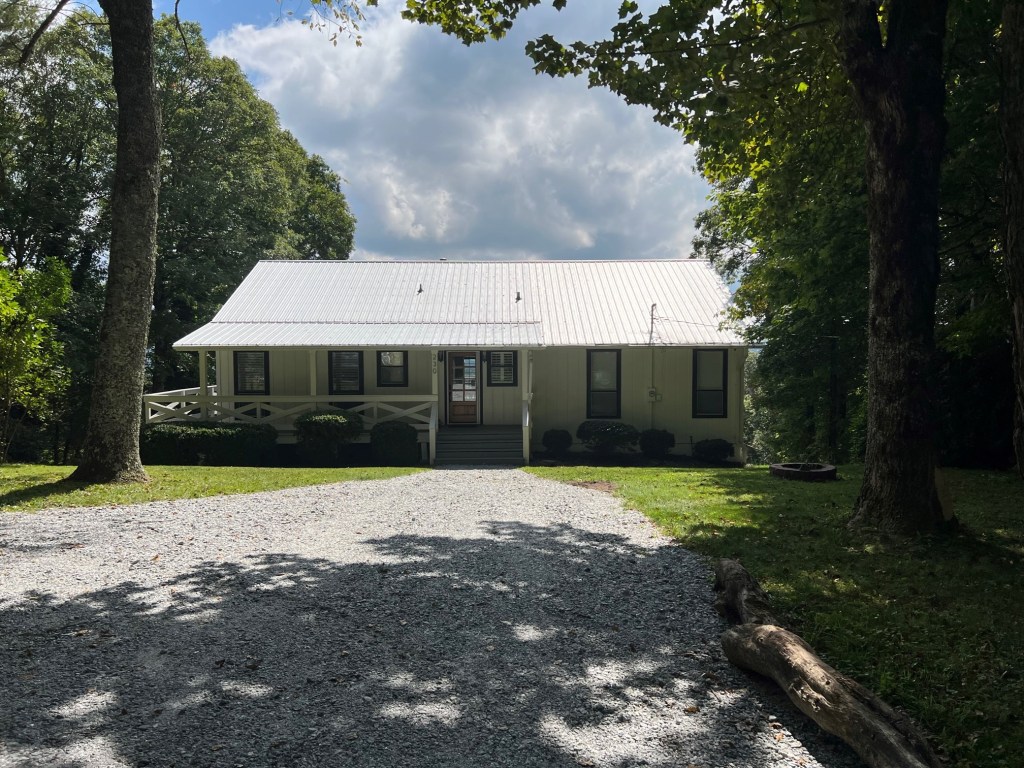
And here’s the end result!

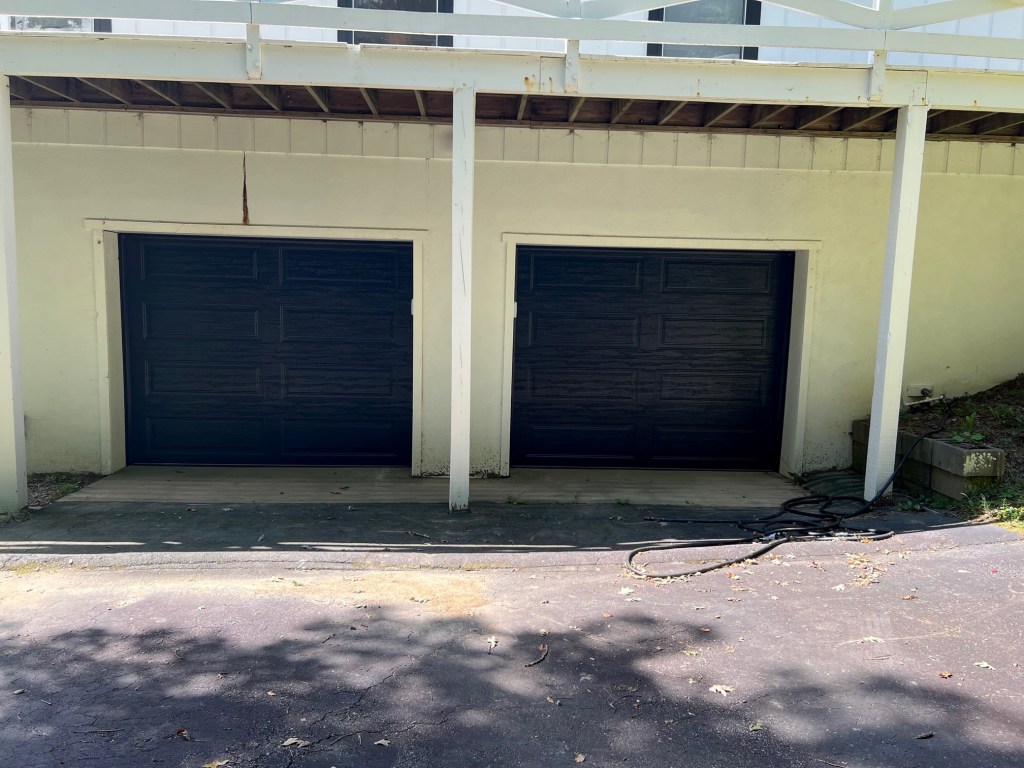
Last but not least, we finally got in our new garage doors after a long supply chain wait. Ignore the weird black line above the left door – we’ve got to clean whatever that is off! I’m so happy. These are safe and secure as opposed to our old nasty ones!

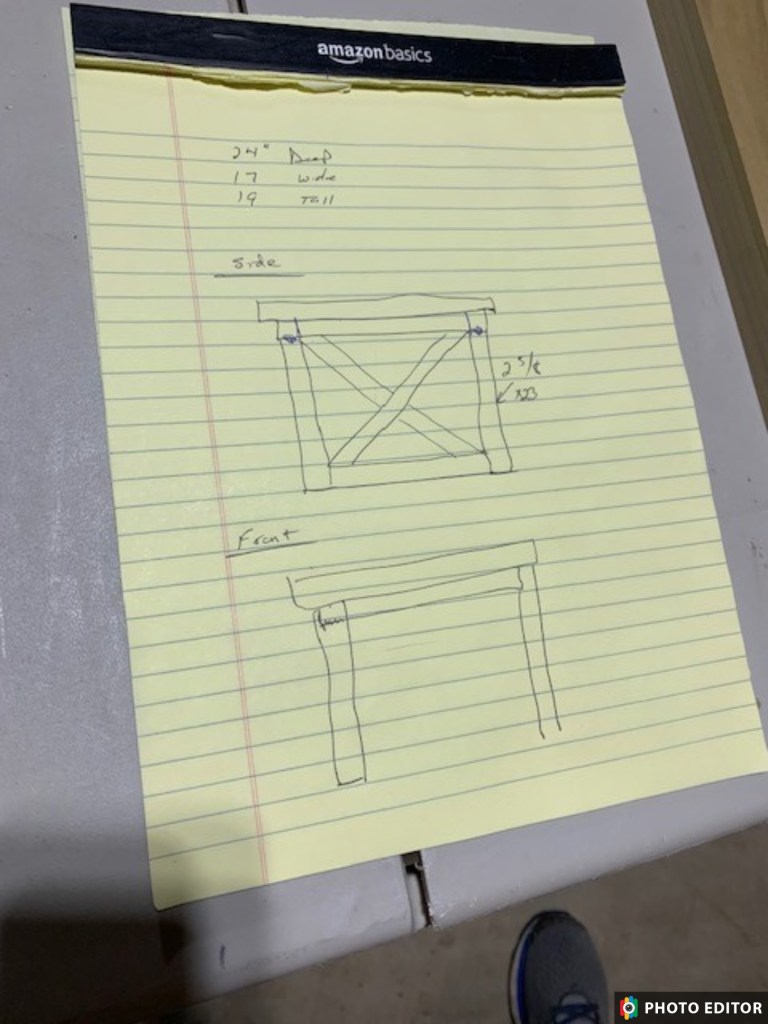
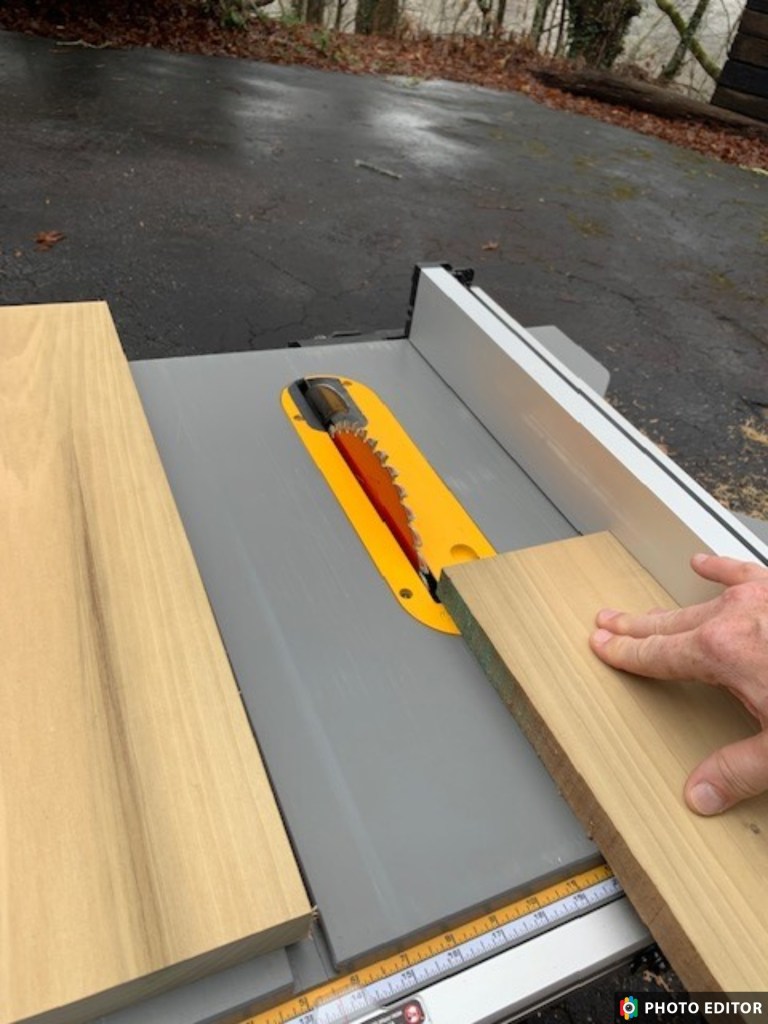
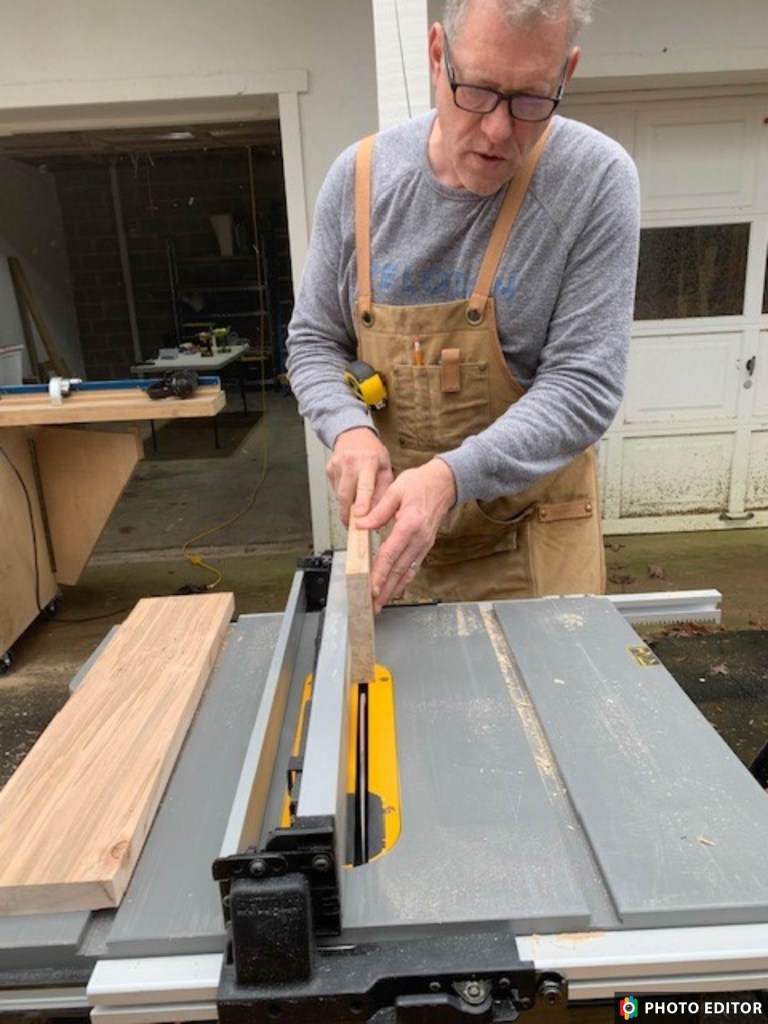
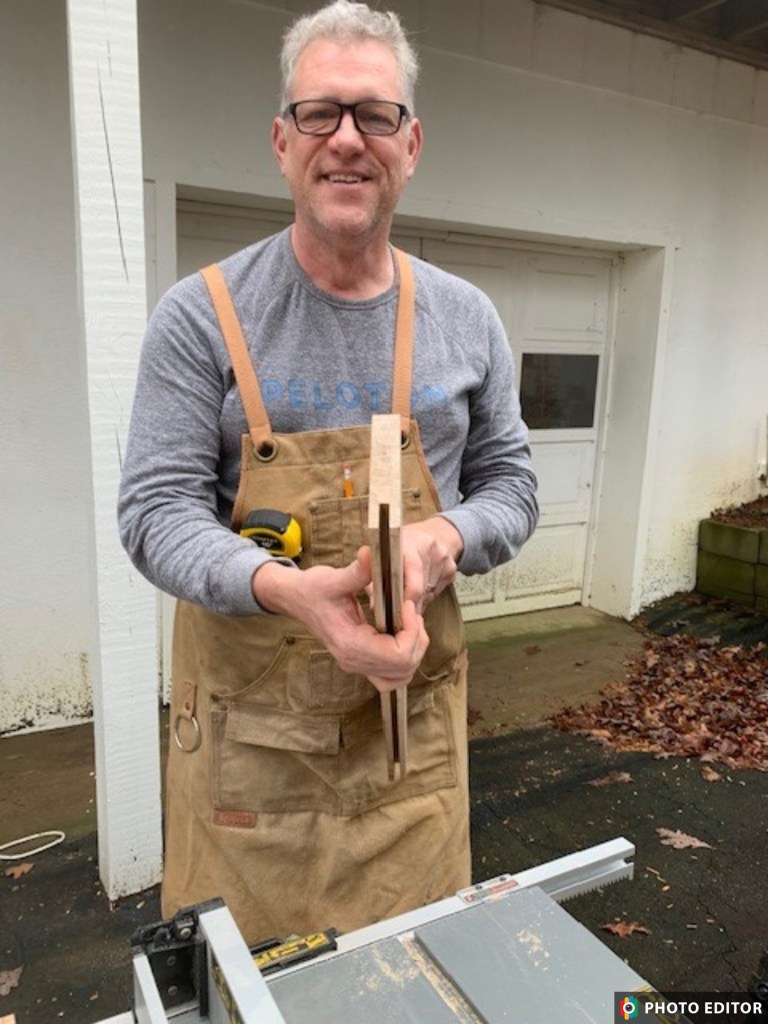
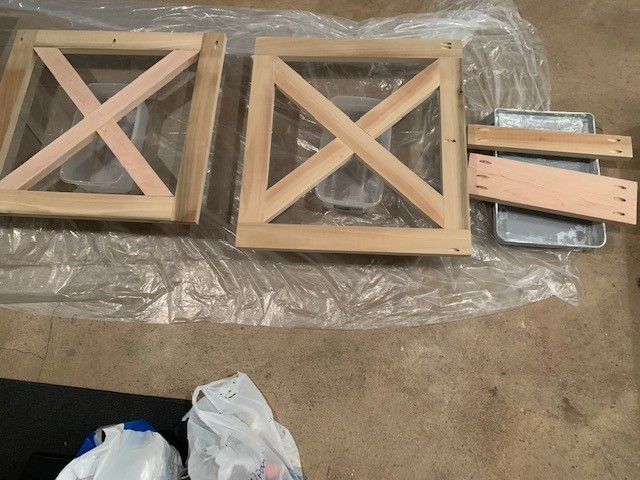
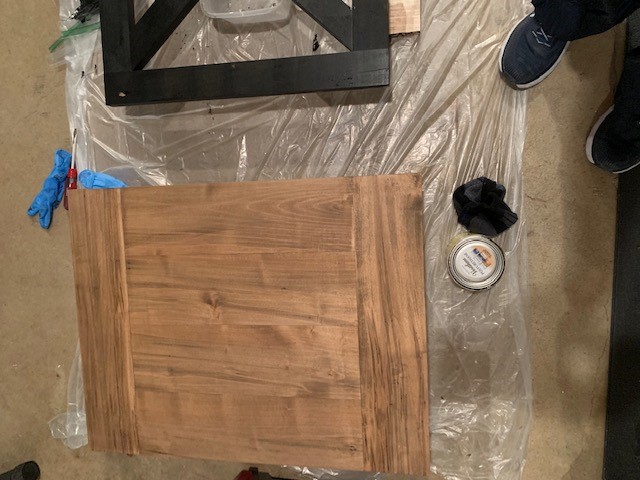
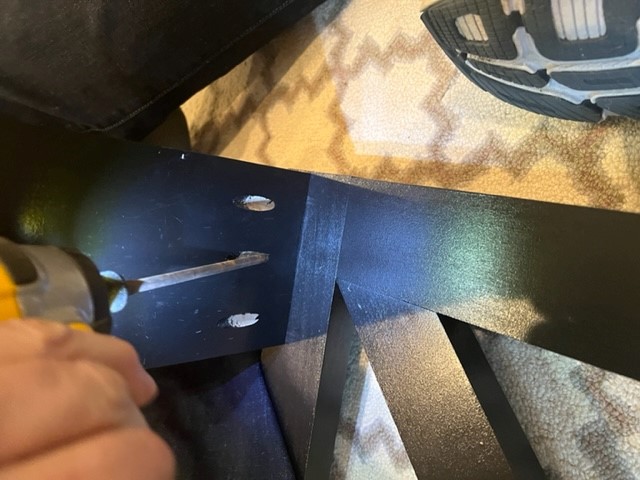
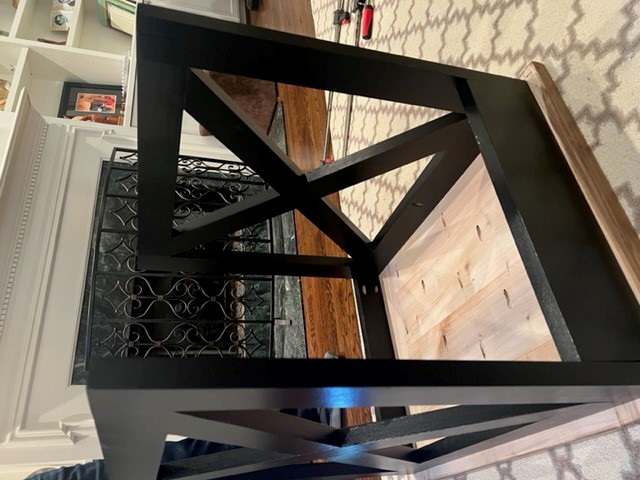
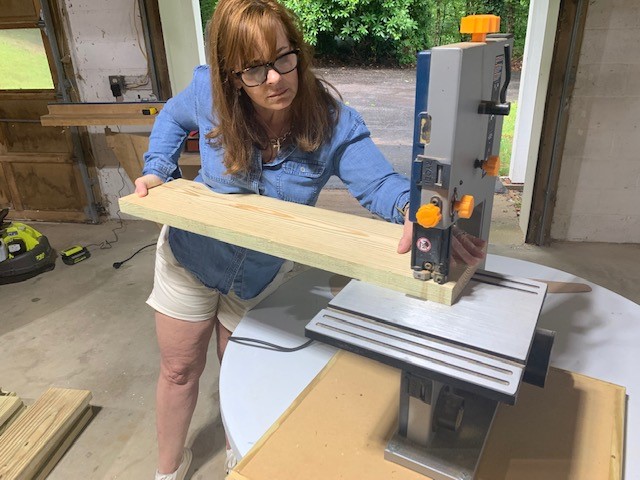
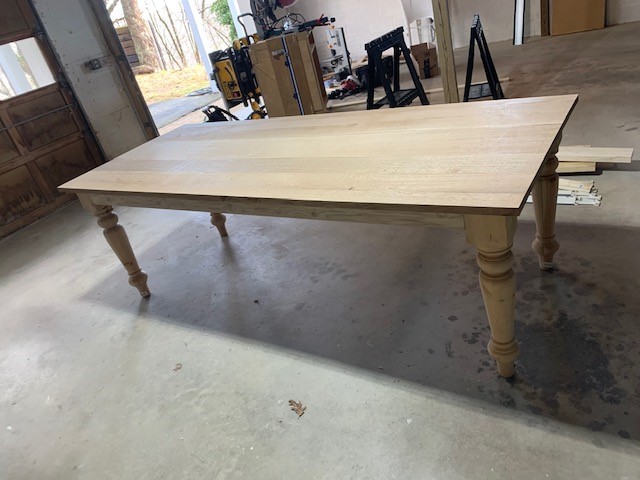
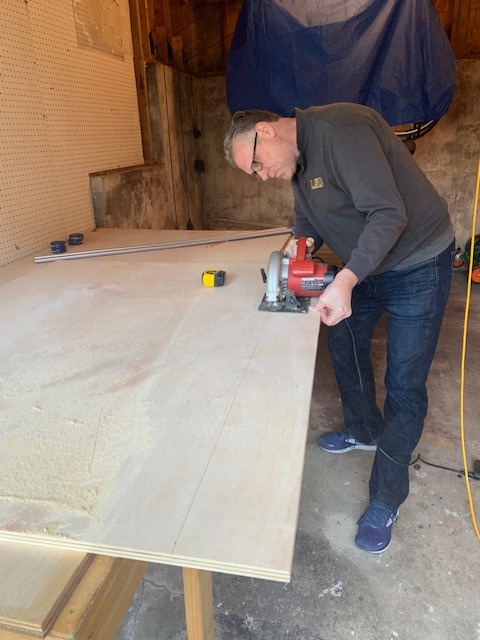
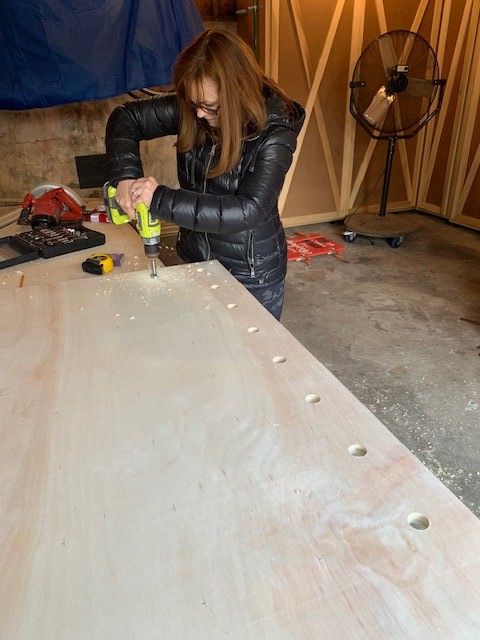
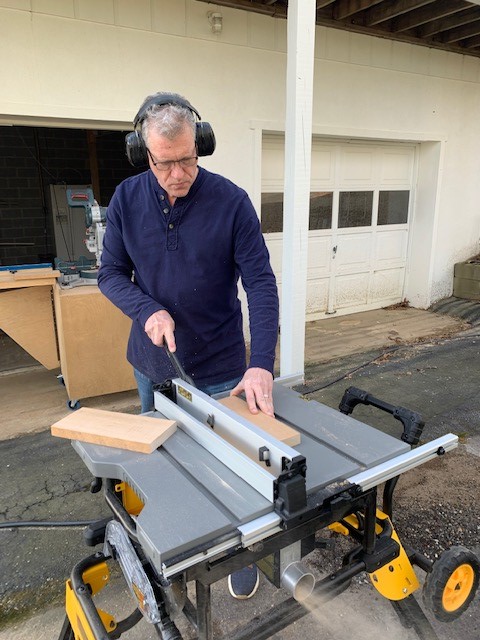
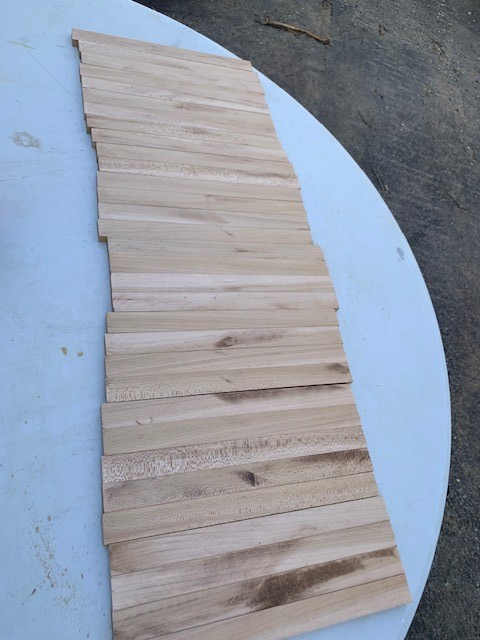
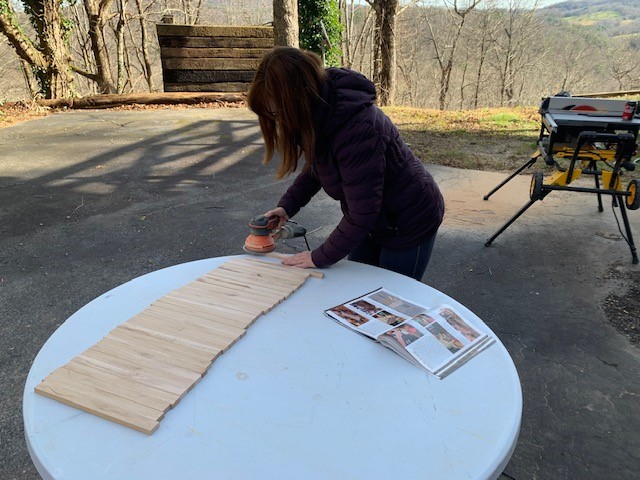
That’s a wrap! For those of you wondering what our next project is going to be, we’ve decided to build a dining room table for our Atlanta house. We have yet to pick out the wood but plan to do that soon! So stay tuned for more projects At Home with the Heffrons!

One of my favorite projects!

Happy New Year everyone! We’ve both been busy with work and travel but found some time over New Year’s weekend to work on what turned out to be one of my favorite projects!

As a background, my Christmas gift from Keith is to redecorate my office which also serves as Chloe’s room and occasionally a second guest room with its pullout sofa. I’ve had an end table next to the sofa and came up with the idea to create a cover for Chloe’s crate which would allow it to act as an end table. Prior to this project, Chloe’s crate sat in front of some built-in bookshelves which always made my office look cluttered and took up more room. So this idea was a win-win!

Some searching on Pinterest gave me an idea of what I wanted, so with Chloe’s crate measurements in hand, Keith & I started planning the project.

Once we finalized the design, we talked about what kind of wood we would want to use. Thanks to our friends Sandy & Jack, we had some leftover hardwood they had given us, so we knew we could use that for the sides of the table, but we wanted something special for the top. So off to one of our favorite places in Atlanta, Carlton’s Rare Woods and Veneers. They have some amazing pieces of wood there for almost any project you could think of. You may remember that last year we built a table for my sister Susan and the top was a gorgeous white oak which came from Carlton’s. But back to Chloe’s table. We didn’t want to break the bank with super exotic woods and found a couple of beautiful Ambrosia Maple planks which would provide us more than ample wood for the table. Carlton’s has a serious planer, so we had them do a few passes on the wood just to make sure we liked what it would look like. Well, we loved it and brought it home that day.

Later that week we headed up to the mountains and got to work!

In case you’re wondering, Keith does all of the work with table saw after a little incident I had last year with it. Nuff said…. 😉 and yes I still have all of my fingers! You may notice that in that last picture above, there’s a channel in the wood. That’s because we wanted to do a breadboard finish to the ends of the top. Once we had all of our cuts, we assembled the pieces.

Notice that on the middle photo above, the wood is vertically aligned, and on the last photo we have the two horizontal pieces butting up to them. We used a tongue-and-groove joinery there which is called the breadboard as I mentioned before. While we were still in the mountains we went on and drilled all of our pocket holds so that we could assemble it back in Atlanta.

It’s been a chilly week here in Atlanta so I set up shop in our basement to finish the project.

I chose a medium stain color for the top and then put several coats of wipe-on polyurethane to protect it. The sides I just painted with a semi-gloss black. It took several coats but the finished product is amazing. Fast forward to today when we assembled it. We had the pocket holes already drilled so all we had to do was screw the sides into the top and the front and back ledgers in and we were good to go! We did make the back ledger lower so that when you slide her crate in, it will stop at the right spot.

And now, here you go! The final project which I LOVE!!!!!!!!!!!!!

That last picture on the right shows the breadboard joinery, which Keith is very proud of! And honestly we’re both proud of the project even though it was simple and quick.

I hope you enjoyed reading about this project as much as we enjoyed making it!

It’s been a while

Hi there! It’s been a while since I blogged last. I almost don’t remember how to do it! We joke that we had PTSD from the renovations on the house, and I’ll admit that it did slow us down from tackling any new projects. That and the fact that we’ve both been quite busy with work, finally traveling some, etc. A few months ago we punted on the idea to build out a banquette in the dining area, primarily because we just didn’t have the energy to do it. The good news is I already have the cushion if you know anyone looking for a long tufted cushion from Pottery Barn! 😉

But all is not lost! For those of you who love a good Heffron project, I think you’ll enjoy seeing this one! Today there is a firepit in our front yard that we fully intend to move to the backyard so it can take advantage of our spectacular view. It will probably be the spring before we tackle that project, as we need to do a lot of gravel work and the quote was a little higher than we were expecting. I’ve pinned a lot of great looking firepit areas and kept coming back to this one.

Sure, we could buy Adirondack chairs but why when we can build them ourselves? 🙂 We could have easily built more primitive ones like the ones above, but we like a challenge! So we ordered plans from Rockler, one of Keith’s favorite online stores. The plans came with templates for most of the pieces, which was key as we started to work on them. But of course before you can cut wood you have to buy it! So off to Home Depot to get some pressure treated wood which will hold up to the elements, since we will be moving these outdoors eventually.

That’s a lot of wood, isn’t it? Well let me tell you, there are a LOT of pieces to our Adirondacks! If Keith was here, I could tell you exactly how many, but I think there were upwards of 40 custom cut pieces of wood per chair. Honestly, we bought this wood so long ago, I really don’t remember how many months it took us to complete all of those cuts. But let’s take a look at the process.

As I mentioned, our plans included templates for most of the pieces, but before we could start cutting out the individual pieces, some of our wood had to be milled down using our planer. Basically you run pieces of wood through it until it becomes the exact thickness you’re looking for. It’s not a glamorous task and it generates a ton of wood chips, but it’s somewhat satisfying to use!

That was a task that both of us worked on as there was a lot of planing to do. Once the prep work was done, it was time to start tracing and cutting.

I could bore you with even more pictures of all of that and other boring things like all of the sanding we did, but instead, I’ll just show you our new toy. Our drum sander. Because there was SO many curved spots on these, Keith convinced me we “needed” a drum sander for this project. So now we are the proud owners of a drum sander. Oh – and a new regular oscillating sander because we wore our old one out on this project! Now back to the drum sander. What is a drum sander, you say? Well here it is! It basically spins around at a high speed while going up and down along the side of whatever you’re sanding.

We both spent a lot of time sanding every piece to ensure no one gets splinters when they sit out the end product. After everything was sanded, Keith got to work with the router using his router table and rounded off the edges of each piece – again to make the edges soft and keep splinters away.

Fast forward to assembly day. This was what we were working with!

That’s a lot of pieces! Basically you assemble the part that sits on the ground and then you start adding the back slats, then the chair slats, and lastly the actual arms. Oh and some supports in different places.

And now for the big reveal, let me show you our new Adirondack chairs!

And here they are all together in our basement, where they will sit until I can give them all a good overall sanding. We’ll let them dry out over the winter, as pressure-treated wood is very wet and takes a long time to cure. Sometime next spring or summer I will likely paint them all probably white.

We may also make some end tables and/or footstools, as we do have some leftover lumber. We’ll see! If you have any other great project ideas for us, send them my way!

Lipstick on a Pig!

Hi everyone! I hope you all had a wonderful Christmas and New Years and are doing well. We had a really nice quiet Christmas in Baton Rouge and New Years in the mountains. We haven’t done a whole lot project-wise since my last blog. We have gotten a very slow start on our banquette for the mountain house, but we’re in no rush to finish it.

I did want to update you on what I wrote about in my last blog. My sister’s table, and our basement project. Let’s start with Susan’s table. She and Jeff came to pick up the table last weekend. You can read her blog here and find out more about how she finished it. I must say it looks amazing!

Susan and I have joked for years that we want to start our own HGTV show called Handicapable. Kind of a joke, as she is blind in her left eye and I am deaf in my right ear! We both love doing projects!

Now on to the Lipstick on a Pig project. Let me tell you a little bit more about our basement before I get to the pictures. Our house was built in 1928 and our basement is part crawl-space, part basement. When I bought the place 9 years ago, the basement was truly horrific. It was filthy with a bunch of nasty wood on top of cinder blocks as “shelves”, etc. It had 1 bare light bulb to illuminate the entire basement. After I moved in, I gradually got it cleaner and removed a lot of the crap that was in there, but it was still gross. When Keith moved in, he called it a “Silence of the Lambs” basement. I’m not kidding when I say that I had to really think about whether I’d want to take my chances during a tornado warning down in the basement or upstairs in a closet!

As I mentioned in my last blog, a few years ago we started working on the basement. Keith rewired it and added a lot more lights and I painted all of the dusty nasty bricks in there. It took gallons upon gallons of paint to cover the bricks, but it helped brighten it a lot. Keith and I also covered the crumbling plaster at the top of the stairs with beadboard and even added a light up at the top of the stairs.

Then last year I really got organized down there and was able to consolidate a lot of my storage in to space which was once where the stairs were to the outside (which are no longer there due to the addition which is now our den/kitchen). I’m even able to store my Christmas tree upright underneath the stairs! Prior to Covid, we had hired a trainer and had made it a little makeshift “gym”, but hadn’t gone too far with it.

As you’ll remember, we started on the project to make a giant pegboard for storage. For Christmas, Keith gave me a Pivot which allows me to turn our Peloton screen sideways for taking Bike Bootcamp classes and some of the other fantastic Peloton classes. I love it! Because of all of this, I knew I wanted to move the Peloton from our guest bedroom to the basement and start working out more. There was really just one spot that would work where Keith wouldn’t hit his head, and it was right next to a large opening to the crawl space. Without an easy way to really close that off, I made makeshift “curtains” to at least hide the crawl space. It’s a ton better than looking at the crawl space for sure!

Again, it’s not ideal but it works! While Susan and Jeff were here, we used Jeff for his muscles to help Keith get our Peloton down to our basement. Today we finally got around to hanging our giant pegboard and adding a few other touches to make it more conducive to working out. I had bought a pack of motivational gym hangings, which I used double-sided tape to attach to some ductwork which is right in front of the Peloton. I had a few left so added them to the wall where our weight bench is. I bought a cheap long mirror from Walmart and we hung that next to our pegboard. The last thing to do was for Keith to add an outlet so we could plug the Peloton in without running an extension cord across the basement. Without further delay, here’s the final result!

Note that I am representing for the Saints today! 😉 Here are a few other close-ups for you.

So now you’ve seen our Lipstick on a Pig project! I hope you like it!

A little housewarming gift

Hi everyone! I hope you’re having a great holiday season. Ours has been busy with some virtual fun as well as … you guessed it … a couple of projects!

The first project I want to share with you is a housewarming gift we have made for my sister and brother-in-law. They just moved into their “forever” home in Wisner, LA and she wanted a custom table for their dining area. Keith & I quickly volunteered to make one for them and it was a lot of fun to make. We finished up building it last weekend and it’s waiting up at the mountain house for them to come get it! Rather than show a lot of pictures of the construction project, Keith put together a video of the process. To give you a few highlights of the process, Susan and Jeff brought mom up here for some follow up surgery back in August. While they were here, Keith took them to our favorite wood store, Carlton’s Rare Wood & Veneers (https://www.rarewoodsandveneers.com/). There they found some gorgeous quarter sawn white oak for the table. Susan had bought some turned legs at a place she loves in Mobile, AL, so we were able to use those. Keith & I would love to learn how to use a lathe to turn our own legs, but we’re afraid we’d like it too much then want to buy a lathe! 😉 The wood sat in the mountain house garage until October when we ran it through the planer, then it sat another couple of months until Thanksgiving and then last weekend. And here are the results!

If you want a closer look at the final result, here are a couple of pictures of it.

It’s beautiful, isn’t it? It still needs to be sanded and finished. Susan plans to paint the legs and the skirt and then oil or poly the top somehow. I’m not sure yet but I know it will turn out great! Once it’s finished and in their house, I’ll share a picture with ya’ll!

Now on to our other project which involves our Atlanta basement. For any of you who saw our basement prior to a couple of years ago, you may know that Keith called it a Silence of the Lambs basement. It was dark (1 lightbulb hidden behind duct work), dusty beyond belief and pretty much disgusting. So bad that I really had to force myself down there once when there was a tornado warning!

A couple of years ago, Keith rewired the basement to add 5 more overhead lights and I embarked on a project to paint the brick. Keith thought I was crazy, and for a while I thought I was as well! After about 10 or 12 gallons of paint (no kidding), I finally encapsulated all of the dust from crumbling mortar inside the brick walls.

Fast forward to last year, I figured out we could use our basement for a very small home gym. That motivated me to really organize all of our storage down there and get rid of some stuff. I was able to get rid of several sets of old plastic shelves we had down there and really get it looking good. Prior to covid hitting, we had our friend Mike (Keith’s former Physical Therapist for the big knee replacements) as our personal trainer and we used the basement for training space. Well, then we all know what happened … covid and a mountain house. That space has gone pretty much unused since then. However, in the past few months I’ve really gotten to loving the Peloton Bike Bootcamp classes but with our Peloton in our guest room it’s hard to do. So…I now want to move the Peloton down to the basement and fix things up just a little more. I’ll provide more pictures over the next few weeks, as I have some ideas up my sleeve to make it less gross (because it’s still half crawl space half basement). But in the meantime, I’ll show you what we’re making for down there! It’s a really cool giant pegboard to hold all of our gym and Peloton equipment! Here’s the inspiration picture.

Cool huh? We figured out where we wanted to hang it in the basement and then we cut down a 4×8 piece of nice grade plywood into 42″ x 5′. We will use the extra plywood for shelves.

The next step was to measure out where our pegs would go and drill a BUNCH of holes. I think I counted 70 holes.

And here’s the final product after all of the holes had been drilled and I had lightly hand sanded it.

Since our chop saw is up at the mountains, we’ll wait til we go back up there to cut the dowels. I may or may not edge band the shelves depending on how they look. I did put a quick coat of polyurethane on the pegboard before we put it down in the basement.

I’ll share more over the next few weeks, but I’m super excited to get this project moving!

Have a wonderful Christmas and a safe and happy New Year. Here’s to 2020 being in our rear view mirror!

Christmas crafty … and a toe kick!

Hi everyone! I hope all of you had a wonderful, healthy Thanksgiving holiday! We had a really nice week up at our mountain house and had my stepdaughter and her fiancé join us for a few days. We did some hiking and cooking and of course some projects!

First, and not so glamorous, is that we finally finished the toe kick in the kitchen, so the kitchen is officially DONE! The last indoor project we have is to make the banquette, so stay tuned to some winter blogs on that. But back to the toe kick, the way the Ikea toe kicks work is they snap on to the cabinet legs with these little plastic pieces. It took us about 45 minutes to get it all put on. I did the running down to the basement to cut the toe kicks to length while Keith laid on the floor, measuring and snapping on the toe kicks. I forgot to take a picture of the finished product, but trust me it looks WAY better than before when you could see the legs and under the cabinets!

Now on to the fun stuff! Now that it’s the Christmas season, I thought I’d show you a project we did last year, and a new project we finished this afternoon. Let’s start with our project from last year. I was at lunch with two girlfriends and told them Keith & I were planning to make a Santa, sleigh, and reindeer for our front yard. My friend Leslie, who is more artistic in one finger than I am in my entire body, suggested that we make a dachshund “reindog” instead of a reindeer. My first thought was “no way can I do this”. Then I got searching and found this inspiration.

And every single day, I get to see this inspiration….

And while I was totally intimidated at the idea of doing the reindog, I decided to go for it! I borrowed Leslie’s projector and traced the body of the inspiration picture onto a piece of pressure-treated plywood. Keith & I merged the reindeer template with the dachshund inspiration to create the legs as well as the cross-pieces to attach them. Here’s a few pictures of the process.

Okay, so that wasn’t horrible to do, but then I had to make it look like Chloe. If I had been thinking, I would have traced the facial features of the inspiration picture onto the plywood, but I wasn’t. For Santa it wasn’t too bad because the template we used allowed for me to trace the lines to paint inside. Plus my sister Susan had come for a weekend so she helped me some with Santa. But I was on my own with Chloe! I spent a lot of time in the basement painting Santa and Chloe.

And then we started assembling Santa….

Oh and let’s not forget the sleigh. That was some work with the jigsaw, let me tell you!

But the end result was SO worth it! Plus, it all breaks down and can easily be stored in our basement for the other 10 1/2 months of the year! Chloe the Reindog and Santa and his sleigh are back up in the front yard for all (in Atlanta) to come by and see!

I’m sure those who in our neighborhood who don’t know Chloe wonder what the heck we were thinking, but for those who do know her, they love it! And so do we!

Now, on to our latest project which we just finished this afternoon. Keith gets a number of woodworking magazines and we saw a super cute project in one of them. So, on Friday we started making it. It’s a Kisses Christmas tree. To make it, we used some scrap wood we had laying around. I cut it to 12″ length and then we ran it through the table saw to create 30 1″x1/2″ strips. Once we had those cut, I sanded the pieces to get rid of the blade marks.

That was as far as we could go on the project until we came back to Atlanta where we had our band saw and our drill press. It had been a little while since we’ve made anything in Atlanta! But we were right at home back in the Heffron woodshop!

Ha! That was a gift for Keith a few years ago. 🙂 Yesterday afternoon, we drilled holes in the center of each board and then clamped up the pieces and cut the angles to make the “tree”.

The drill press made easy work of the holes. Once we had cut the “tree”, it was time to start drilling the recesses for the kisses using a forstner bit. That’s when the drill press pretty much became essential to have uniformly cut recesses.

It took a while to cut all of the recesses, but we eventually finished them all. Then it came time to stain all of the pieces. It was messy work. It was my first time to use gel stain and I’m not sure I’d use it for this kind of project again. It was hard to apply to all of the recesses and then was even harder to wipe out once it was in there!

And here is the final result! I had bought a bag of kisses thinking one bag would be enough, but I still have a LOT of empty recesses! I think it’s absolutely adorable and I hope you think so too!

Have a great week ahead and stay well!

Almost Finished!

Good morning! It’s been a couple of week since I last blogged, but I have good news. The kitchen is almost finished!!!! Keith & I were “stuck” up in the mountains for a few extra days a couple of weeks ago, waiting for an HVAC repairman to come fix the furnace. Since we were there longer than anticipated, we were able to finish up the trim in the kitchen and den. And it looks great!

To trim it out, we used 1×6 to build the inside box and then we used the same MDF trim we had used in the rest of the house for the window. Once it was up and caulked, I gave it two solid coats of semi-gloss paint, which should ensure no water causes problems with the MDF.

And here’s the final look!

All that is left in the kitchen is the toe kick! And even that won’t be hard. The way the toe kick works with Ikea cabinets is you cut it to length, put “end caps” on it and snap it on to the feet. It will probably take us a couple of hours, so we’ll try to get that done while we’re up there for Thanksgiving.

Once the toe kick is done and we have a little free time, we’ll start on our banquette. It’s the last interior project until we build out the basement. We’ve ordered a cushion for it from Pottery Barn, and we’ll customize the bench around the size of the cushion. I’ve been looking at different styles of banquettes to figure out what we want to do. We’ve decided not to do a storage banquette since we seriously do not need any more storage in the house. Who would ever think you’d say that?!?!? Here are my inspiration pics for our banquette. Let me know your thoughts on them and which one you like best!

When we got back to Atlanta, I finally got “crafty” with a project for the mountain house. When we remember, we’ve been putting aside corks from our wine bottles and I figured one day I’d make a project with them. I want something to put above our bar cabinet in the mountains, so I made this! It’s still a little skimpy but once I get enough additional corks, I’ll get the hot glue gun back out and make this a little heftier!

And that’s a wrap folks! I’ll blog again in a few weeks. We do have a little something up our sleeve for Christmas, so I’ll be back with that in a few weeks.

Please stay safe and healthy!

There goes the manicure!

Hi everyone! Keith & I have had another productive weekend up in the mountains. We’ll be here a little longer than we intended. Originally we planned to head back to Atlanta today, but when we arrived on Friday we found that our furnace blower wasn’t working. And thanks to Hurricane/Tropical Storm Zeta blowing through the southeast, the soonest we can get someone out here to look at it (and hopefully fix it) is Thursday. We are both super grateful for our direct vent fireplace which has a blower on it as it is currently acting as our furnace for the house! It’s supposed to drop into the 20’s here tonight so it will get a workout!

You may remember that last week I had finished assembling and painting the planter box to cover our wellhead. Yesterday while Keith was busy blowing an insane amount of leaves out of our yard and driveway, I got it set in place. I put our house numbers on it and planted some pansies and violas. I think it looks fantastic! What do you think?

You may notice my flowers are purple and gold! 😉 LSU may be having a tough rebuilding year, but I still love them!

After all of our yard work, we worked on something necessary but far from glamorous. Insulation. You may remember that our stairwell was opened up and we moved the door down to the bottom. We will eventually finish the basement and when we do we will add HVAC down there. But until then we needed to add some insulation down the stairwell.

Once we finished putting up the insulation, we moved on to what would turn out to be a comical task. When Keith moved the electrical and plumbing, we had some old holes in the subfloor which needed to be filled. So we used spray foam to cover them. You know, this stuff…Great Stuff.

Well the comedy (which thankfully did not turn into a tragedy) started when Keith couldn’t get it to stay up in a fairly large hole so he used his hand to try to keep it in. In retrospect not such a wise idea, but we weren’t really thinking. Then Keith realized a big blob of it got in my hair. Oh no! I had been handing him the can so was standing under where he was putting it and some got in my hair. We quickly tried to finish up the task and then started looking for how we were going to get it off of Keith’s hand and out of my hair. We tried denatured alcohol and all that really did was make both of us cold. We read the side of the can and it said acetone would take it off, so I ran to Dollar General (because Keith’s hand was covered in plastic Great Stuff) and got some fingernail polish remover. Thankfully it worked and it didn’t strip my hair, although I did lose some strands as I was trying to get it out. Crisis averted.

Today we worked on the backsplash and caulking. Between caulking and the planter yesterday, my nails are a mess! I caulked all of the ceiling trim we put up last week and Keith & I put up the backsplash. We had originally intended to put bead board up, but after having trouble finding the product we wanted I suggested we put in vertically hung shiplap. Keith got on board and we are really pleased with the outcome. It took some time and lots of trips up and down to the garage, but we finished it. Once we finished hanging it, you guessed it…I caulked it all. Good fun!

We had every intention of finally trimming out the window as well, but then realized that we bought 1×6 instead of 1×8 trim for it. Since we have the thickness of the shiplap in addition to the window frame, 1×6 wouldn’t work. So back to Home Depot we’ll go. And honestly, we were pooped and didn’t mind calling it a day at that point.

Since we’ll be up here until Thursday, I’m hoping I can get some of the painting done in the evenings. I still have all of the ceiling trim and the backsplash to paint. It’s all caulked and ready to go, so hopefully it won’t take too long.

I hope you all have a great week!

Whoopsy Daisy!

Hi ya’ll! It’s been a great week. Mom has been in for the past week so we were able to have some fun and enjoy the gorgeous fall colors up in the mountains. Some friends had rented a place not too far away so we were able to spend some time with them and do a train ride through the fall colors. All in all a great week with one big whoopsy daisy. I’ll get to that in a minute.

The first great thing which happened this week was getting countertops! FINALLY! No more plywood! I happen to think they’re very pretty. We are planning to do a white beadboard backsplash, so we wanted some contrast with our countertops. What do you think?

Given that our cabinets are VERY white, we needed to make sure our countertops didn’t have any yellowish tinge to them, and these worked out perfectly! We are super pleased!

One other thing the countertops allowed us to do was permanently install our sink and get me a DISPOSAL! You’re not really supposed to use a disposal with a septic tank, so we’ll be careful not to put a lot down it, but at least now I don’t have to empty that little nasty trap thing anymore.

It also meant we could finally install the dishwasher! This has been sitting in front of the window for about a month now, because our countertops took longer than anticipated (plus our little snafu which delayed it a week).

Installing it turned into a little more of an ordeal than we had planned thanks to a defective plumbing adapter. But Keith prevailed and yesterday I got my dishwasher installed! He still needs to raise it but we’ll do that next week. I’m a happy girl!

While Keith was busy installing the dishwasher, Mom and I took a break and took an online flower arranging class with some ladies from a Junior League group I’m chairing this year. Since it’s a weird year, we’re doing everything virtually. The flower arranging class was a blast and look what we created in this adorable pumpkin ceramic vase!

So fun! Once we finished up the class, I helped Keith with finishing up most of the trim around the house. We couldn’t put it up until the ceilings were finished and the cabinets were in place, and honestly we had procrastinated on it a bit. We had cut it the prior week and I primed it during the week, so it didn’t really take long to put up. I still need to caulk and paint it, but that will have to wait until next weekend. We also added trim along the sides of the cabinets to hide the gap between them and the wall.

My one other project I worked on this week was the planter to cover the well head. You may remember that I started working on the box part of it last week, but had to go buy some more lumber to do the top. It didn’t take long to make the top and then I primed and painted it. I probably should let the pressure treated wood dry a bit more, but I used Zinnser Bin Primer on it, which allowed me to go on and paint the outside of it. That is the best primer if you ever have something where paint won’t adhere. It’s not yet outside as the second coat of paint was still drying yesterday. I was able to find some cute black reflective numbers on Etsy, so I will put those on it next week when we’re back up there and put the box outside. In the meantime, this is what was done!

Now on to my whoopsy daisy moment. When I bought more lumber for the planter, I also bought a paper towel holder. I went to install it yesterday and took the screw for it and placed it on the top of the cabinet door to make sure the screw wasn’t too long. Nope – it was perfect. Well, what I forgot was that the doors, while flat on the inside, are indented on the outside where I was hanging that paper towel holder. Yep, you got it….my screws went through. ARGH! That’s a $70 mistake and now I have to go BACK to Ikea and get another door. I was SOOOO mad at myself but these things happen!

Next week we hope to get the trim painted and put on the backsplash and maybe trim out the kitchen window finally. We’ll see when we are able to get up there and how much we can get done. In the meantime, I’ll leave you with one pic I took the other day. It doesn’t really do the colors justice, as they changed every single day we were up there. It really is such a peaceful and lovely place!

Have a good week!

I’m baaaccckkk

Hi everyone! It’s been a while since my last post, so I’ll try to catch you up on what we’ve been up to these past few weeks. We’ve had a few fun weekends up here and have been enjoying the fall colors as they’re appearing. The waterfalls have been incredible since we had a pretty wet September.

Since my last post, we’ve managed to get all of our doors and drawer fronts and install all of them. They look great and we’re really pleased!

So, have you noticed something missing still? Countertops? Well…there’s a story here. They actually came to install our countertops last week. See? I was so excited I even took a picture of the truck with our granite in the back!

Unfortunately, that was as close to the granite as we got. We found out our cabinets weren’t level. Wait what? We had leveled ALL of the rails that the Ikea cabinets hang from. We had checked level when we hung them. Without boring you to death, here’s what happened. Ikea provides these little clips to help you get exact level of those rails. But once we hung everything and put in the drawers, etc. the corner cabinets dropped by 3/4″. We didn’t realize it and when they came to measure for the granite, the measuring guy didn’t catch it either. So, the granite guys came and then they left with our granite. Keith ended up staying back an extra day to take all of the lower cabinets off and level and rehang them. 😦 On a happy note, the granite guys are scheduled to come back tomorrow. But until then, you’ll just have to admire some more pictures with our lovely plywood countertops!

The kitchen is fully functional in spite of the unfinished nature of it. Just to make you jealous, here’s the big pot of gumbo we made for dinner today.

We have gotten some other things taken care of around here. Our ceilings in the den/kitchen are finally finished and painted. Now we just have to put the final ceiling trim and baseboards up. We had run out of all of that, so today Keith & I ripped down some more MDF to make the last of the trim. I’m not going to lie. As I was sanding all of it down, knowing that I still have to prime it all, I decided I am GLAD we are almost done with that trim! I’m so over sanding and painting it, and when we were pulling the MDF out of the truck, I sustained a little injury.

Ouch, right? I am having to wear my wedding bands on my right hand right now as it’s not gone down any in a week. 😦 I am taking this week off of work, so I’ll begin the fun task of painting all of that trim tomorrow and we’ll hang it later this week.

Now on to my next project. You may remember the dilemma I had around the unsightly crypt looking wellhead. I finally started building the box/planter to cover it! I was able to use leftover pressure treated lumber to build the box. I have to buy a few more deck boards to make the “lid” which will be a shallow planter box, but good progress was made today. I’m hoping to have it done to show you next week.

Here are some pictures of how I went about making the box.

And here’s a preview of the box on the crypt. This thing is HEAVY and solid! One thing to note. If you look inside the box, you’ll see a ledge about 4″ down. That will hold the base of the planter which will be removable. I’ll put some landscape fabric down on the bottom of the planter portion and some drainage holes. Once I make the lid I’ll paint everything white and I found some reflective house numbers on Etsy which I’ll put on the front of the box. It should look great!

Mom is here visiting, so in addition to house projects, we’re going to do a few fun things. We’re taking a train ride to see the fall colors, we’ll probably go see some waterfalls, and who knows what else we may do! It will be nice to have some quiet time. We were supposed to be on a European River Cruise with her this week to celebrate her 85th birthday, but since Covid took that away from us, we’ll try to enjoy some mountain time instead! And Chloe is certainly happy to have her DeeDee back! She’s barely left mom’s lap since she arrived….

Hopefully I’ll have some more pretty pics to show next week, but I’ll leave you with this view from the deck taken this afternoon.