Except for painting and putting on quarter round, the island is completed! We are both thrilled with the result and very happy with the extended size and significant improvement of functionality.
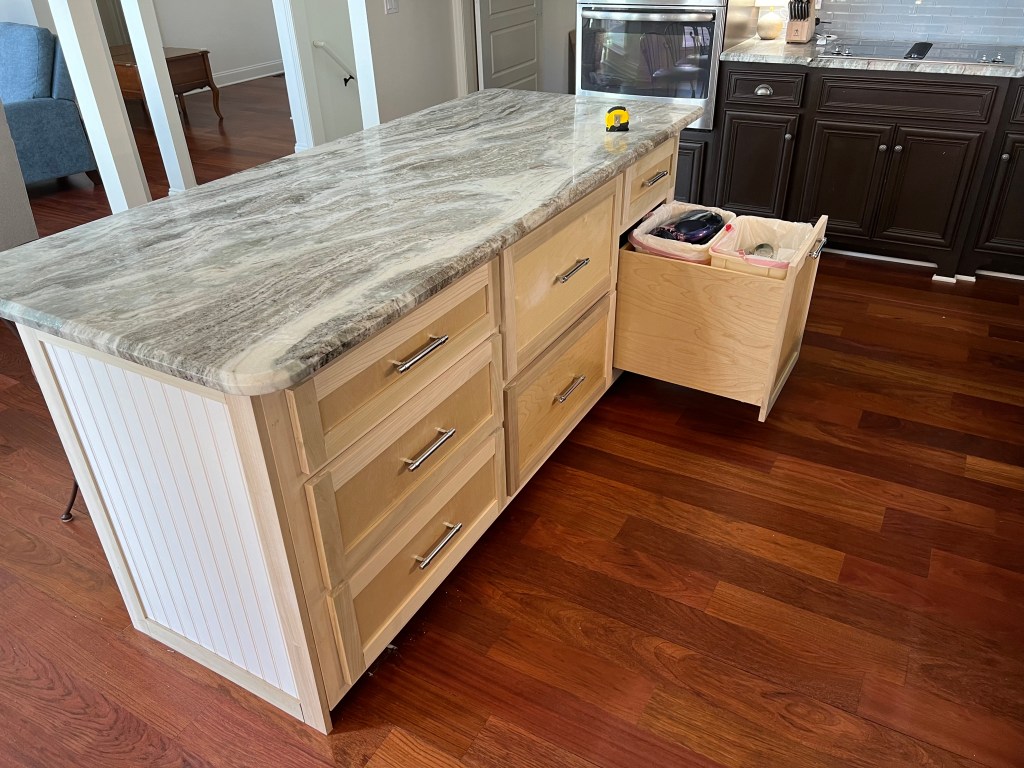
One thing that drove both of us crazy was not having a good place to put trash. By extending the width of the island, we were able to add a pull out trash/recycle drawer, create a drawer to hold all of our dishes, and have lots of additional storage for things like mixing bowls, storage containers, etc. Another thing that was awful about the old island was the fact that the drawers wouldn’t open easily and weren’t very sturdy at all. Just to give you some context on the difference in quality of our old drawer slides versus the new ones, here’s a little compare and contrast! The white drawer slide on the right is the old, cheap drawer slide, and the silver one on the left is a heavy-duty Blum drawer slide which is the best drawer slide you can buy. No more sticking, screeching drawers when they are opened!

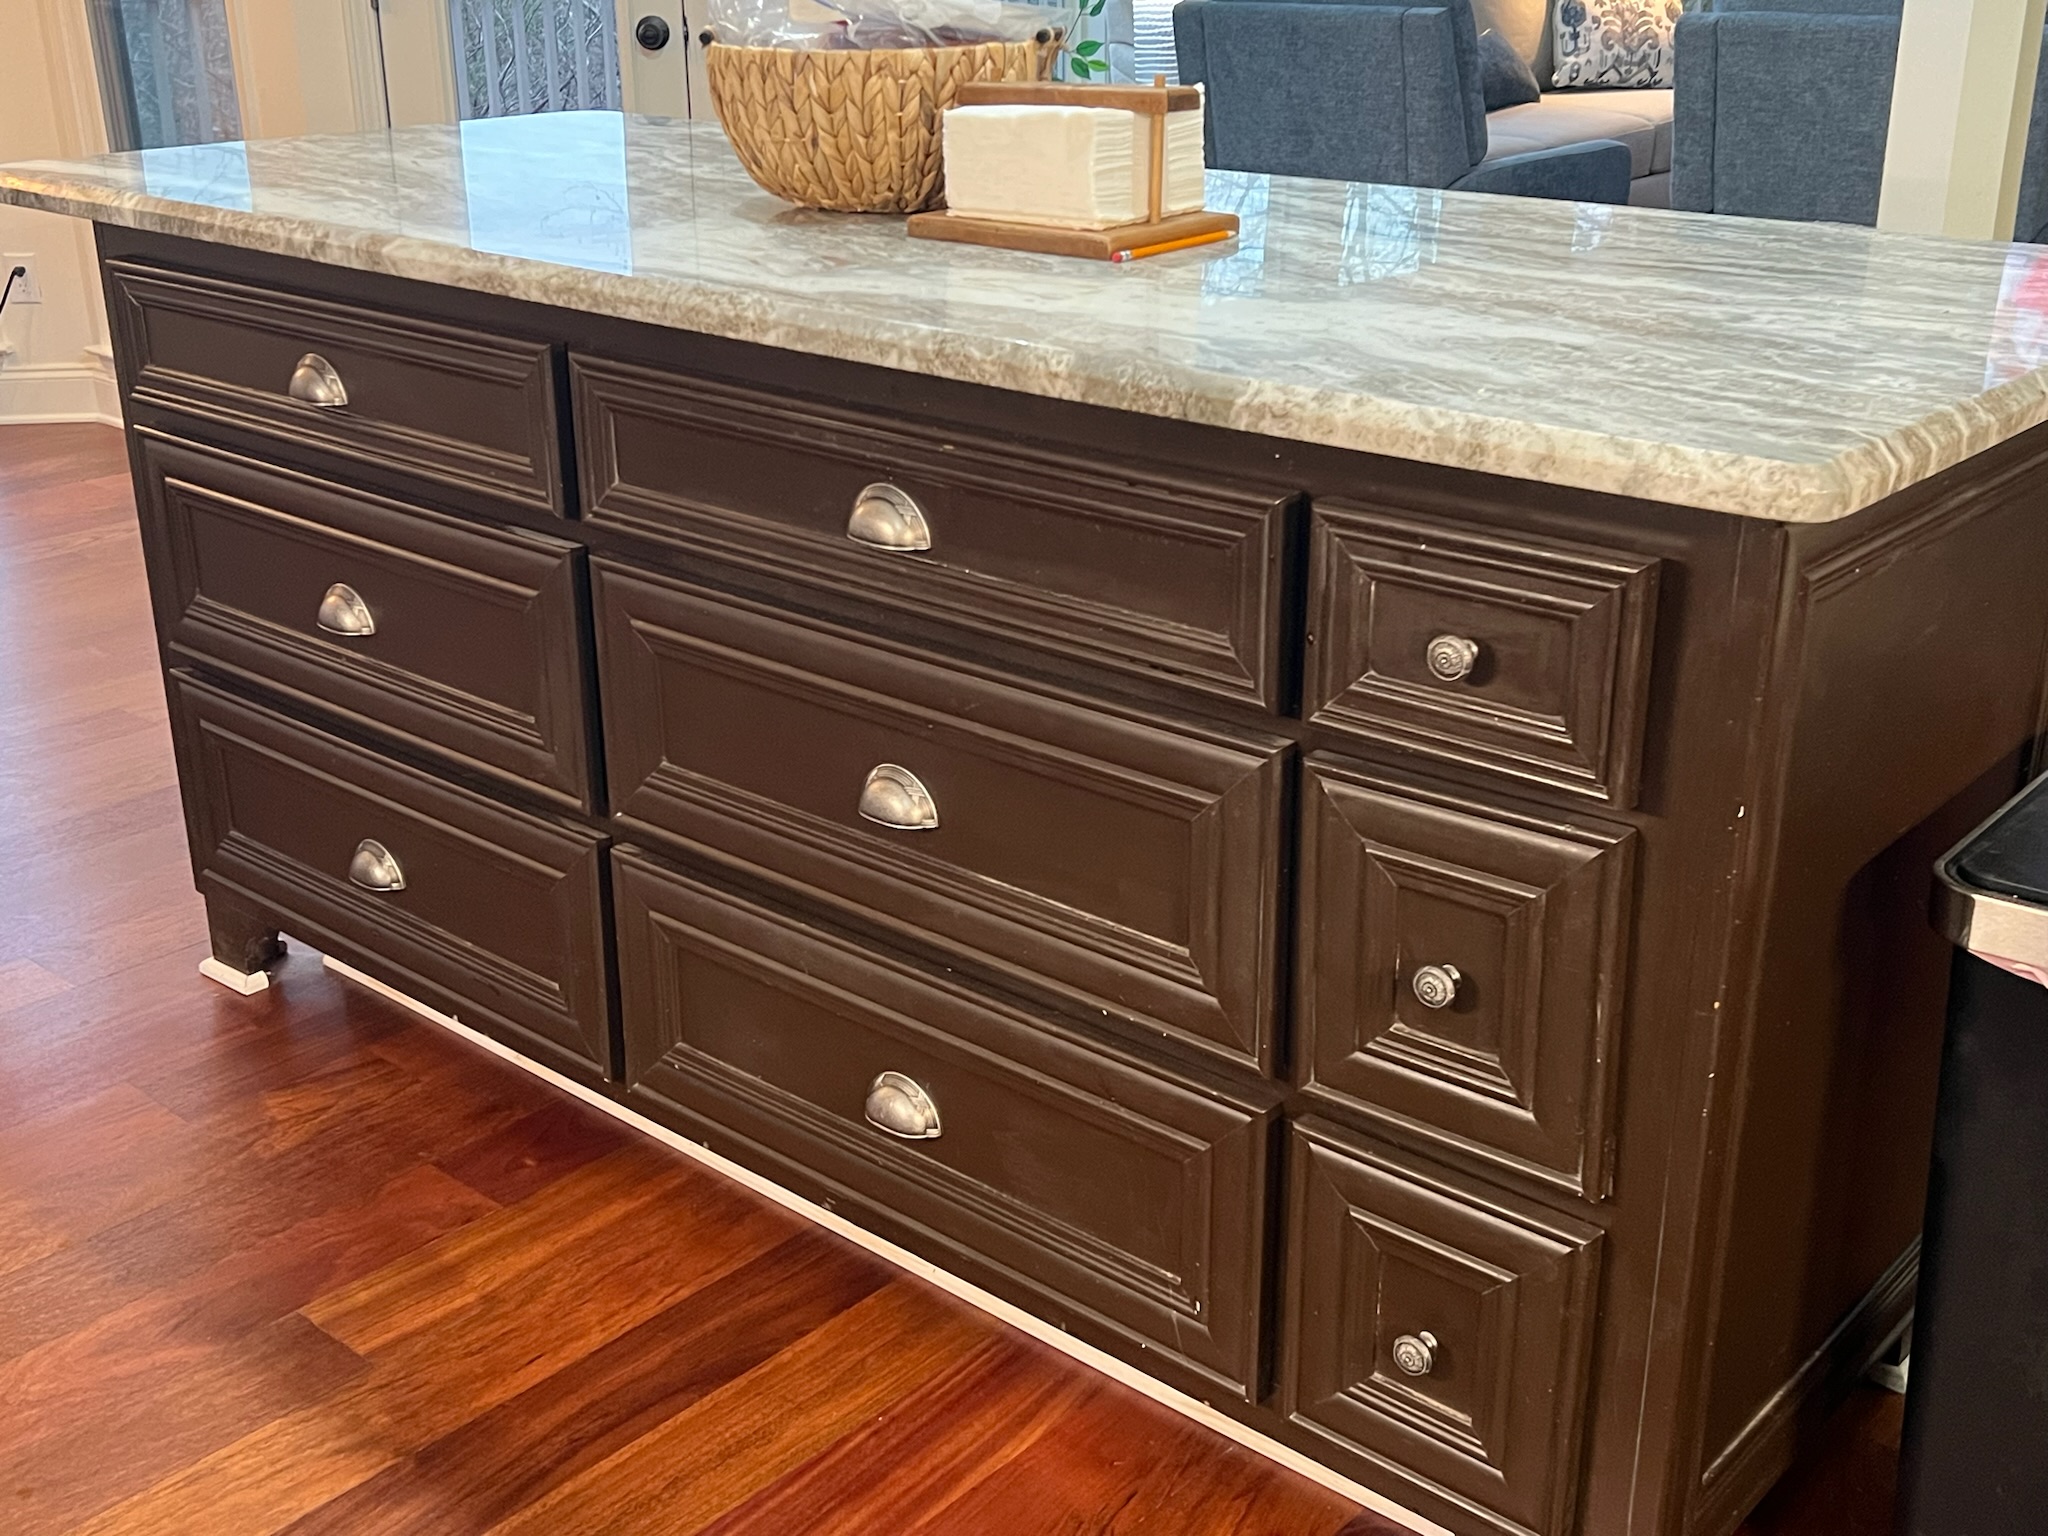
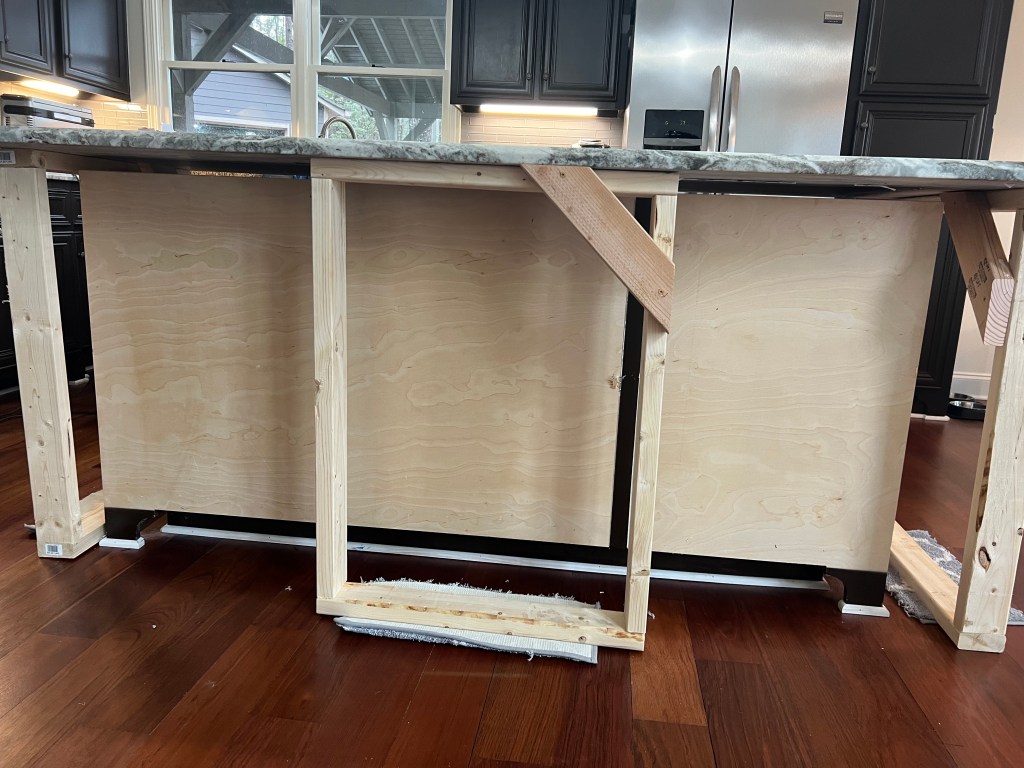
Now back to the rest of the island. As a reminder, we had some room to the left of the island where the prior folks had a bar stool, so we had an extra six inches or so that we used when we created the new island. It gave us a LOT more function. Here are some “before” pics of the island:

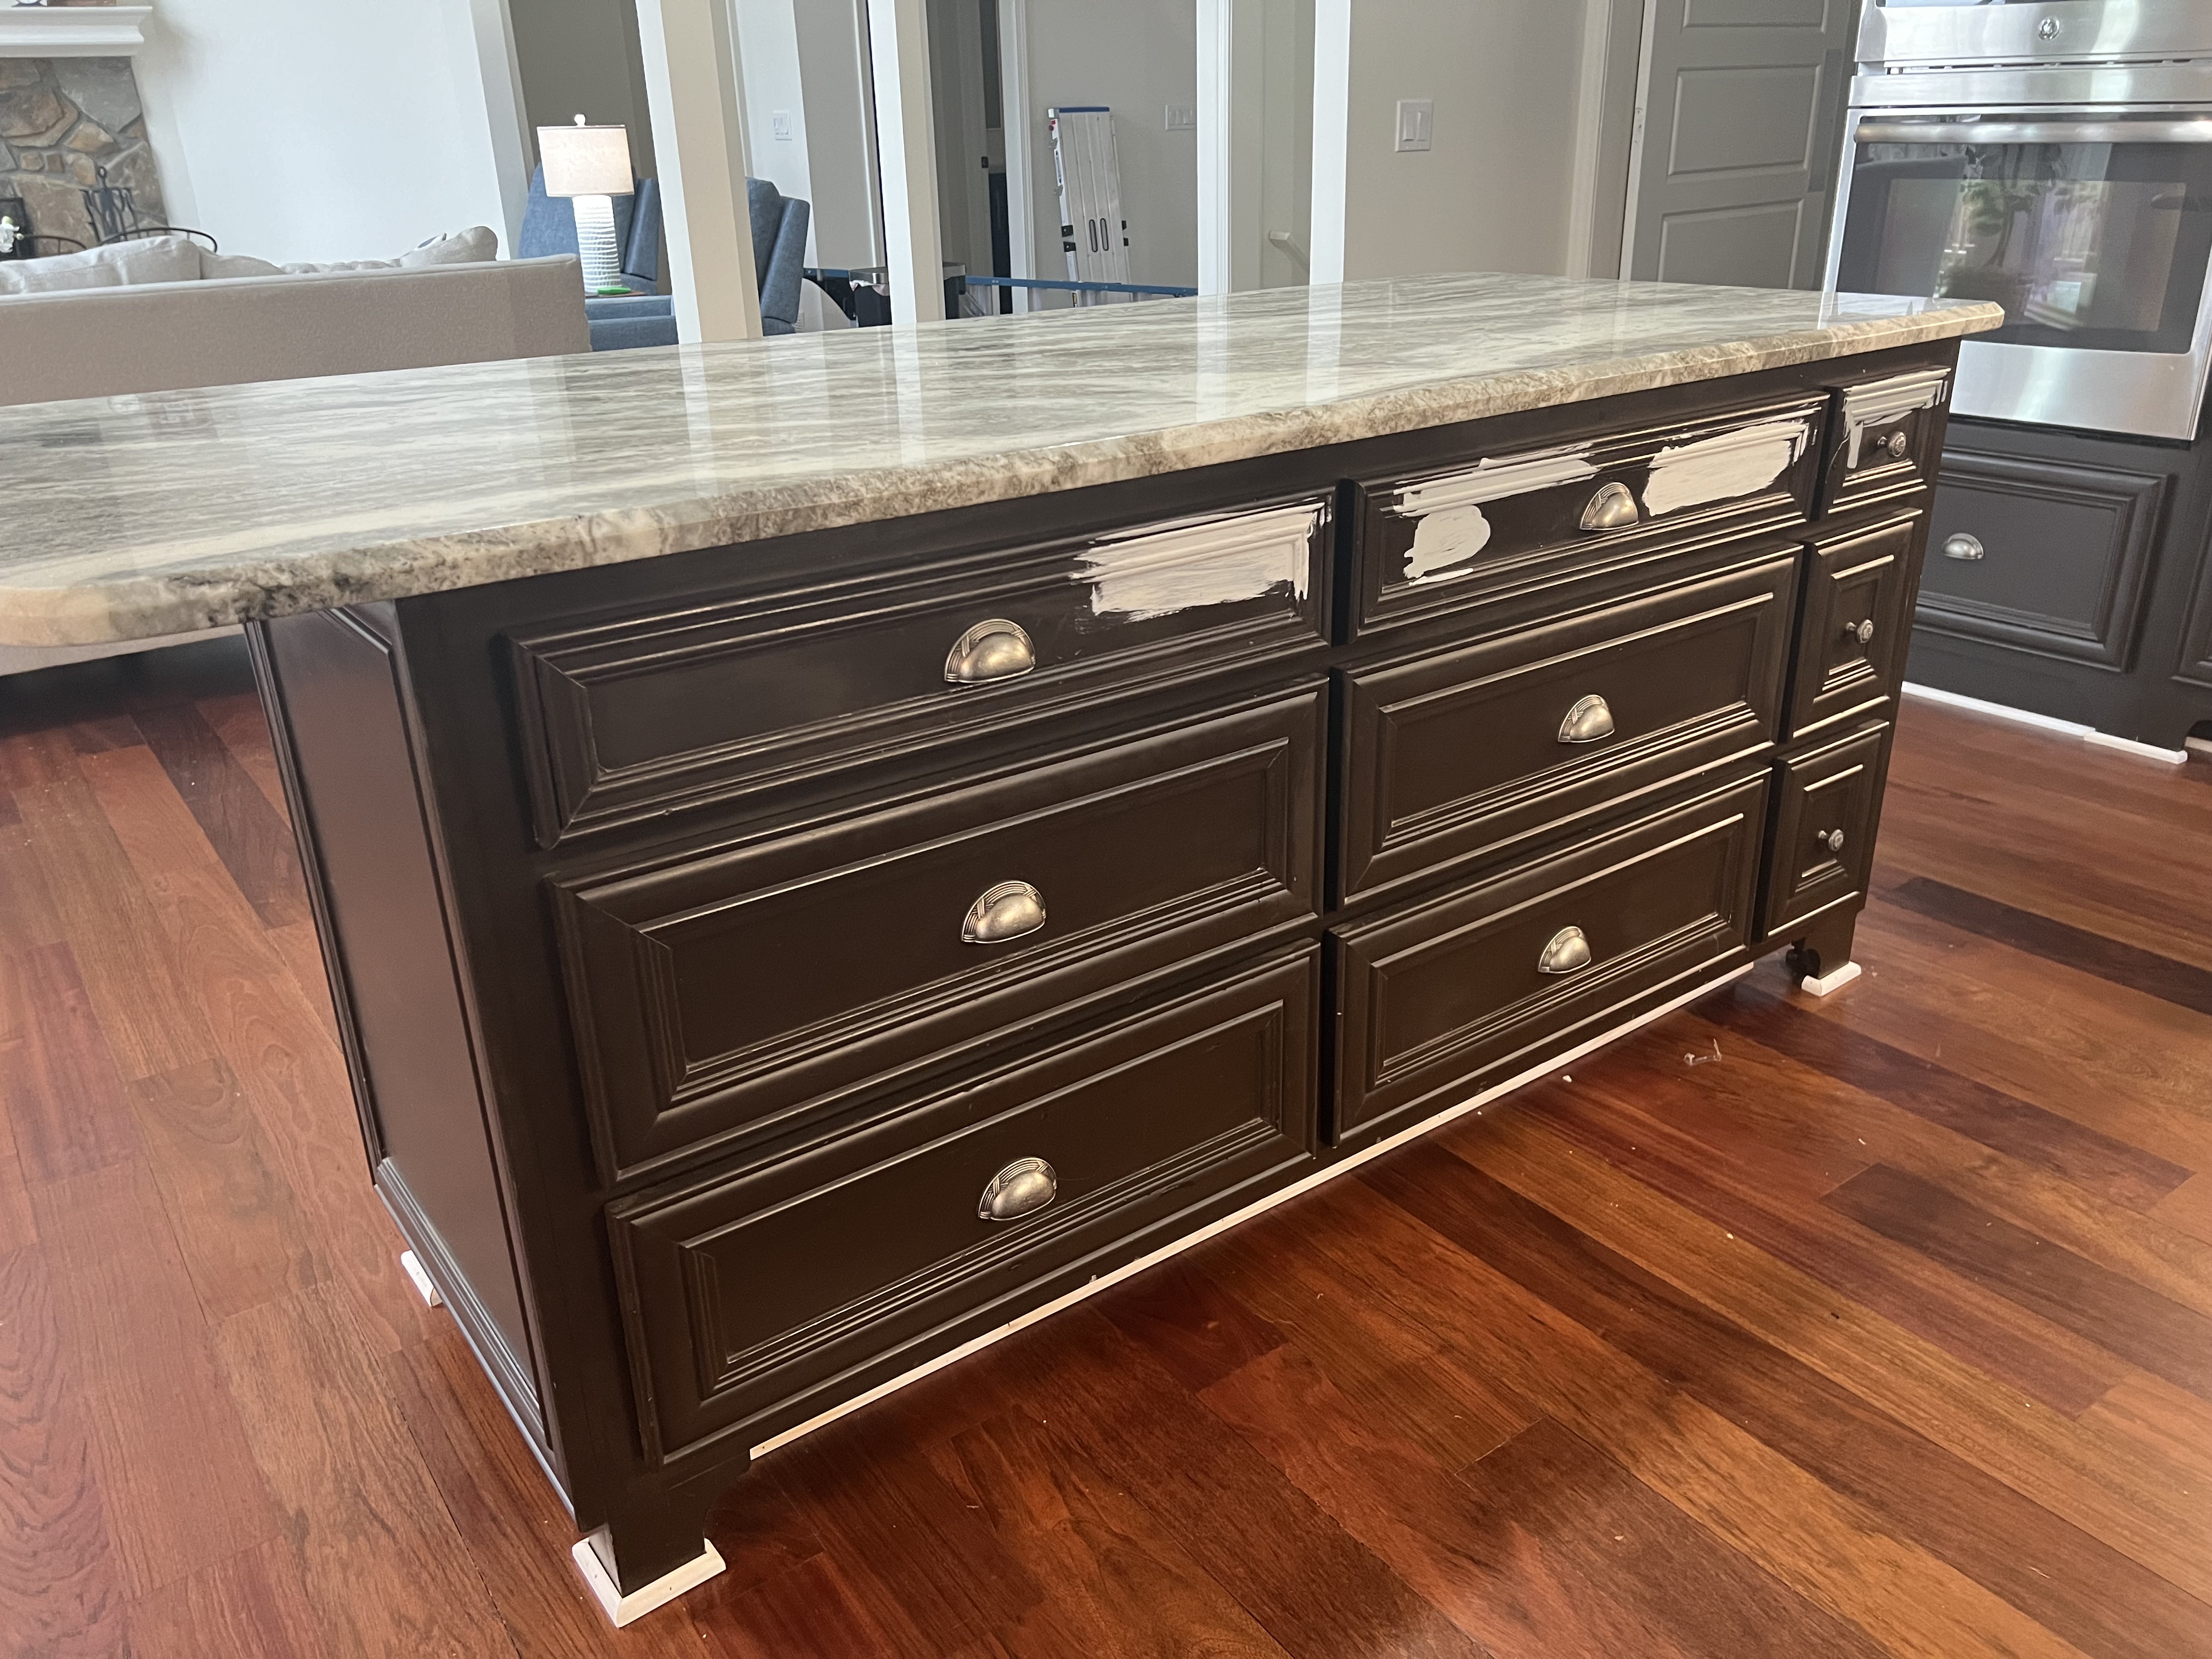
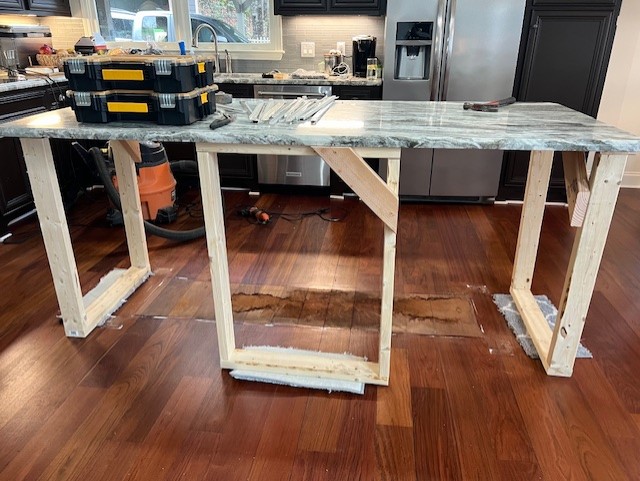
And let’s not forget the rather scary “during” photo of the island along with a few others…
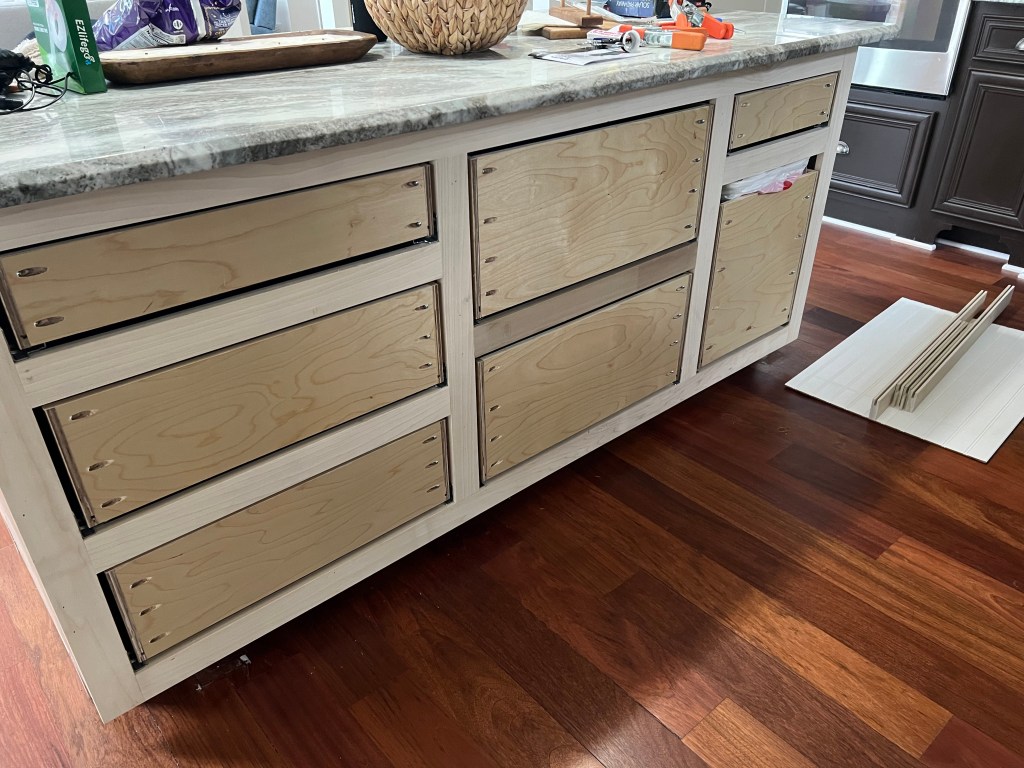
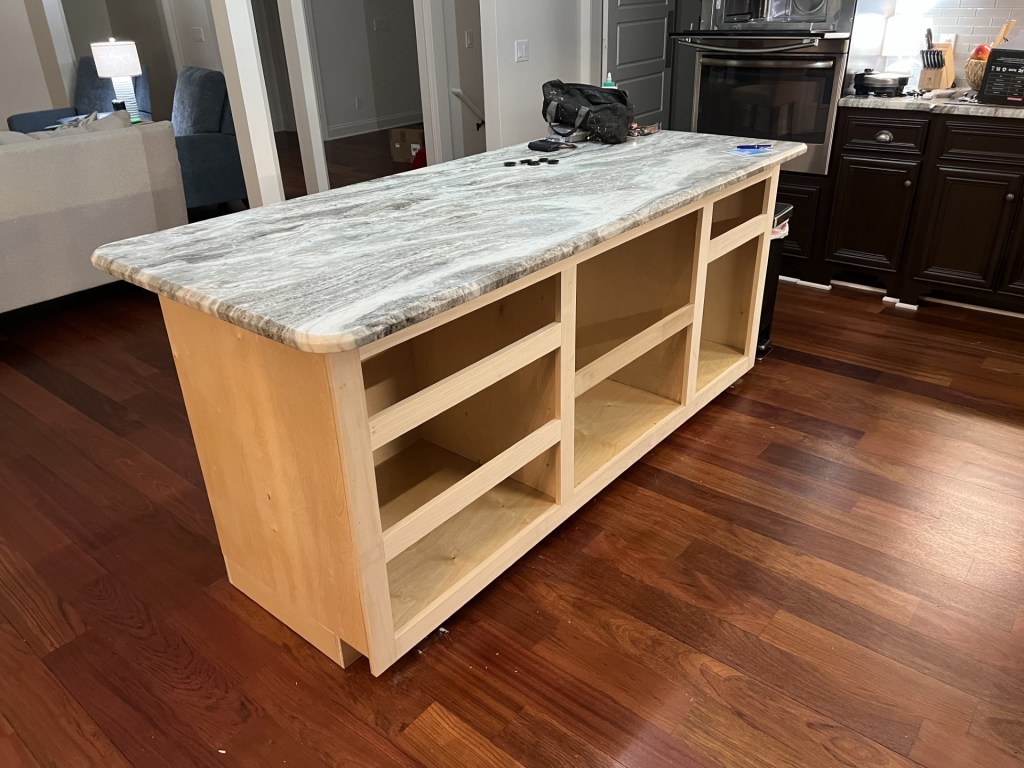
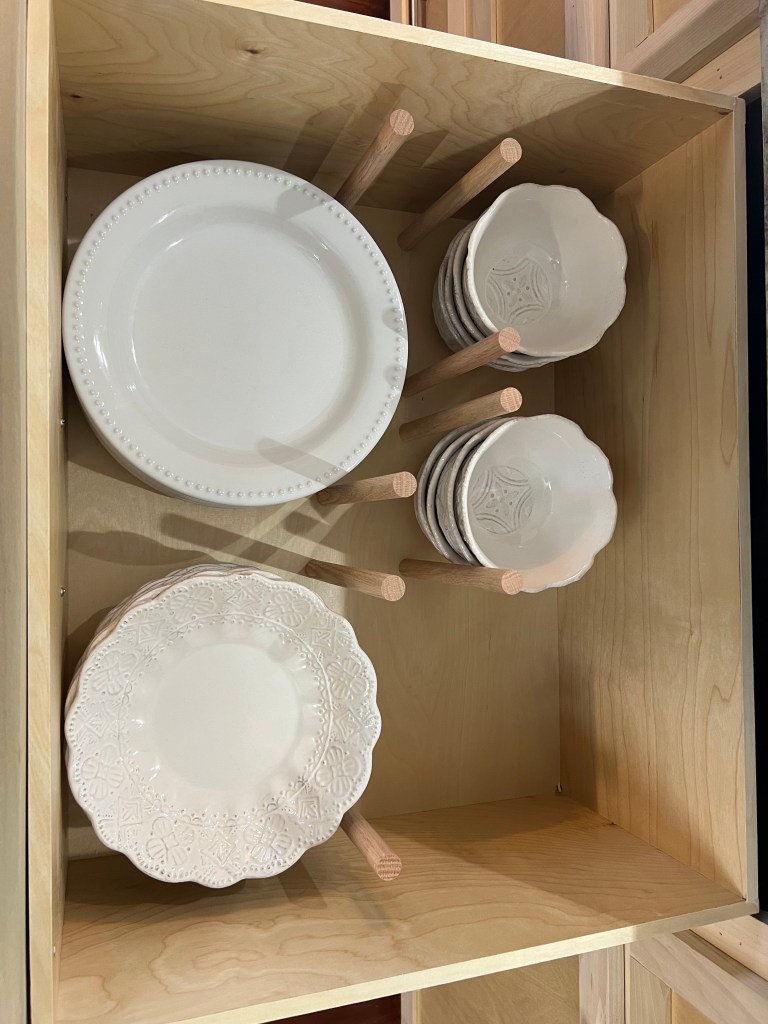
Before I show you the after pics, I’ll share a little more about the island. One of the frustrating things in this kitchen (besides the lack of a good place to put trash/recycle), was that the upper cabinets weren’t deep enough for my dishes. So we had to put them in the cabinet to the right of the refrigerator. Which was fine for a short-term solution, but we have plans for that cabinet and needed to store our dishes elsewhere. The island was the perfect place to do it. Since we were able to build very sturdy drawers with heavy-duty drawer slides, we could actually store our dishes in the middle deep drawer. We put some pegs in to hold the dishes from sliding around and it’s a perfect place to put them. Now …. here are the “after” pictures!
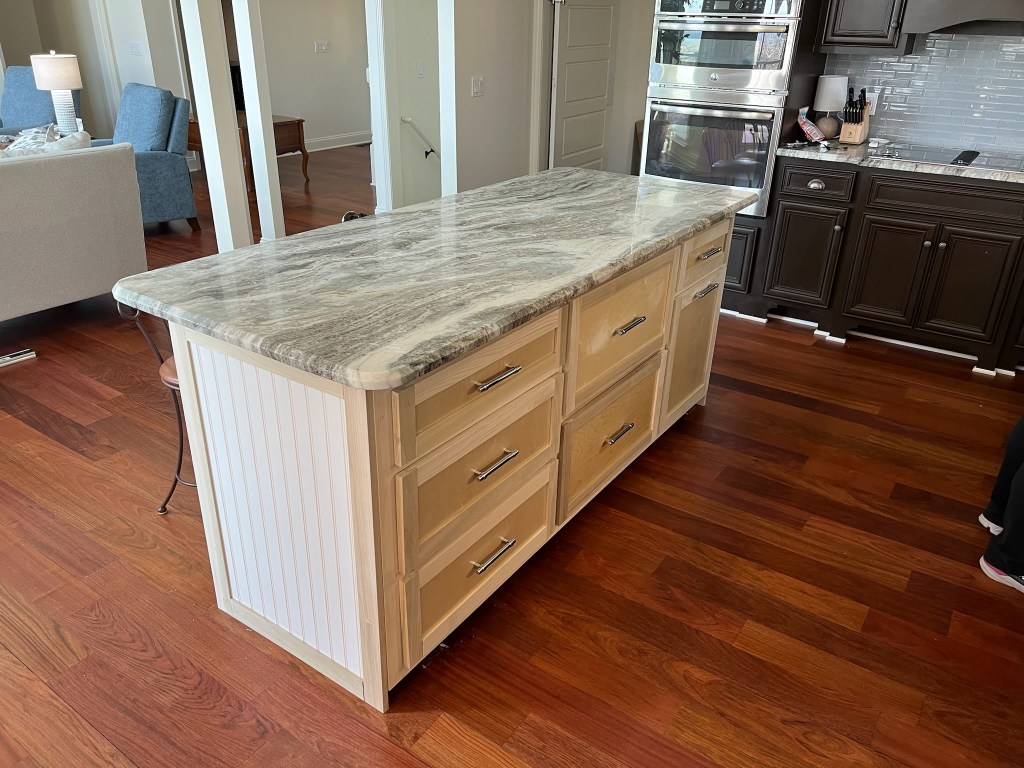
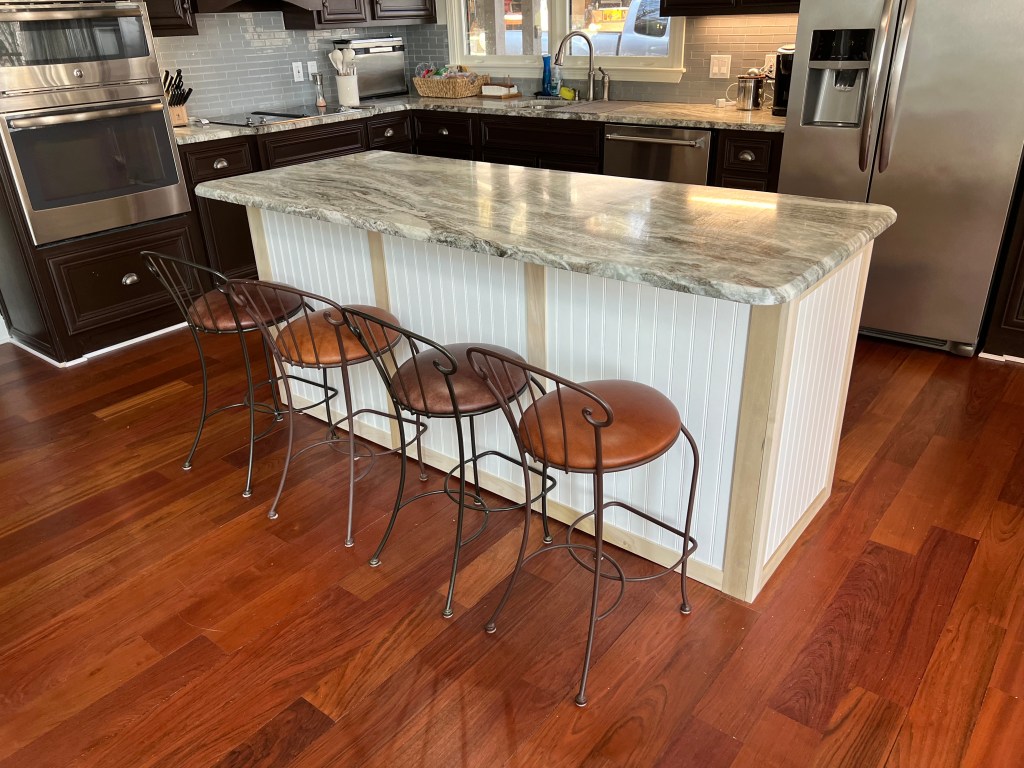
So much more functional! Obviously a paint job will do wonders. We plan to paint it a soft gray to provide some contrast with the rest of the kitchen, which will be a creamy white color. We’ll wait until we are completely done with the entire project before we have them painted.
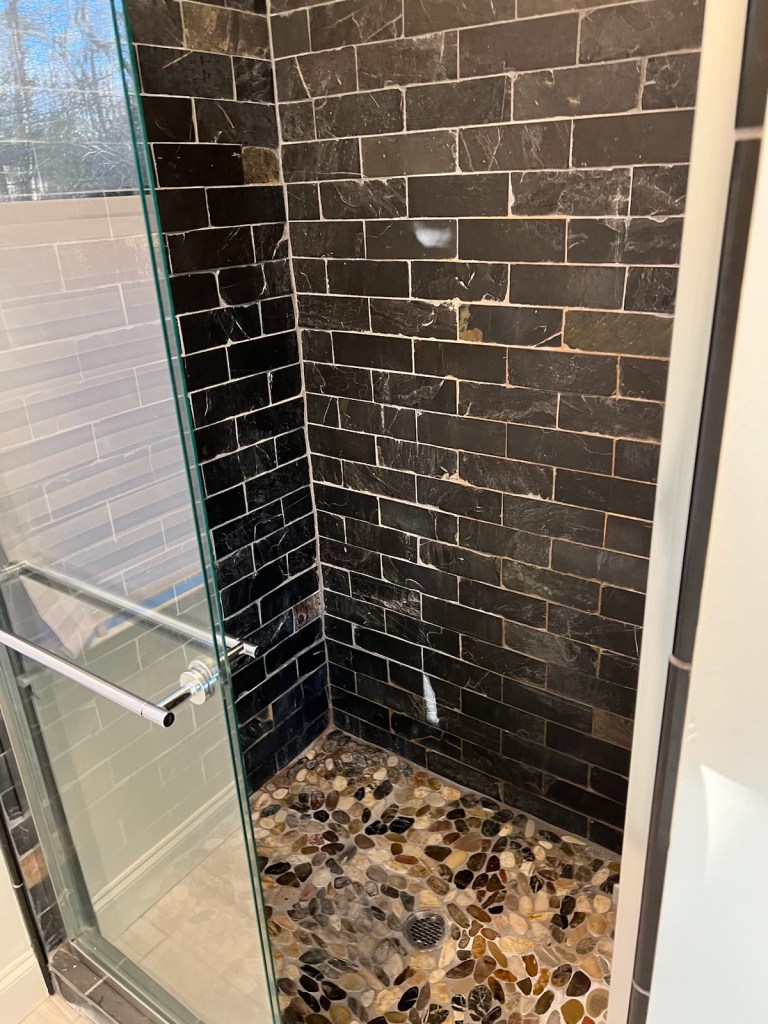
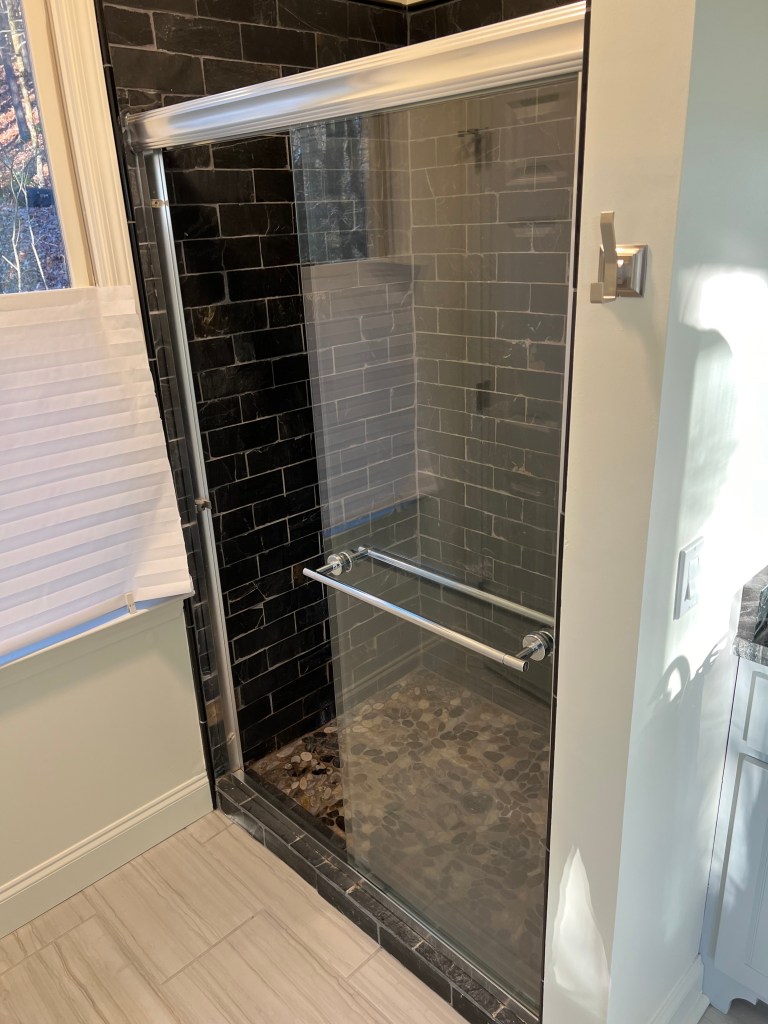
I’ll share more on the kitchen in a future post, but for the time being we took a short break to work on another project for our Atlanta house. More on that in a minute, as I realized I forgot to share with you a much needed transformation that took place right before Christmas. You may or may not remember that I described how GROSS our master shower was. I thought I could live with it until I took my first shower in it and I was so grossed out we decided it was more urgent to get it taken care of. Thankfully our awesome contractor had a little extra time before Christmas to gut the old shower and put in a new shower. We didn’t want to spend a lot of money on the shower, but we wanted something clean and bright. I was able to find an amazing Black Friday deal on a tall shower door (so Keith didn’t have to duck to get in the shower), and we went with inexpensive white subway tile and white penny tile for the floor.
Here is what the shower looked like before.
And here is the after.
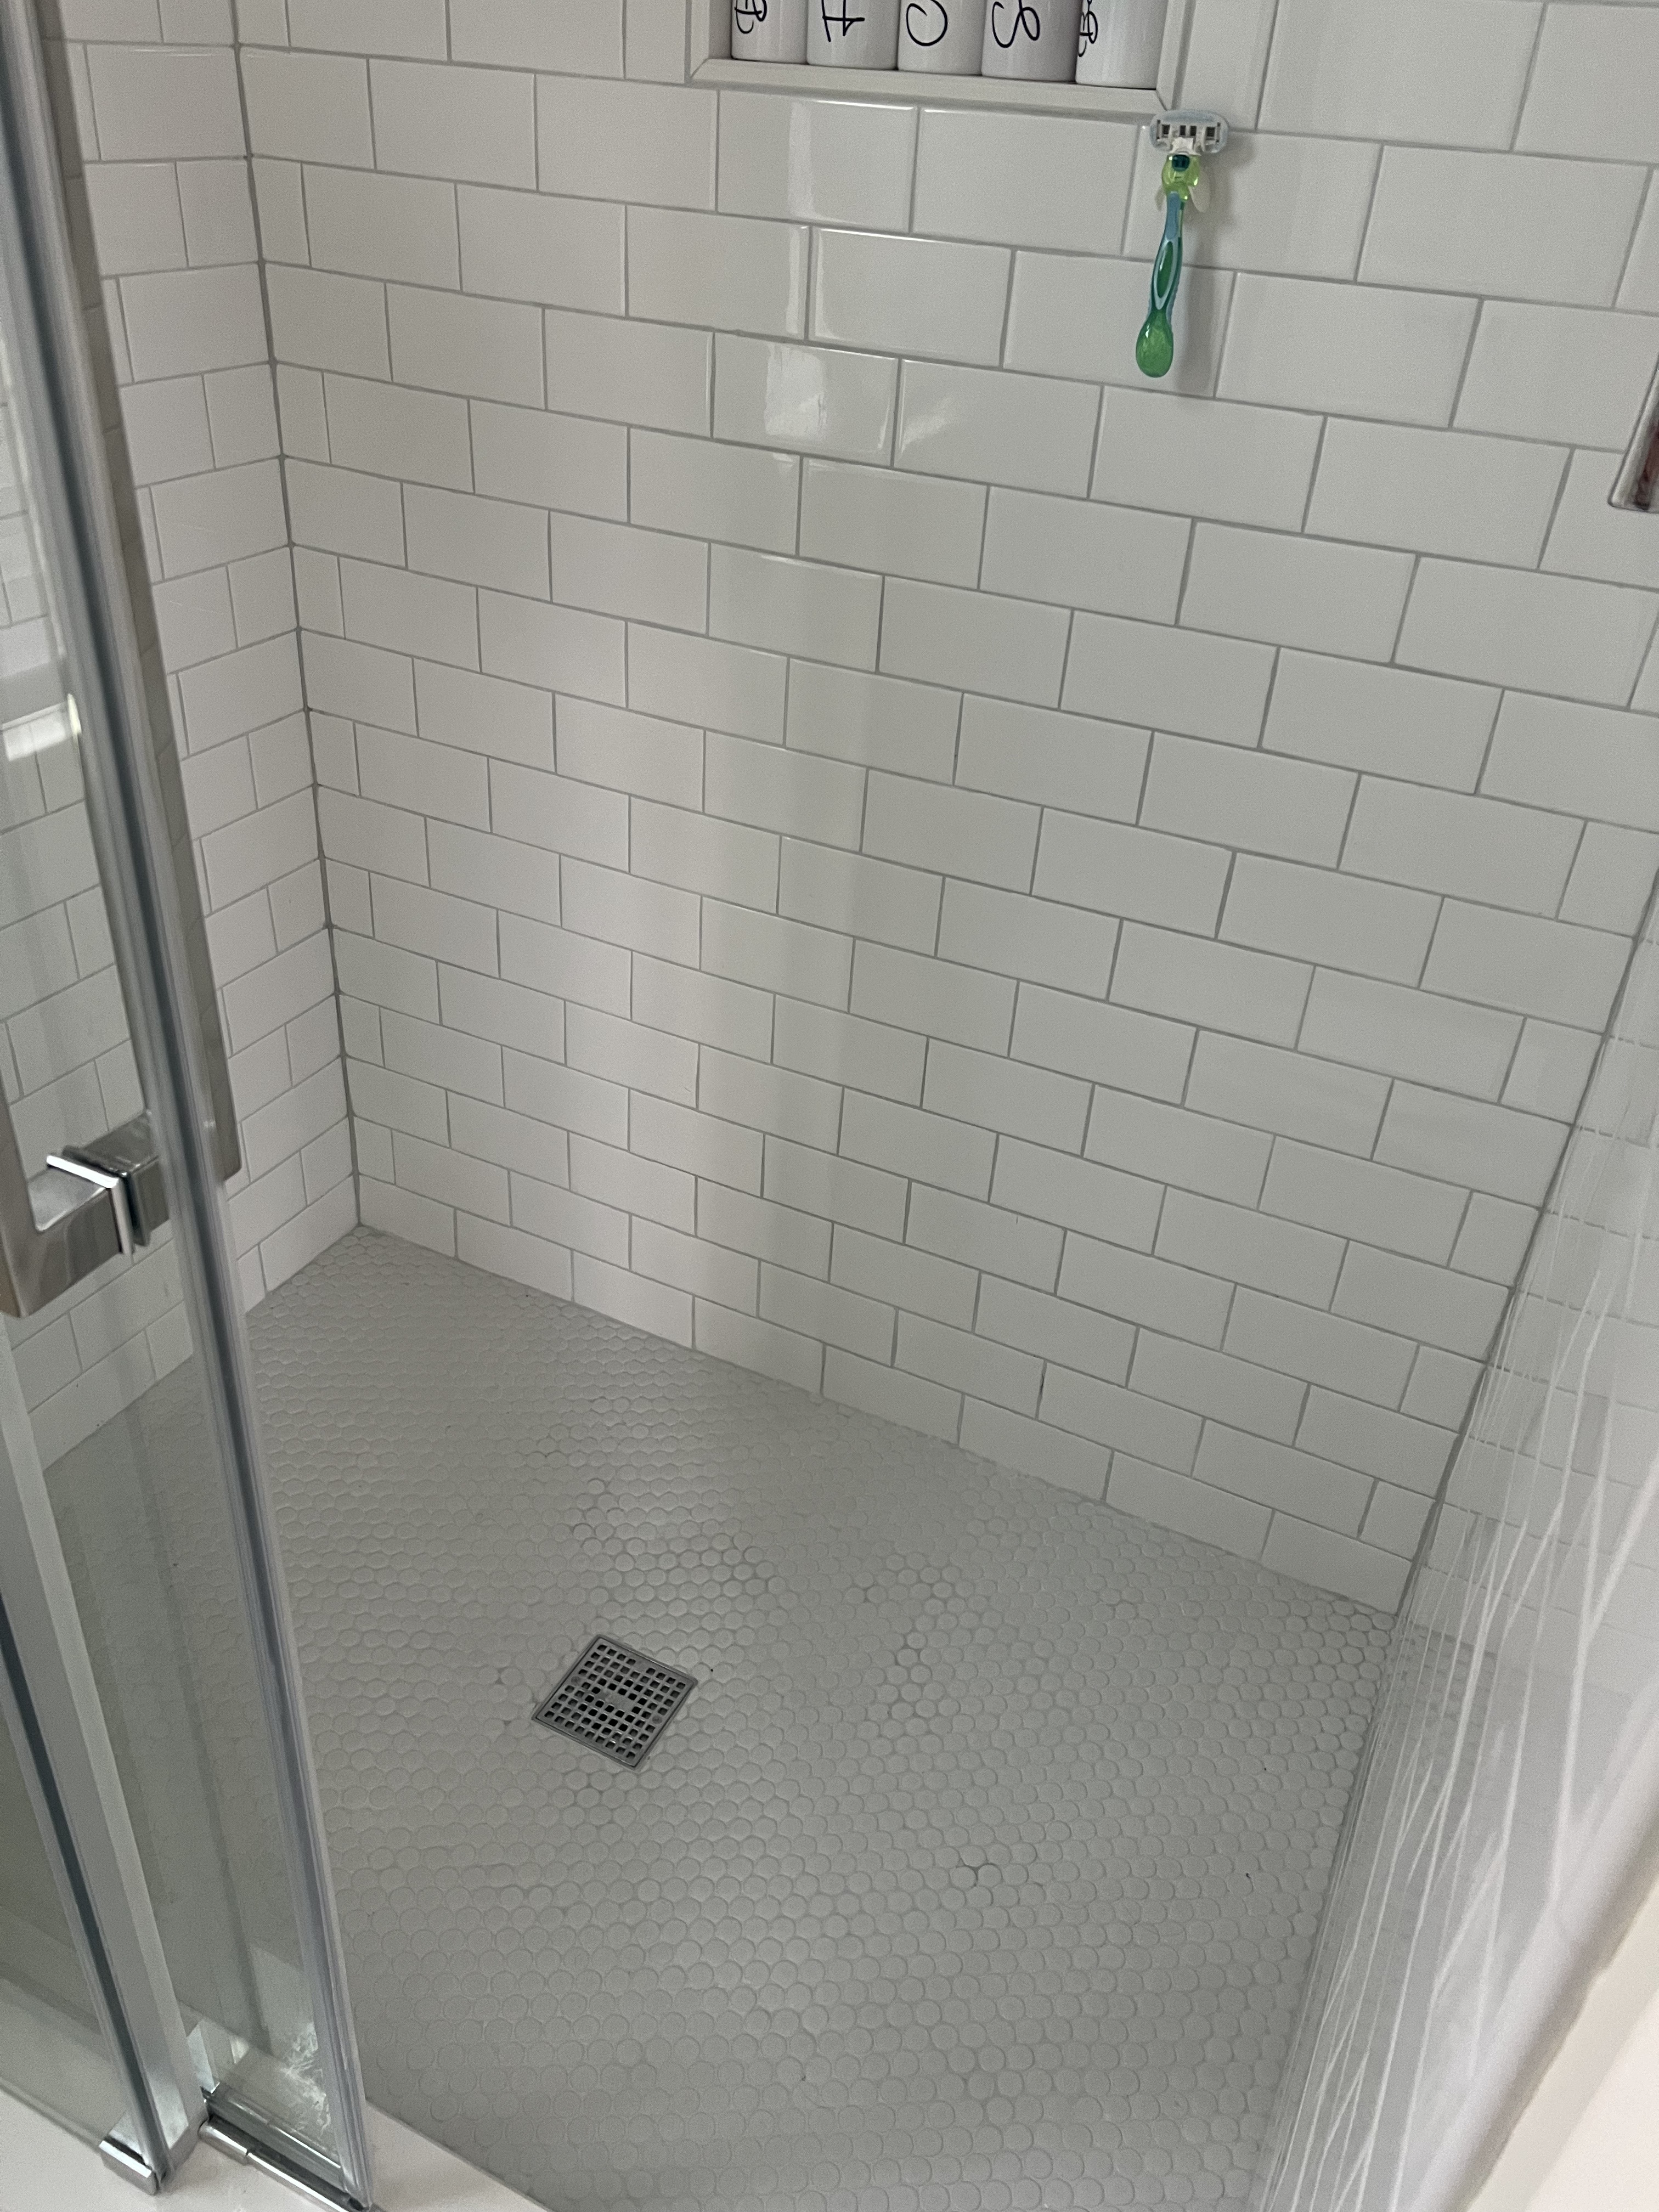
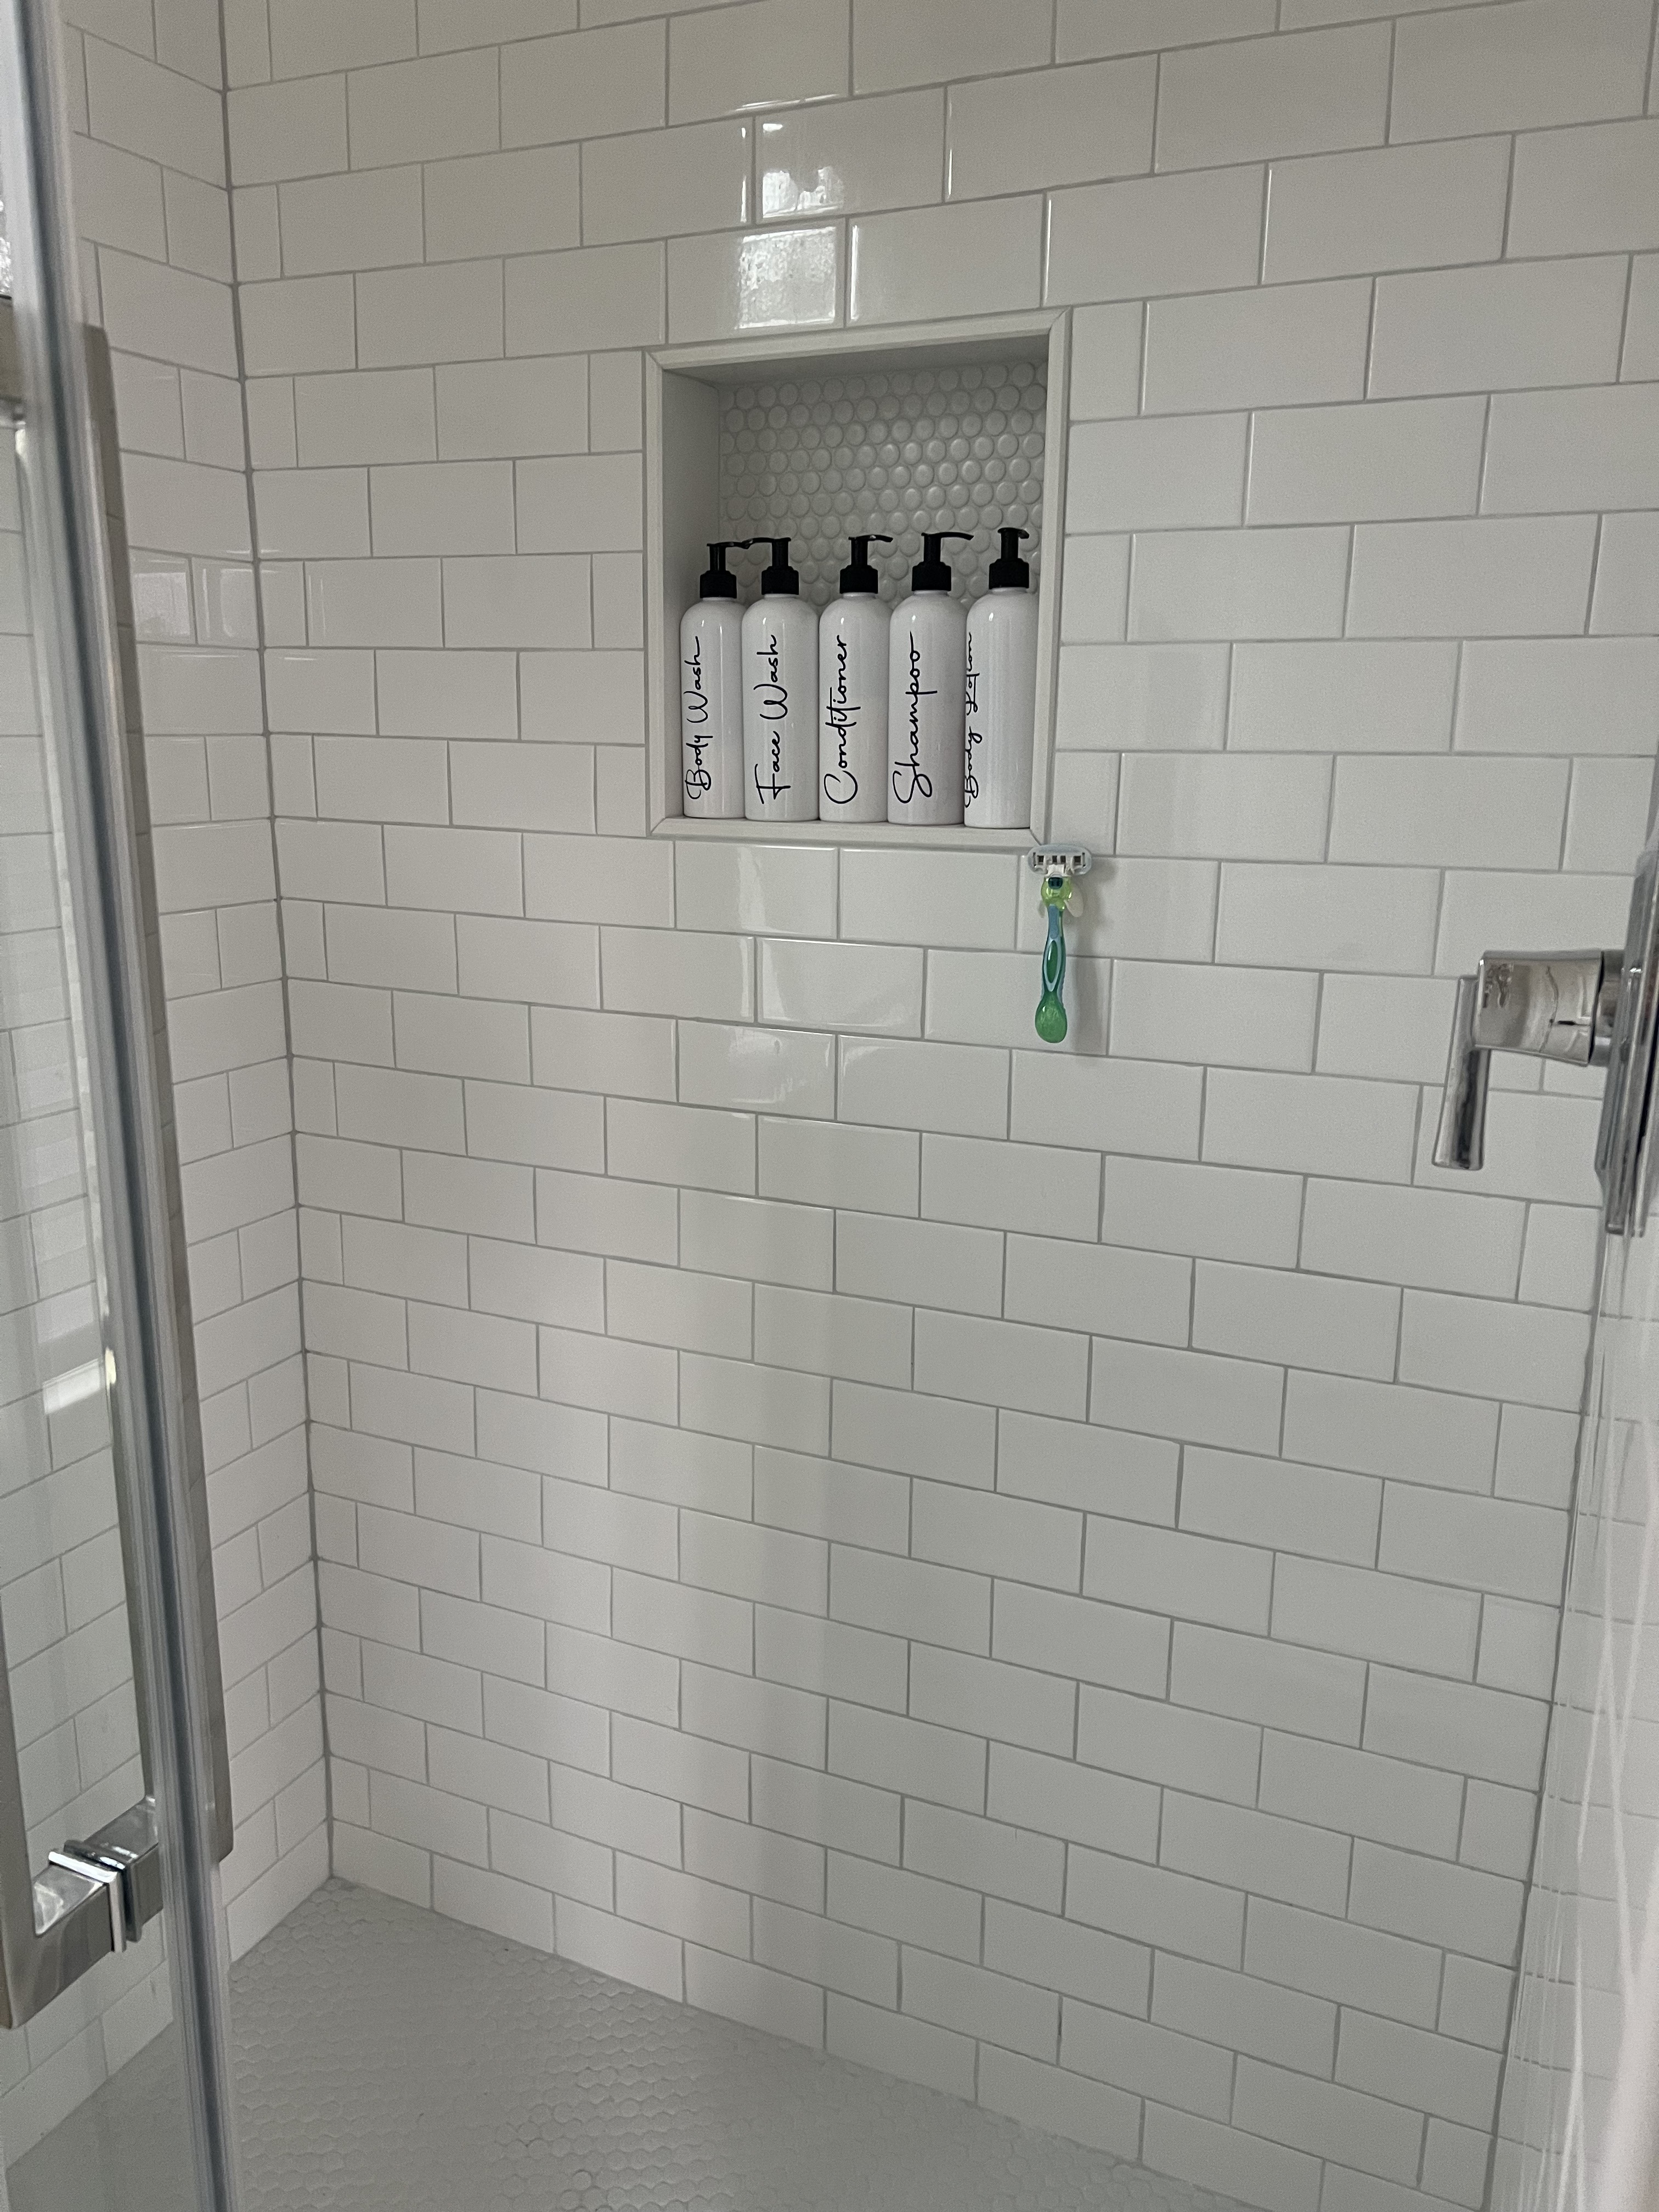
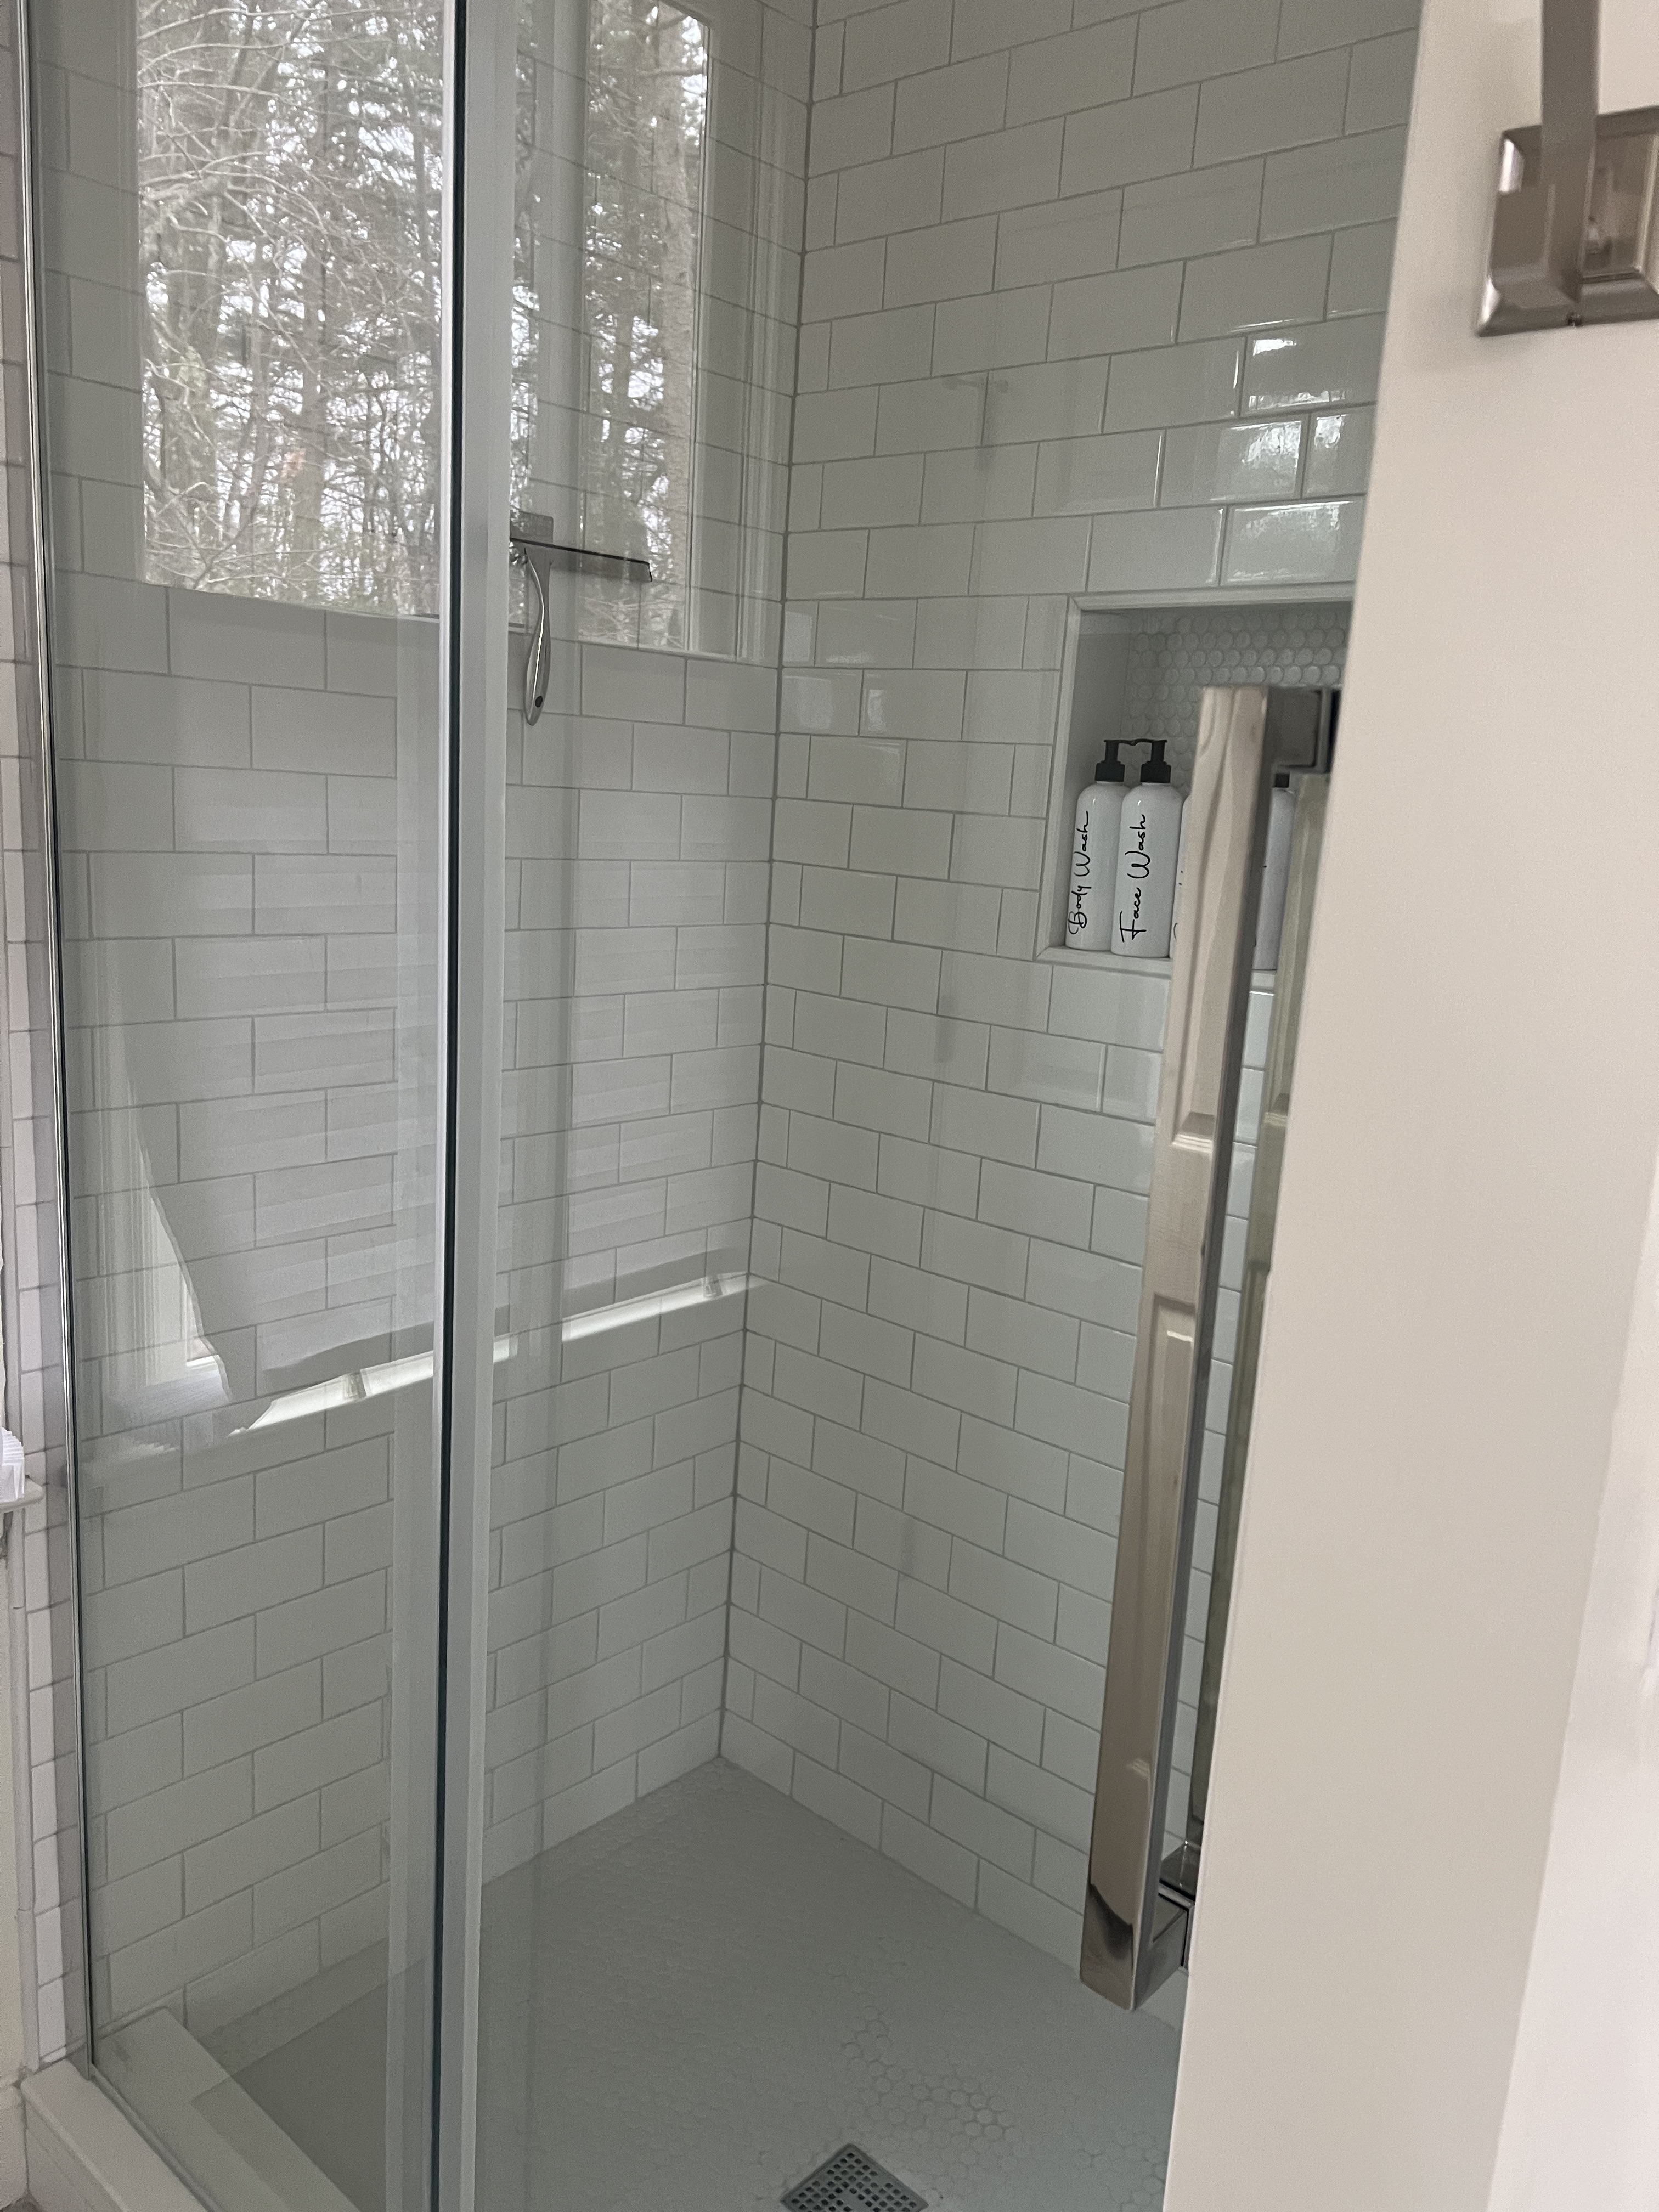
It’s a thousand times better!
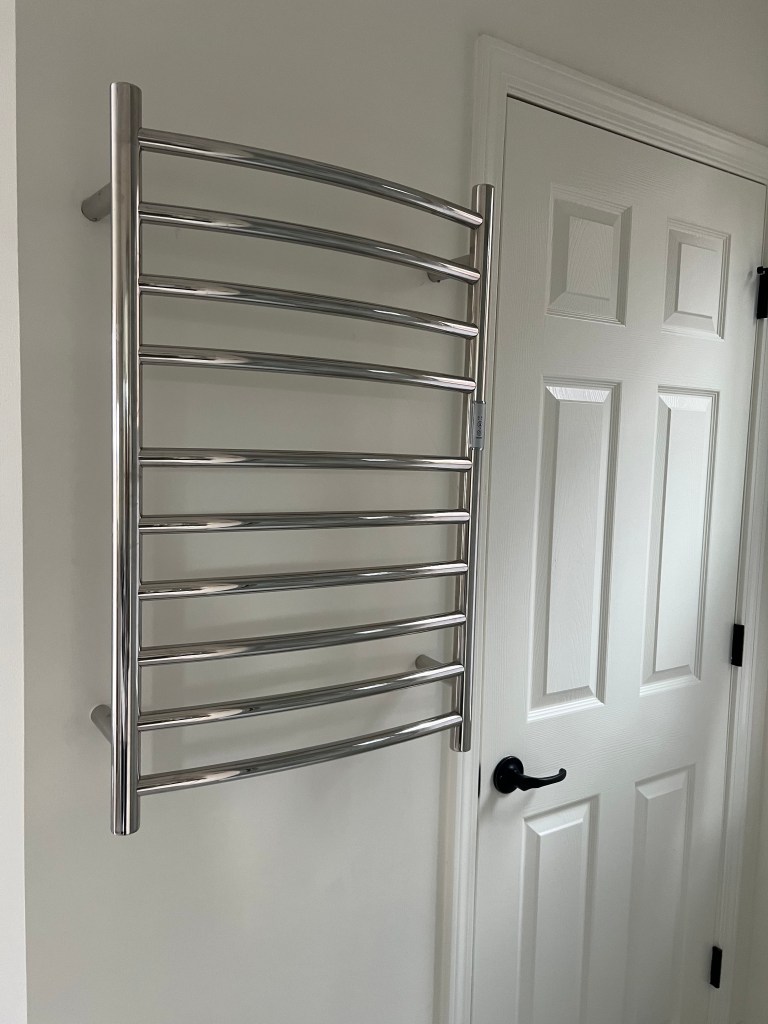
Now on to one of my favorite new things we also added. Prior to us painting, the only towel rod in the bathroom was over the bathtub which isn’t that close to the shower. There’s a little bit of wall space across from the shower, between the water closet and the linen closet. It was just wide enough to add the towel rods there. Then I had a brilliant idea….because it was a narrow space and we’d have to hang two towel rods – one high for Keith and one lower for me – why not put in a heated towel rod instead! So we did and I LOVE IT! All future houses for me will need a heated towel rod!
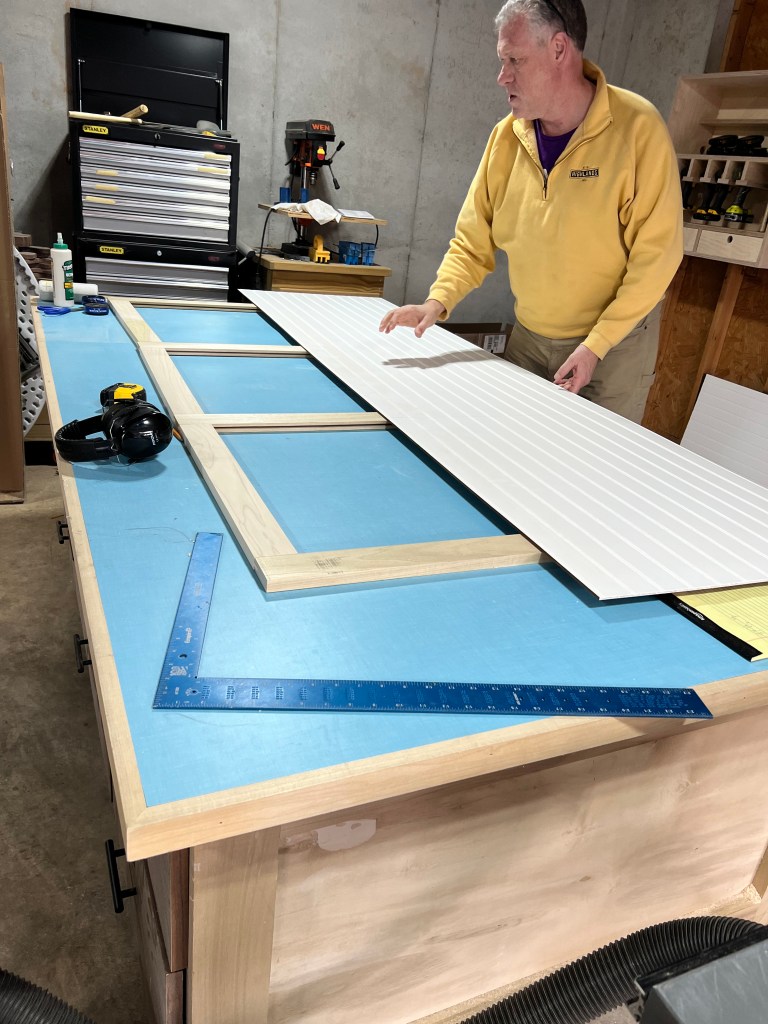
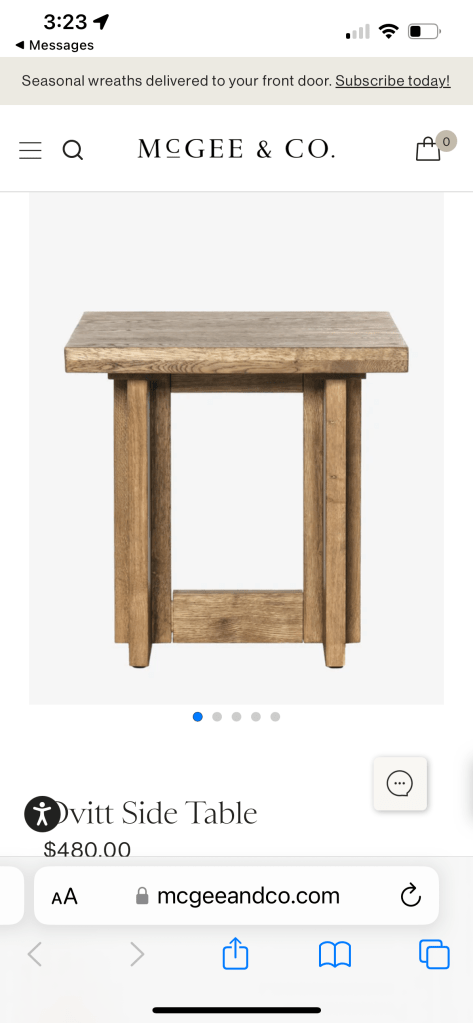
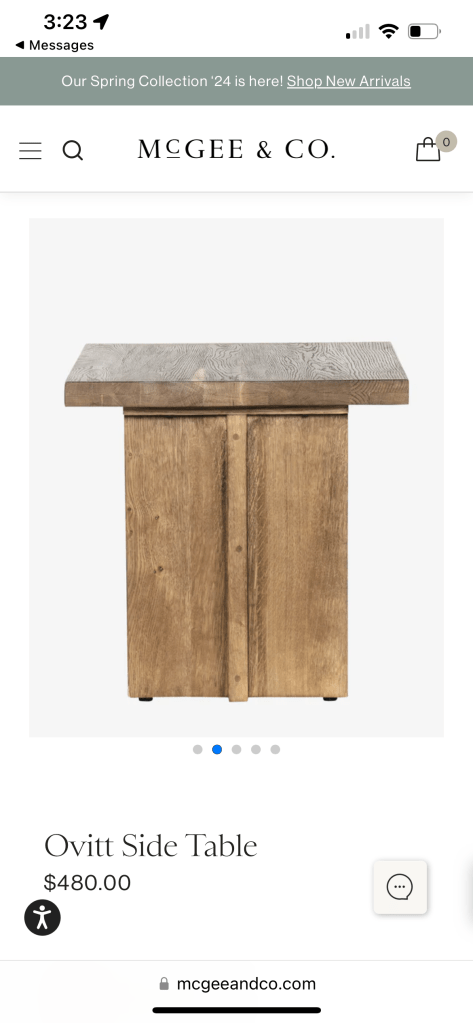
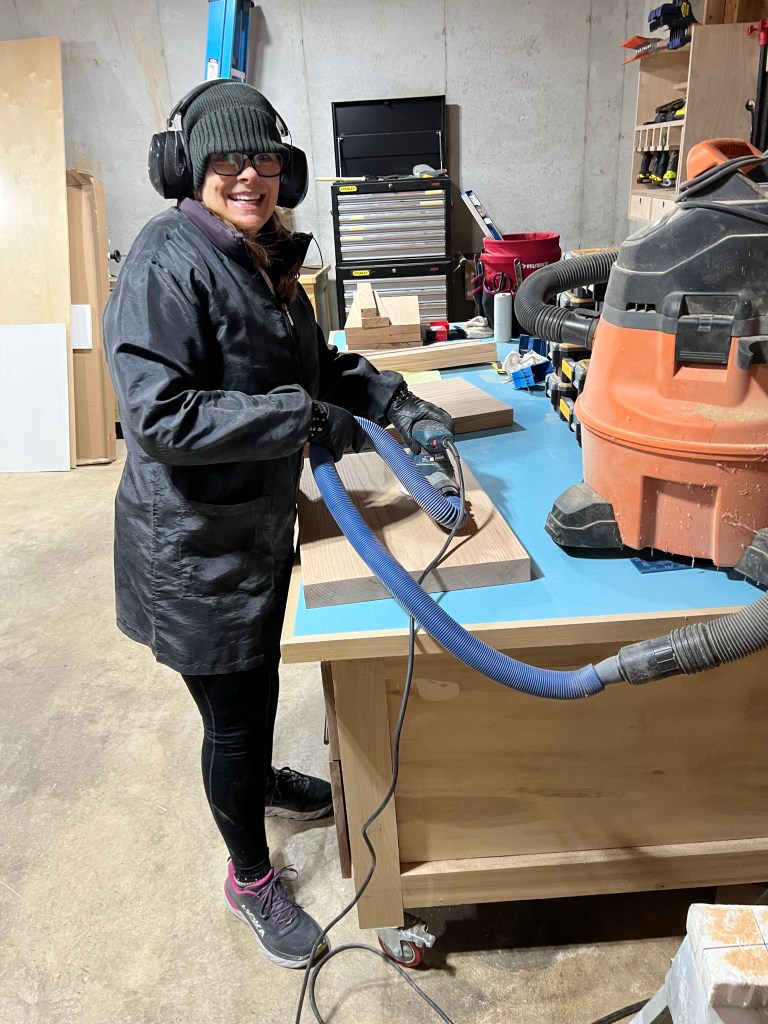
Now, back to our other project. In our Atlanta house, we recently got a new sofa and brought our old sofa up to Big Canoe. Our new sofa is wider than our old sectional, so we need some fairly narrow end tables for it. I’ve been looking high and low and just didn’t find anything I liked. So we’ve decided to build them! We bought some gorgeous 2″ thick, 10′ long, red oak boards for the end tables. They weigh a ton! Initially I wanted to do some nesting tables, but the depth of the boards and the challenge of doing a miter cut on such thick material gave us pause. So back to the drawing board! After getting some inspiration from the folks at McGee&Co, we’ve come up with the design for the end tables. And I’m in love!
After we finalized our design and figured out all the cuts we needed to make, we braved the frigid 18 degree weather and got busy. We made all of the cuts, then while Keith was planing down some of the pieces from 2″ to 1 1/4″, I started sanding. We’ve both managed to avoid frostbite and here’s where we are. I’m a vision, aren’t I?
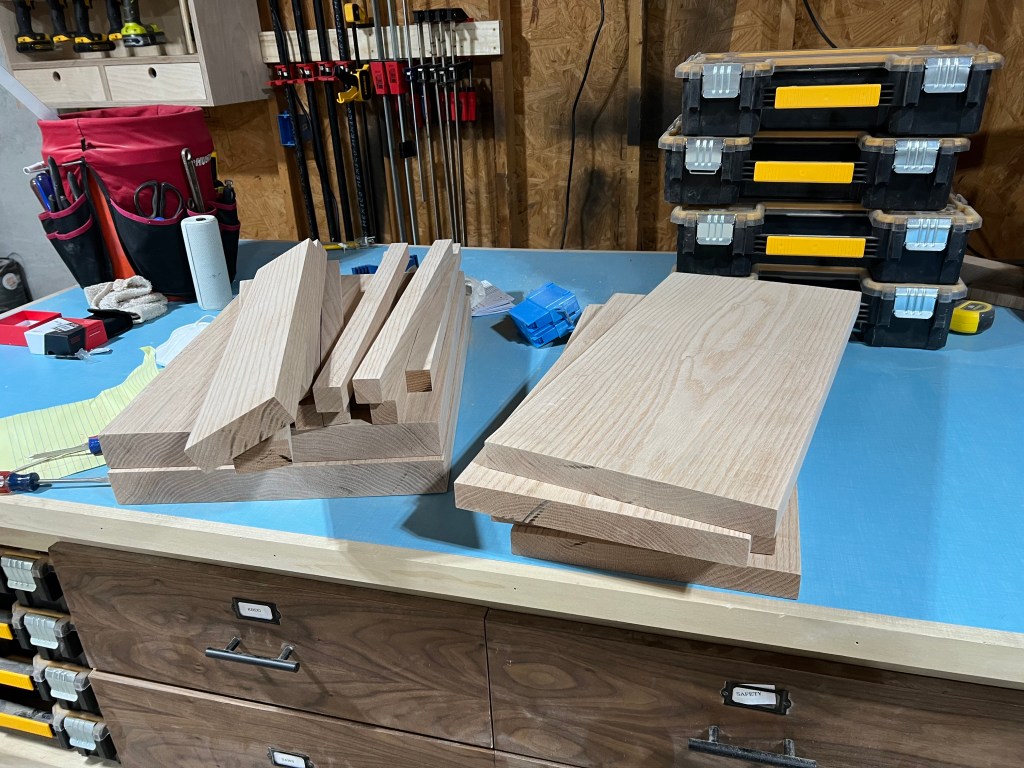
We still have to assemble, stain and poly, but we’ve made a lot of progress.
That’s it for now! More to come sometime soon!
