Well, this weekend we had every intention of wrapping up all of the trim in the den/breakfast area, but you know what they say about good intentions…. However, we did make really great progress and I’ll share with you a little bit about where we are in the process of the overall renovation. We did manage to get the rest of the fireplace trim cut and in place and we have finished putting up the trim in the den/breakfast area. We just haven’t finished painting it. It shouldn’t take a ton of time for us to finish it, but we just didn’t have enough steam today to wrap it up. So let’s take a little look at what we did accomplish this week.
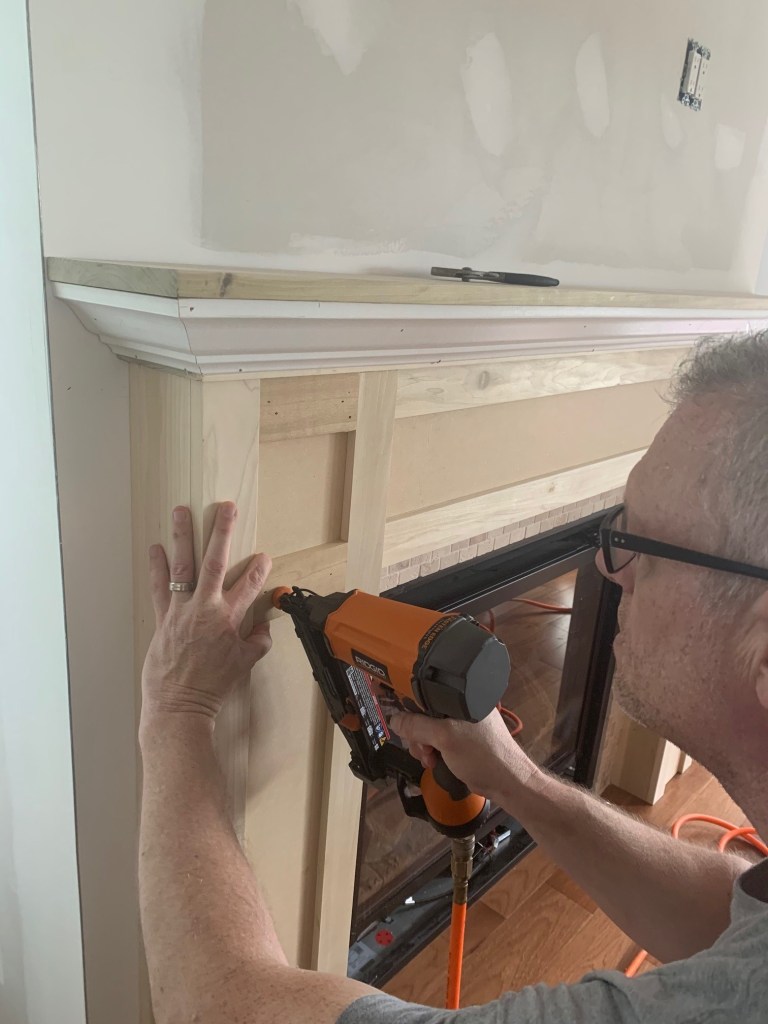
Fireplace….it just needs one more coat of paint on it and then it’s done. Because none of the wood or MDF we used had been primed, it’s taking three total coats. But it looks great. It’s still missing the decorative front cover and the blower. I can’t say I’d recommend the fireplace shop we bought it from. They definitely operate on “mountain time”. But here’s what it currently looks like.
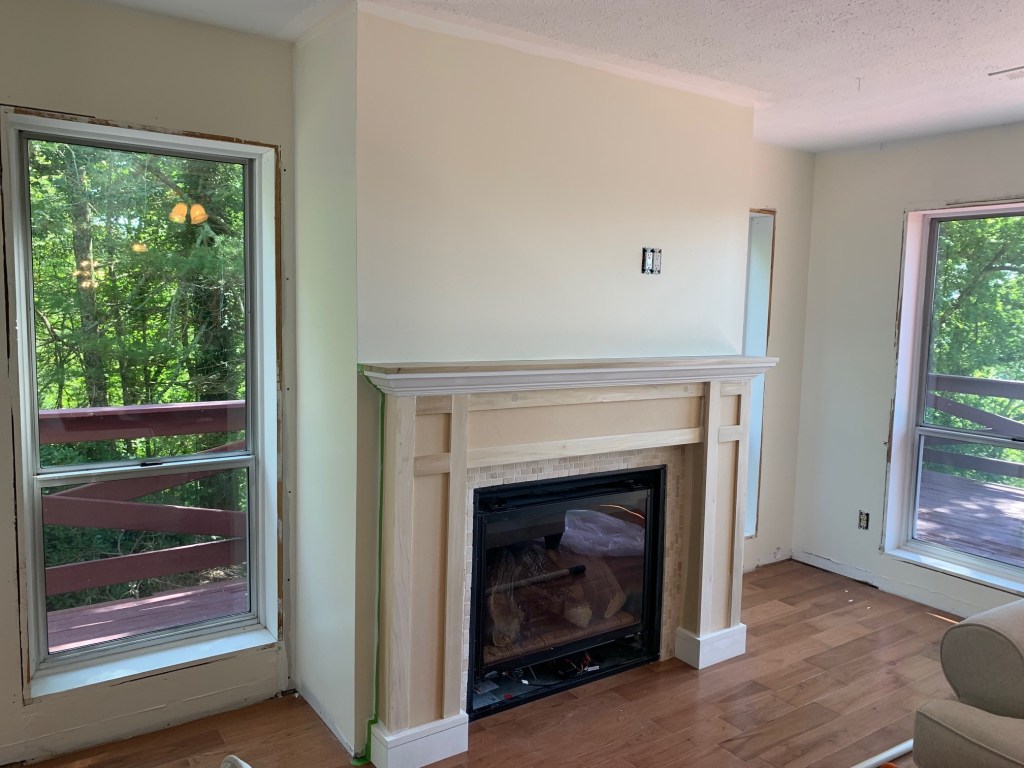
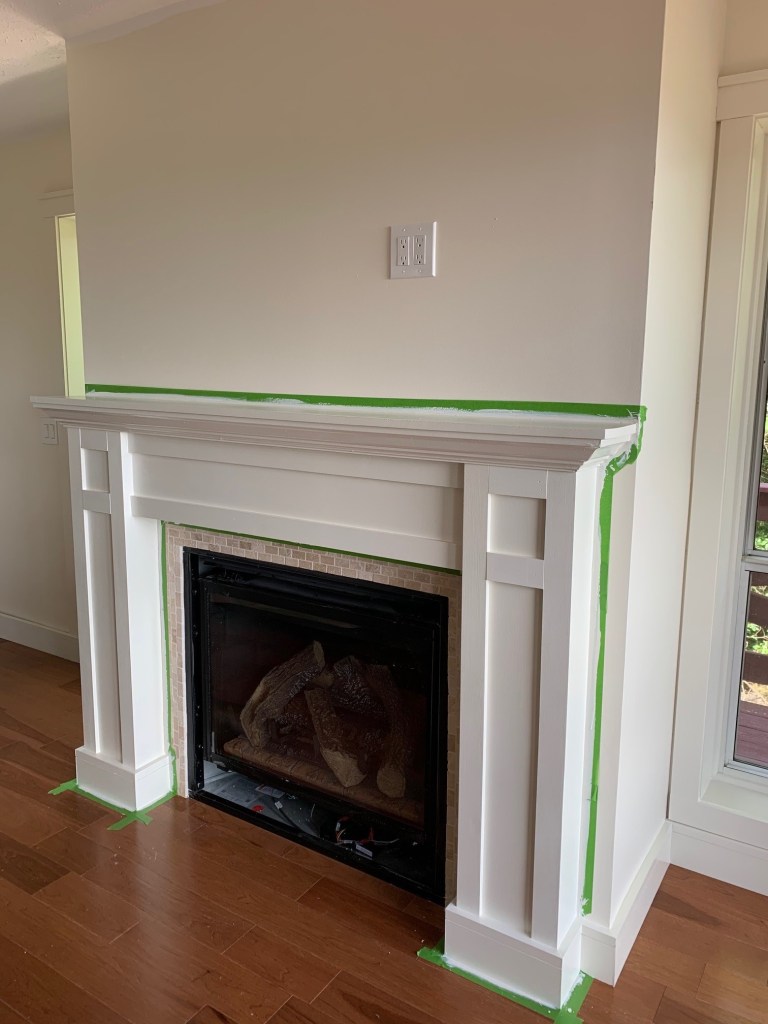
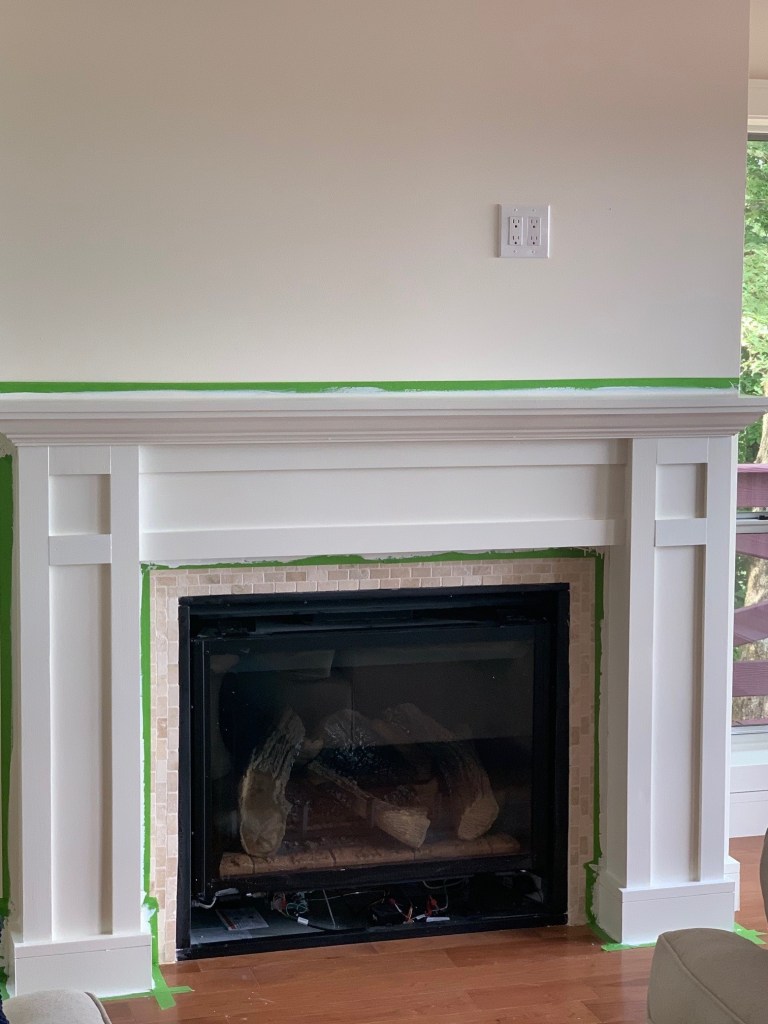
Turned out pretty great, huh? We are really happy with it. And I’m anxious to finally get the TV back up on a wall and not resting on a chair! That will happen when we return later this week.
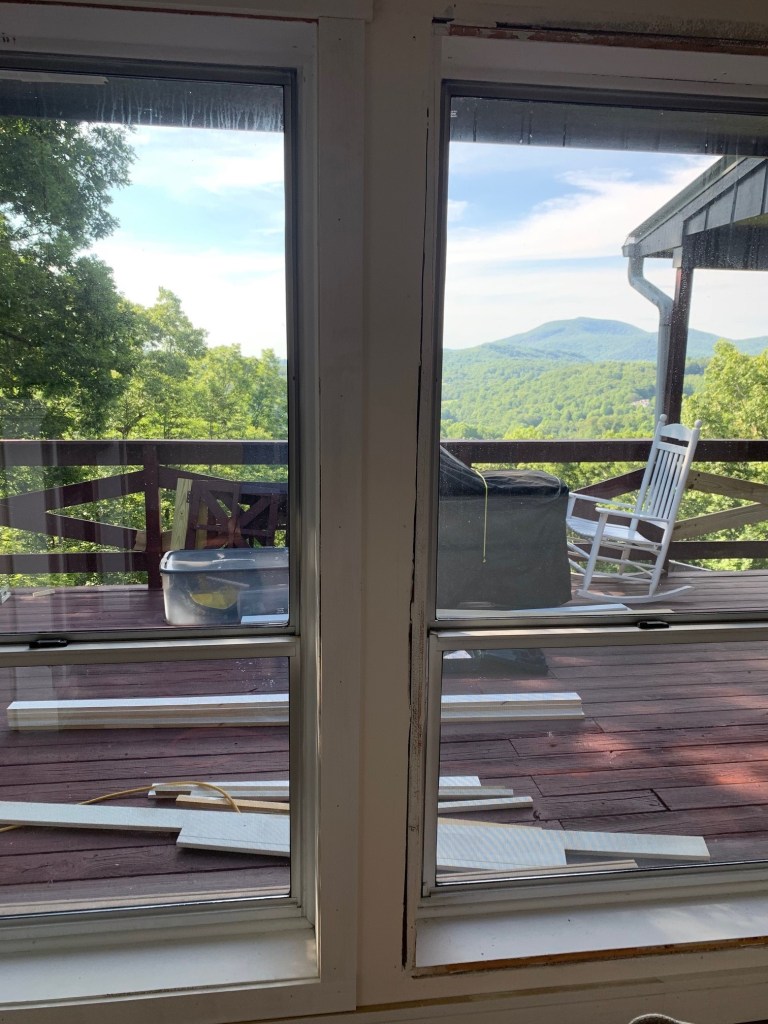
Now on to the trim. It’s not exciting or glamorous, but it does make us happy. Yesterday we had to cut a bunch of extra trim and I spent a LOT of time priming it. Meanwhile, after pulling off all the old trim, Keith was busy painting all of the walls. We did manage to get it all up today and then I began to caulk. And caulk, and caulk. Yep – my fingers bled again. I know there are tools to smooth out caulk but they don’t work (sorry Peter Hunt but they really don’t work well) and it looks better to use your finger to smooth it. After we let that dry, Keith taped it up and I got about halfway through painting it. The windows take a lot of time to paint because they are deep window wells and they haven’t been painted in a while. I’ll finish up the job later this week. In the meantime, here are a few super exciting pics of trim….


Last week I mentioned we were planning something for the mirror in the guest bath. We got started on that but needed some silicone caulk to finish it, so you’ll just have to wait until next week to see that.
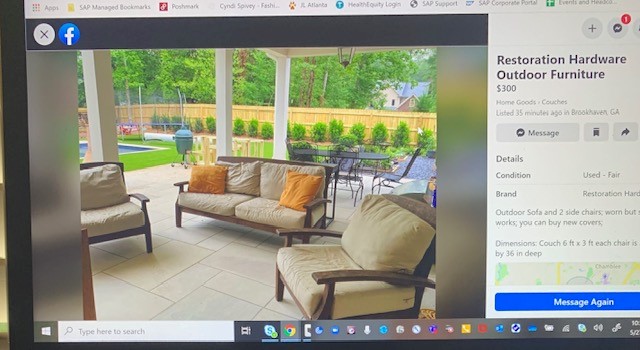
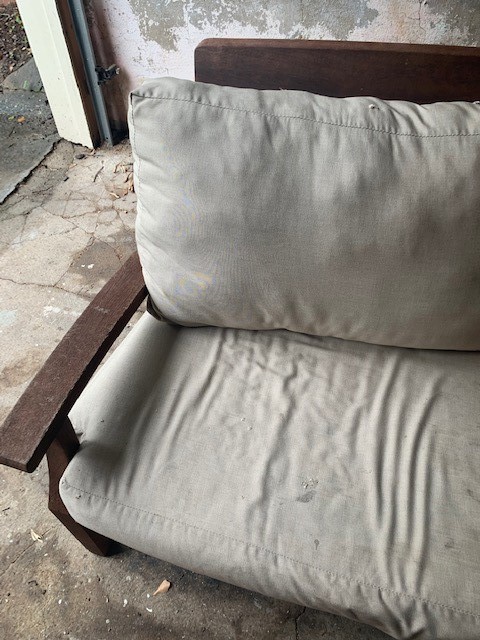
Last but not least is outdoor furniture. Initially I wanted to just build some outdoor furniture, but then found some used Restoration Hardware furniture on Facebook Marketplace. I pretty much bought it sight unseen and when I got it, it was in a bit worse shape than I imagined. I knew the cushions were GROSS and in bad shape, but the actual furniture took a bit more work than I initially counted on. But, after working on and off the past several weeks, I finished up the sofa and we finally sat outside on it last night! We haven’t had anything other than some rocking chairs which are too tall for my short legs, so I didn’t have any comfortable seating until now. I still have to finish up the two chairs (one is sanded and ready to be stained and sealed and the other hasn’t been started), but here goes! Let’s start with the picture that I saw on Marketplace…
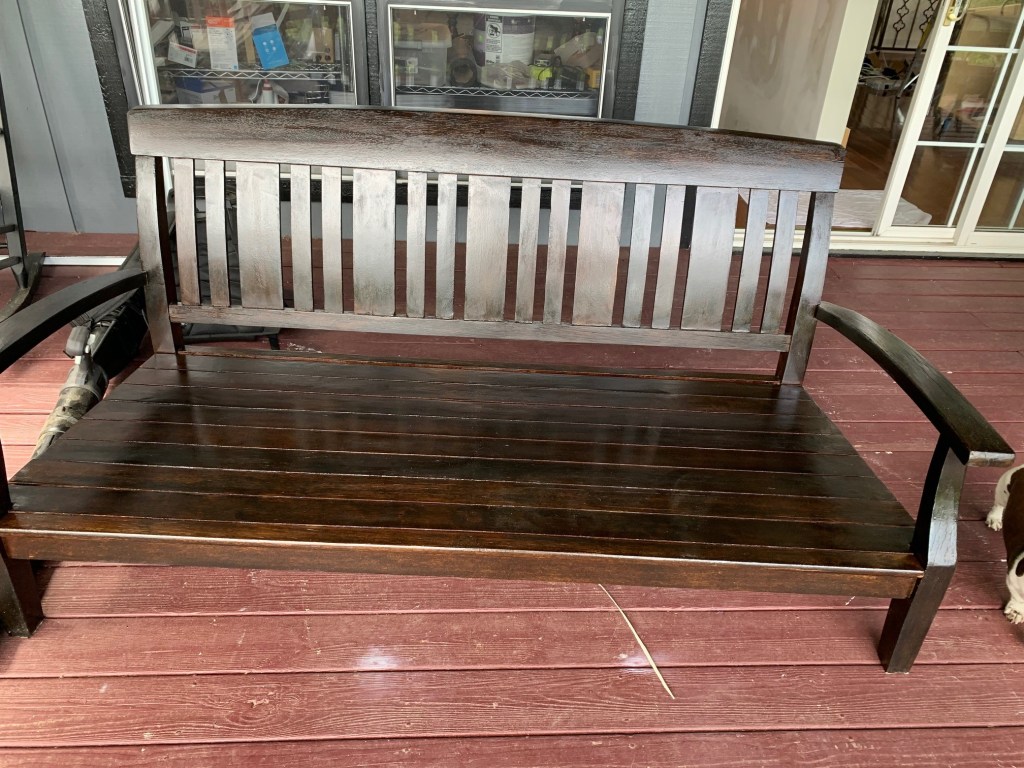
From those pics, you’d think that maybe a quick coat of polyurethane and recovering or replacing the cushions would do it, right? That’s what I thought too. Well, here’s the reality of what I got…
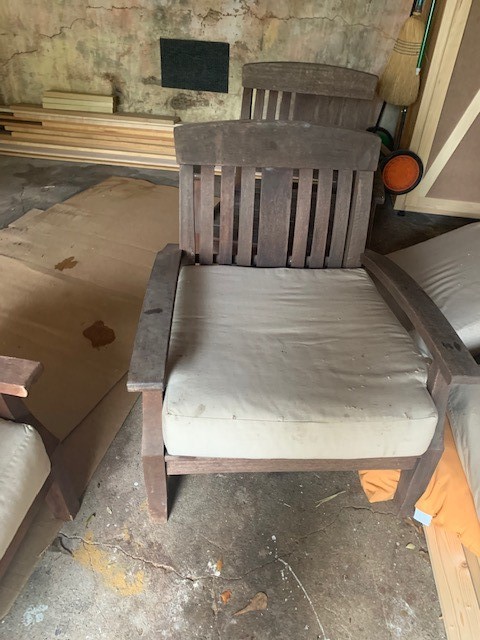
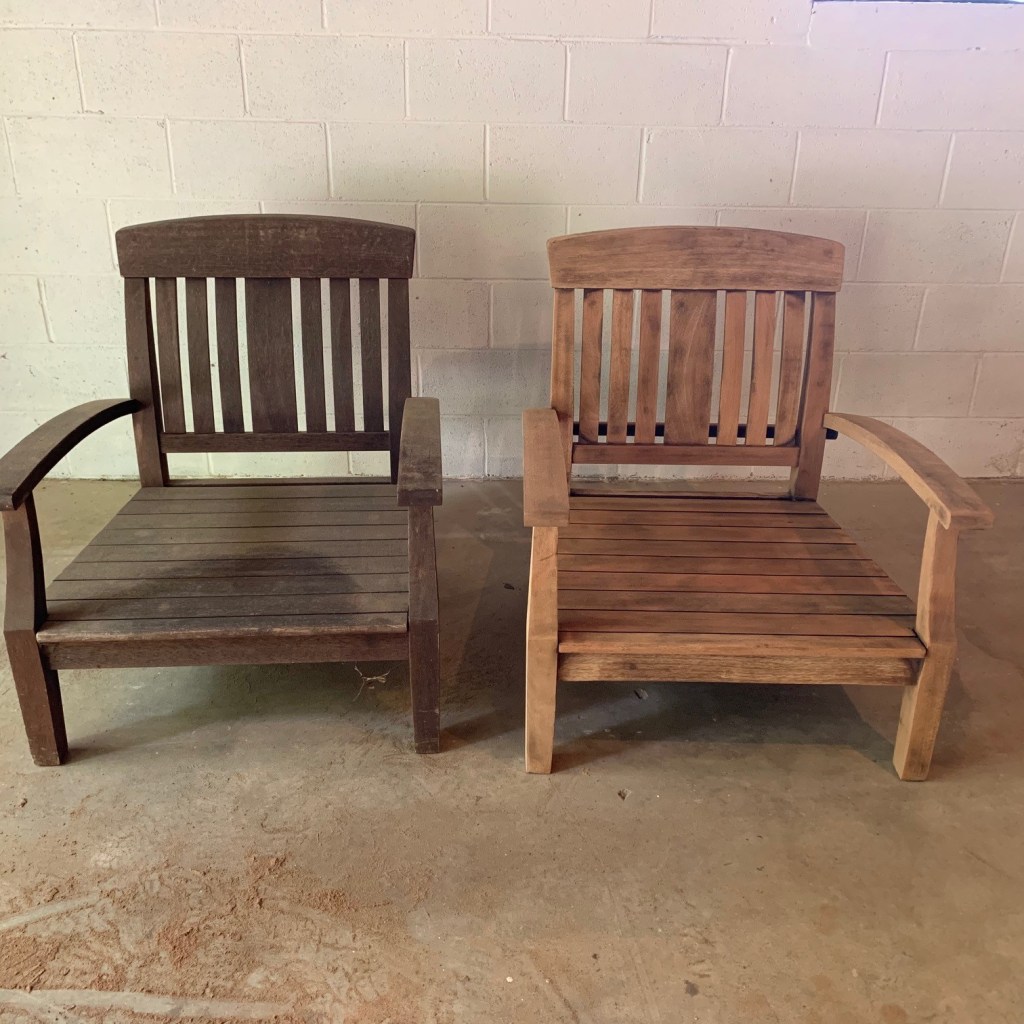
So then it became time to turn lemons into lemonade. I had the cushions recovered (for Atlanta friends, I used Fast and Great Upholstery on Howell Mill and they did a great job for the most reasonable price I could find). While they were working on the cushions, I started sanding and sanding and sanding and sanding. Here’s a look at one sanded and one unsanded chair just so you get a feel for it.
I wish I could say that sanding went quickly, but it didn’t. Once I got it smooth enough and most of the finish off, I went with a dark walnut stain to try to hide any places were I couldn’t sand off the old finish. This is a super unflattering picture of me, but I’ll share anyhow! Those are my “painting” clothes which are covered with paint, poly, etc. but they’re practical to have since I’m quite messy!

I must admit I had a lot of moments of doubt. After the first coat of polyurethane done in the garage, it never really cured and remained very sticky. We moved it over to the unfinished part of the basement and that solved that problem. Three coats of poly later, and the end result is something I’m quite happy with!
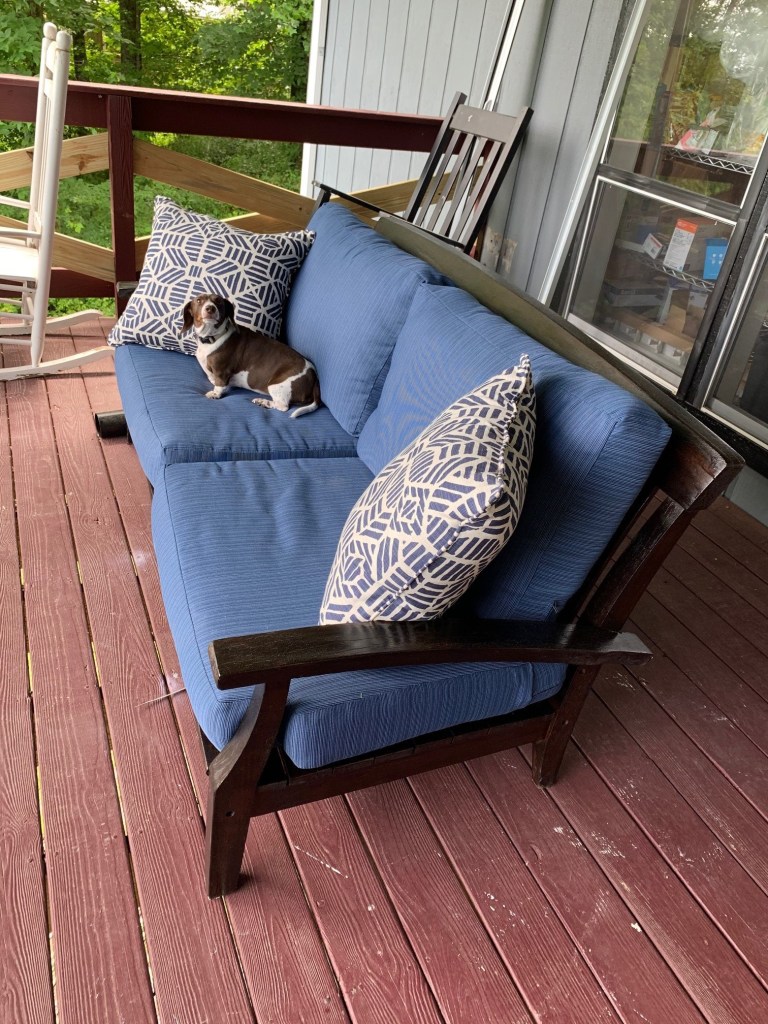
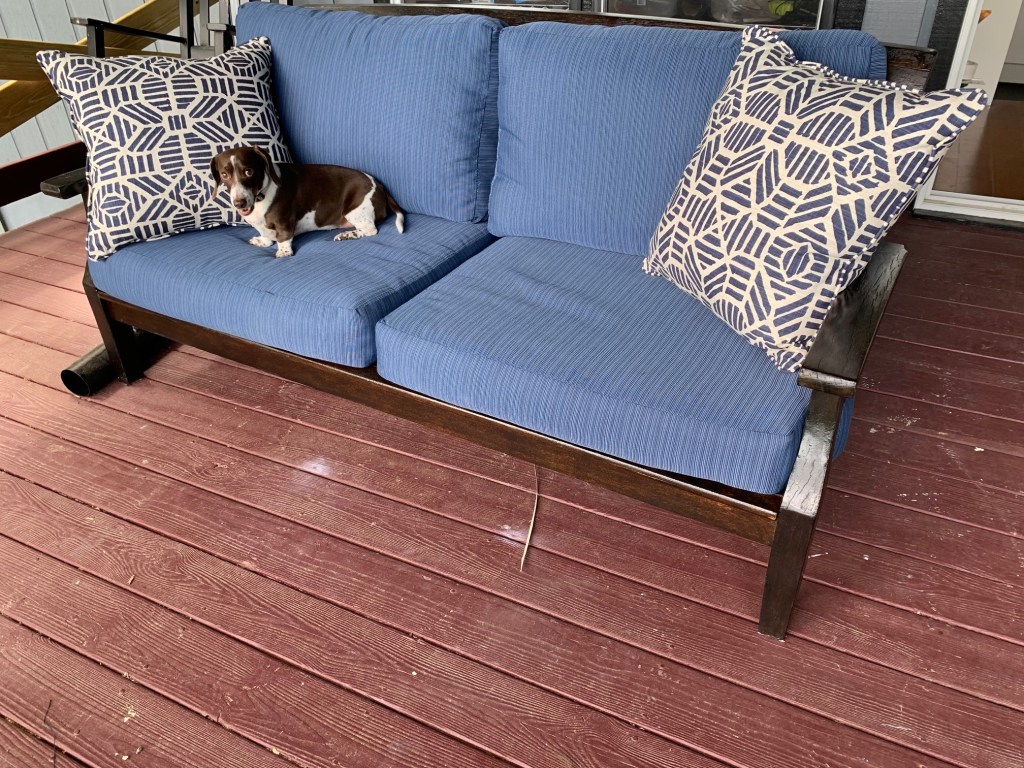
It’s not perfect, but it looks good and is very comfortable for me with my short legs. And you might notice that another girl with short legs named Chloe seems to like it a lot too!
I also wanted to give you an update on the kitchen. We finally ordered everything we could online at Ikea about 10 days ago. The earliest delivery date (to our house in Atlanta) is August 2, so that’s when we’ll get the bulk of our cabinets. They didn’t have 7 base cabinets we need in stock online, so now we’re trying to check to see when the local store will get them. Thankfully we live about 7 minutes from Ikea so it’s not horrible to run over there, but if you’ve ever been to one you know there’s no such thing as a “quick” trip to Ikea. They get new inventory in every week. Allegedly they will have 4 of the 7 cabinets in stock by Tuesday so guess where I’ll be going Tuesday evening after work…. Frustrating but given that ALL of our cabinets are costing about $5500 (that doesn’t include the fronts, because remember we are making those ourselves), it’s worth the hassle.
Well folks, that’s about it! I hope you are all staying safe.
